Overview
This tutorial provides a comprehensive guide on how to deploy a WordPress website in 1Panel using the PHP Runtime Environment, complete with domain configuration and HTTPS setup. As a modern Linux server management panel, 1Panel offers a robust, all-in-one solution for website deployment and administration.
The PHP Runtime management in 1Panel offers:
Multi-version PHP Support: Supports PHP 5.6, 7.0-7.4, and 8.0-8.3. You can flexibly select or switch versions based on your application's requirements.
Extension Management: Provides a library of common PHP extensions (including
mysqli,gd,curl,zip,mbstring, etc.) with one-click installation, uninstallation, and configuration.Visual Configuration: A GUI for effortless adjustment of core PHP parameters, such as file upload limits, memory limits, execution time, and disabled functions.
Prerequisites
Before starting, please ensure you have the following:
A Linux server with a public IP address (e.g., BandwagonHost, VMRack, Alibaba Cloud, etc.).
1Panel installed and configured on your server.
A registered domain with access to manage its DNS records.
Relevant firewall ports (80 and 443) opened on your server.
Step 1: Install Required Runtime Environments
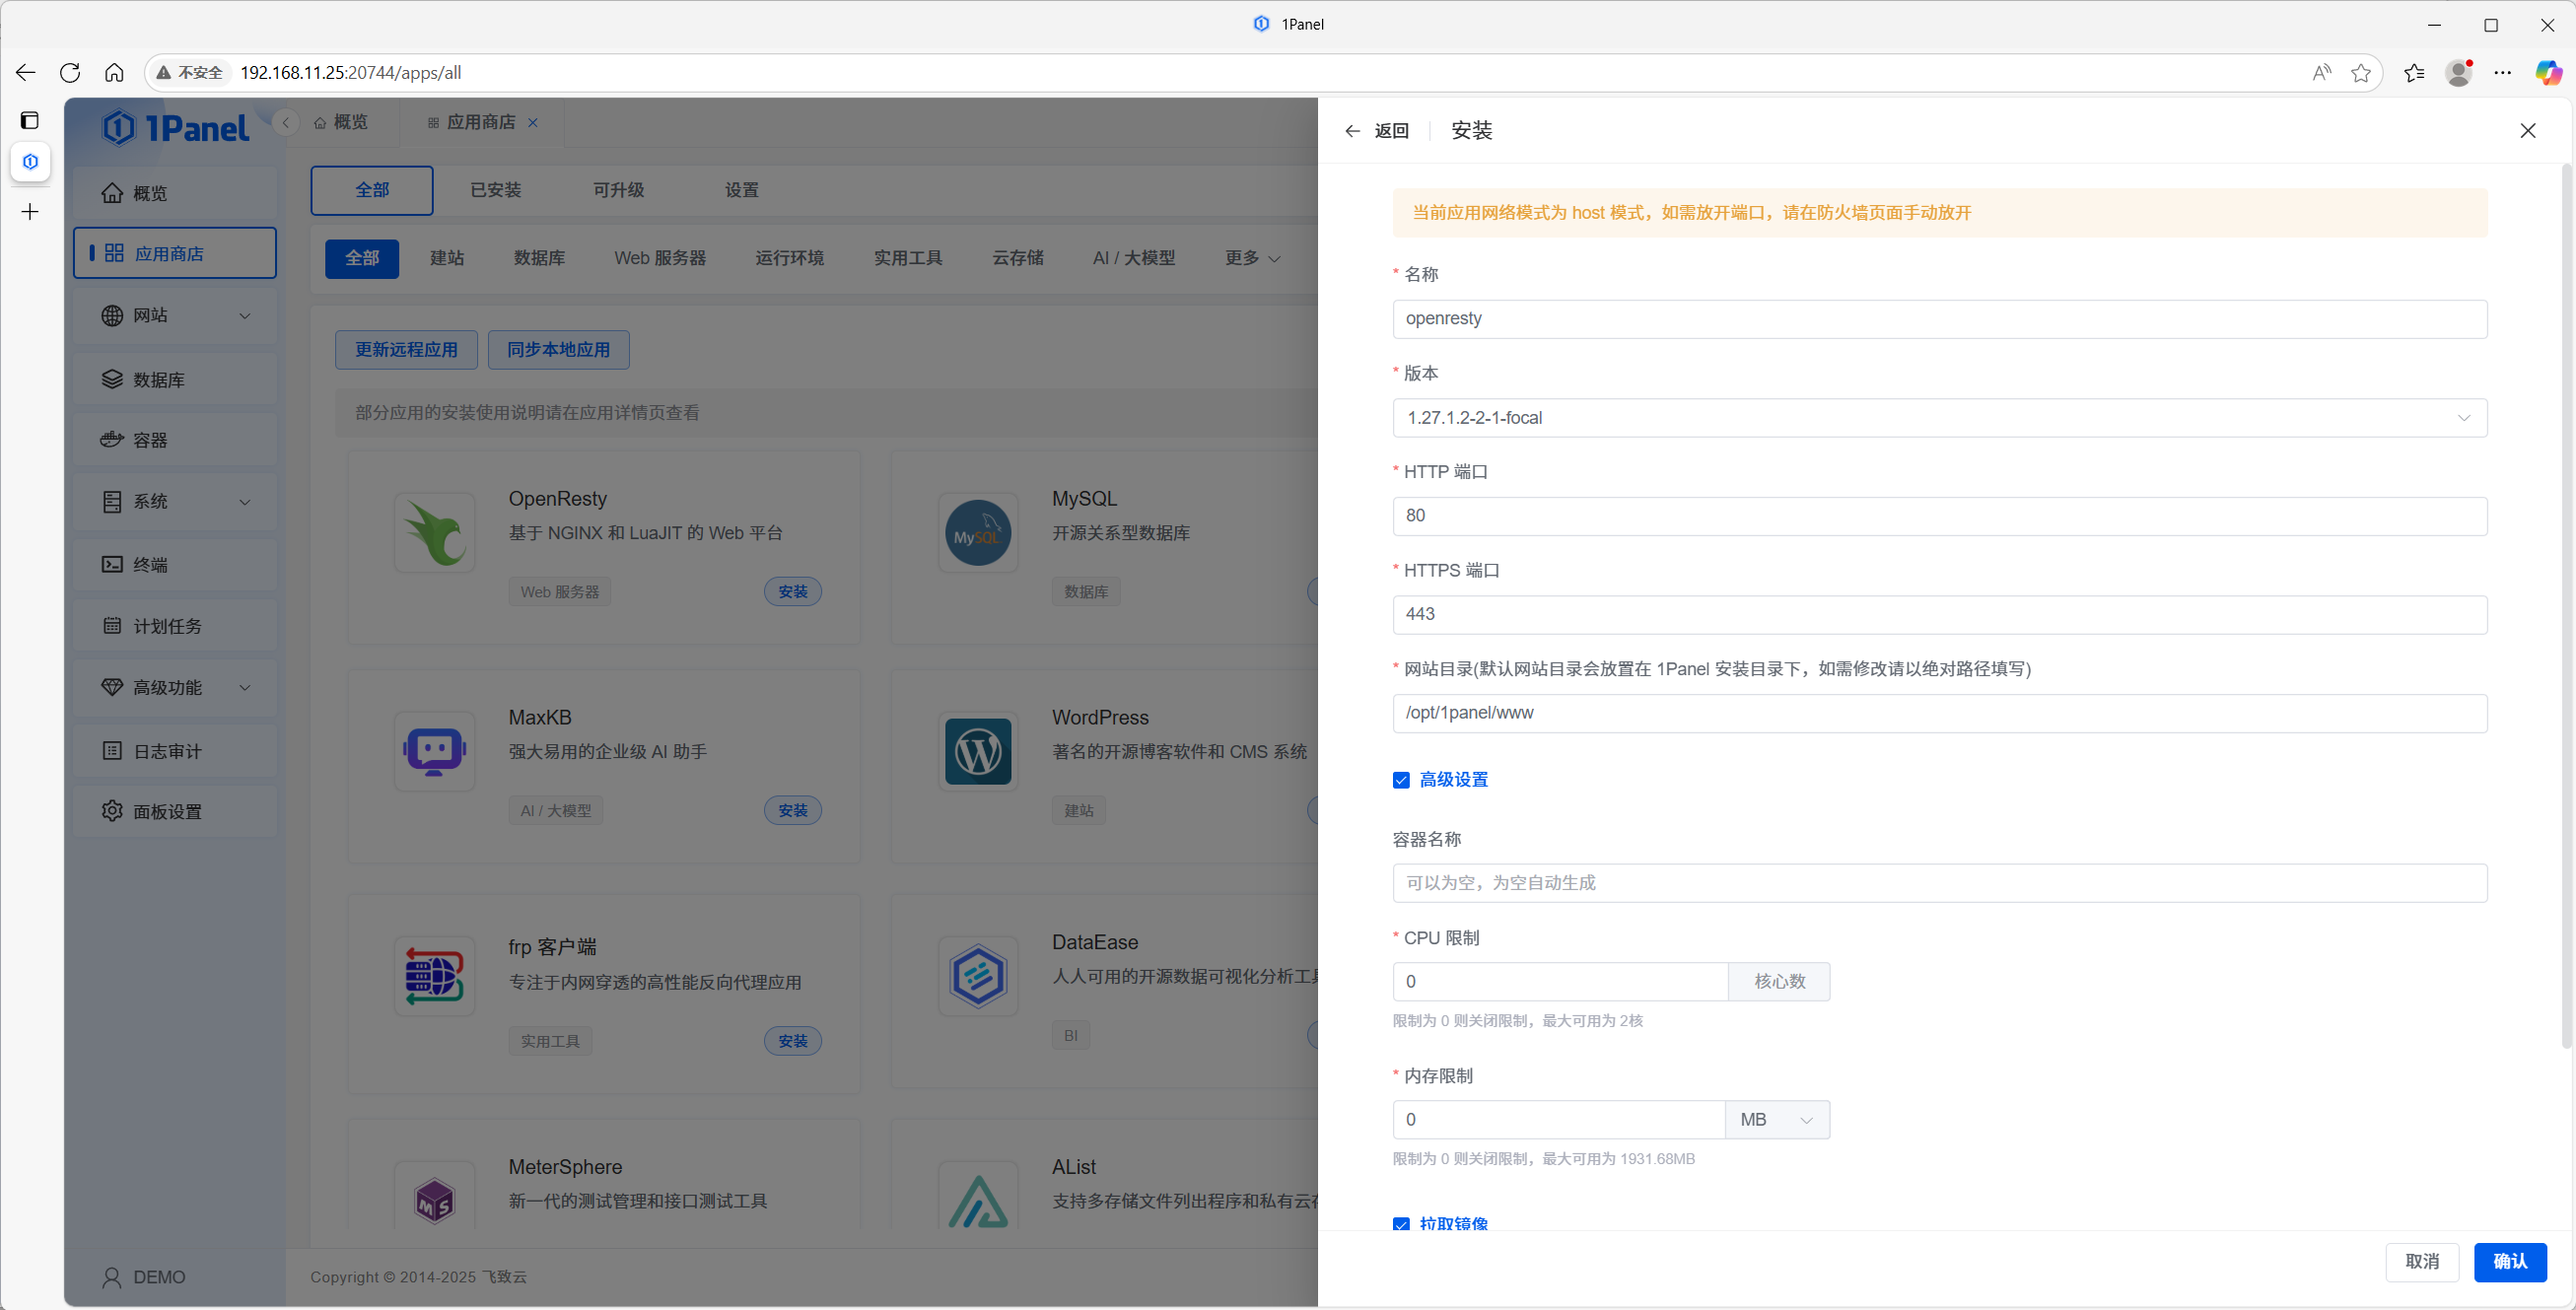
1.1 Install OpenResty
OpenResty is the core Web Server used for website management in 1Panel. It is built on Nginx and integrates enhanced LuaJIT along with a rich set of third-party modules.
Log in to your 1Panel dashboard.
Click on App Store in the left sidebar.
Locate OpenResty in the application list.
Keep the installation parameters at their defaults, click Install, and wait for the process to complete.
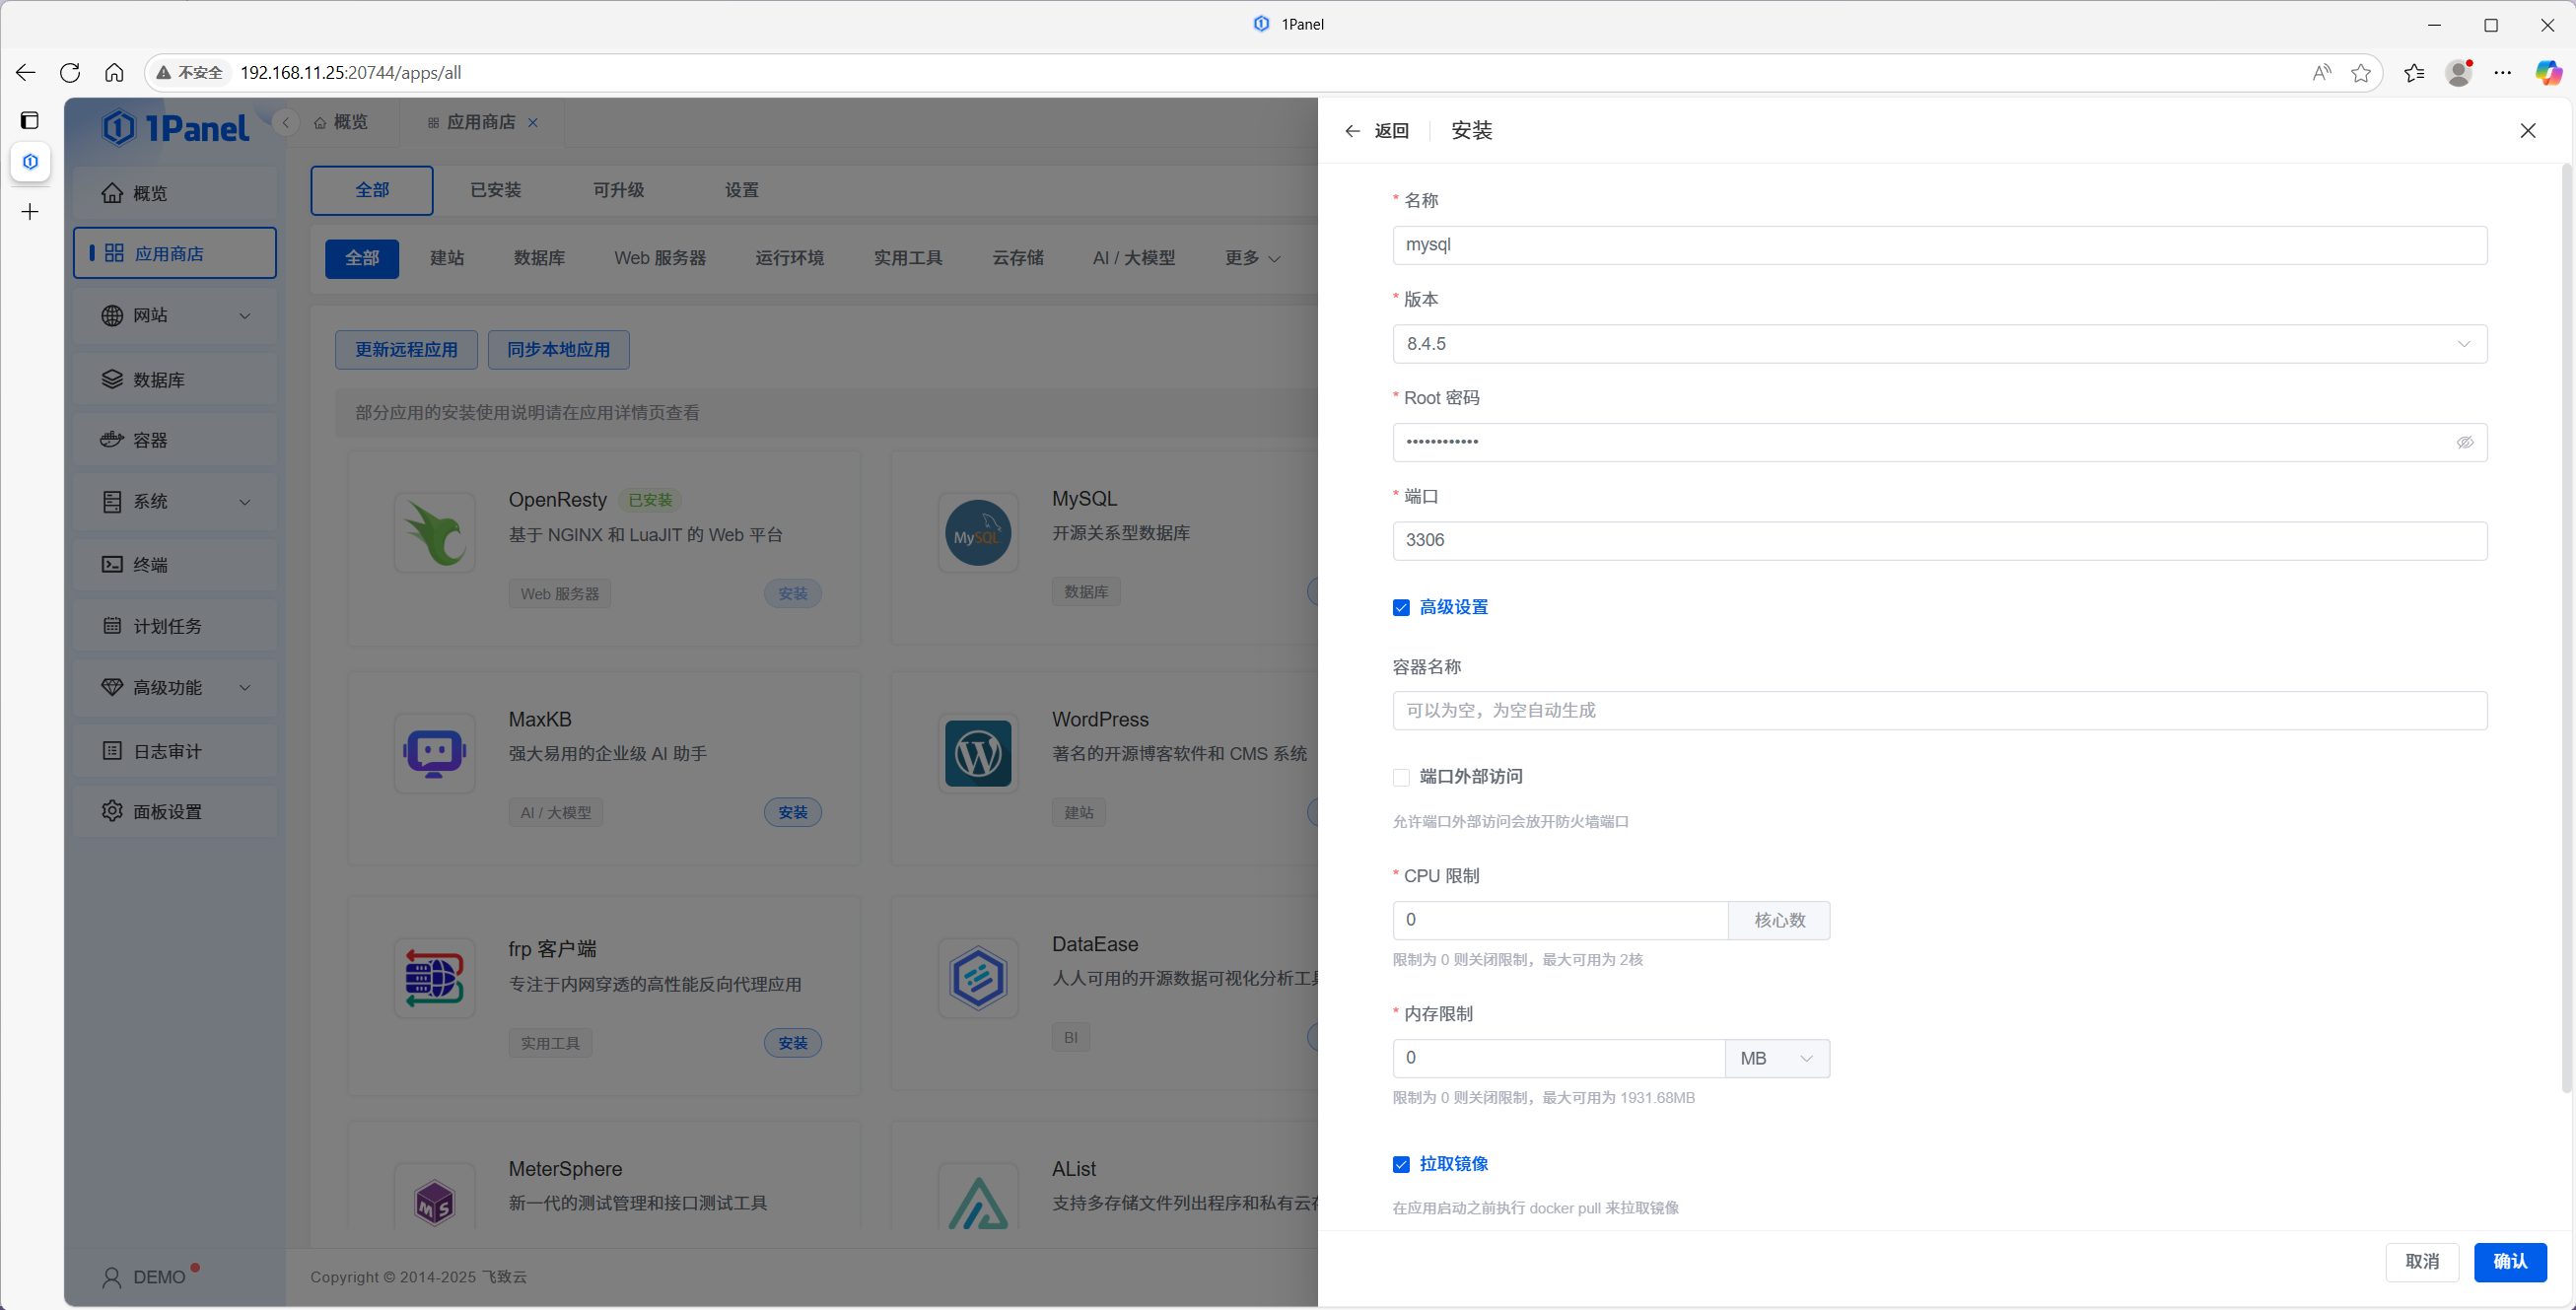
1.2 Install MySQL Database
WordPress requires a database to store its content, and MySQL is the most widely used choice for this purpose.
Locate MySQL in the App Store.
Keep the installation parameters at their defaults and click Install.
Wait for the installation process to complete.
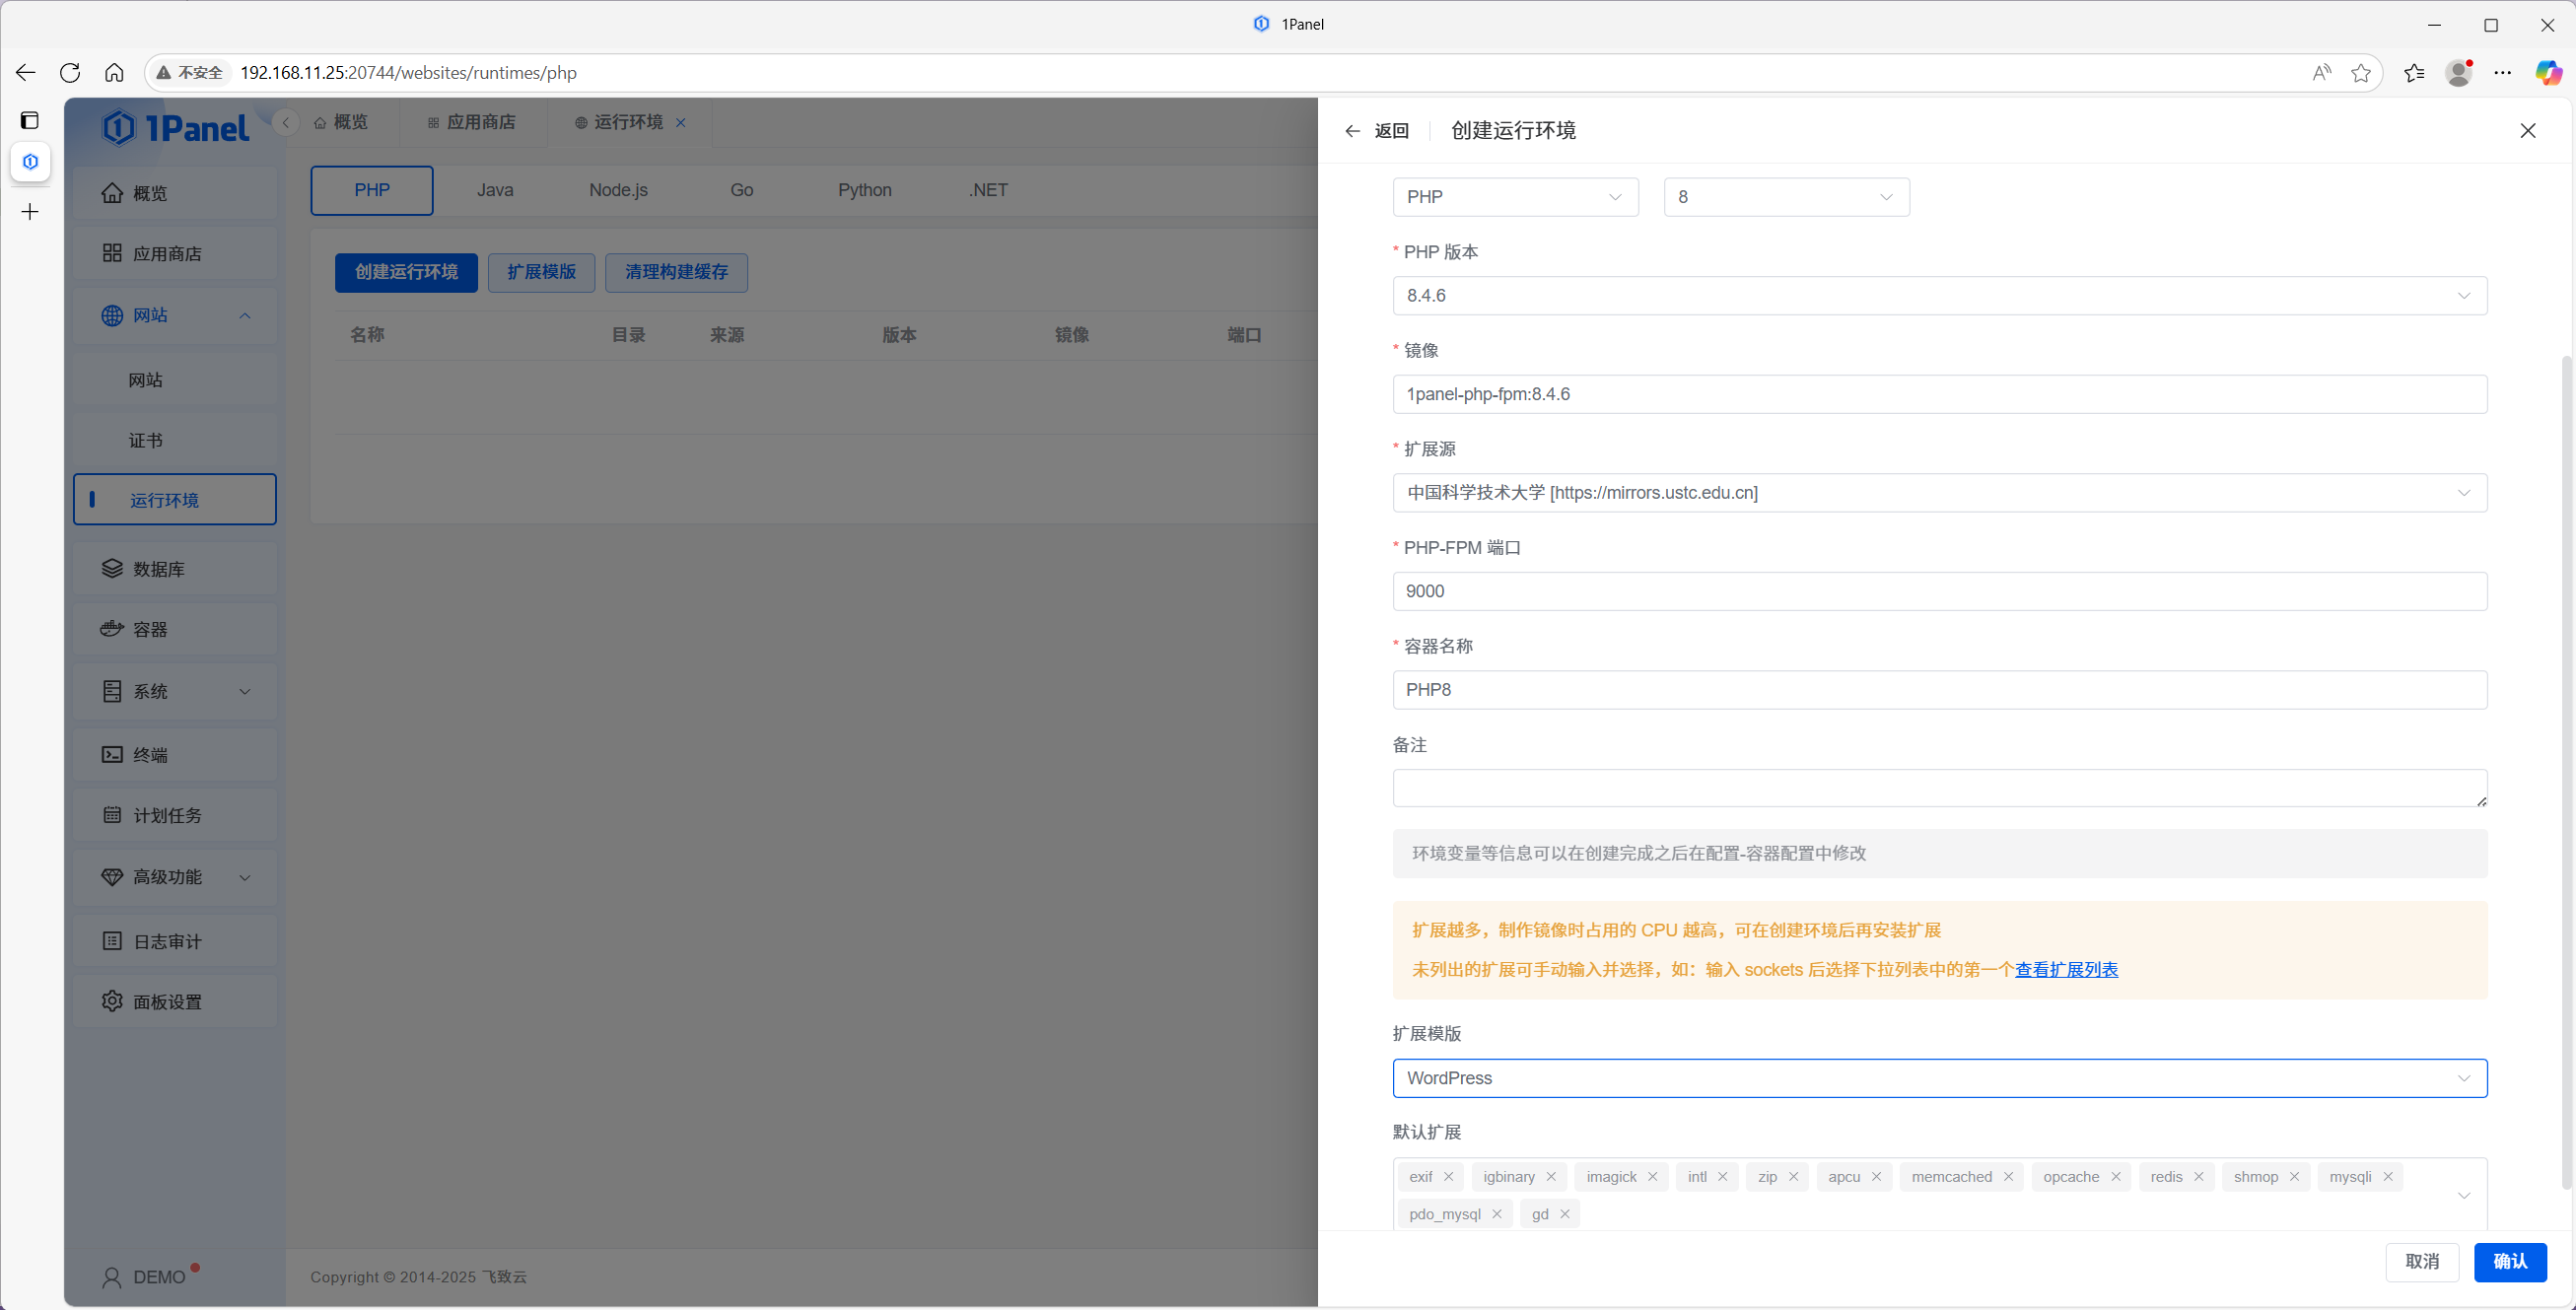
1.3 Configure the PHP Runtime Environment
Since WordPress is built on PHP, a dedicated PHP runtime environment must be configured.
Click Websites -> PHP Runtimes in the left sidebar.
Select PHP and click Create Runtime.
Fill in the Name and other parameters. Select the appropriate PHP version (this tutorial uses the latest v8.4.6).
For the Extension Template, select WordPress. This template automatically includes common extensions required by the WordPress core.
Add any additional extensions based on the specific requirements of your chosen themes or plugins.
Click OK and wait for the runtime environment to be successfully created.
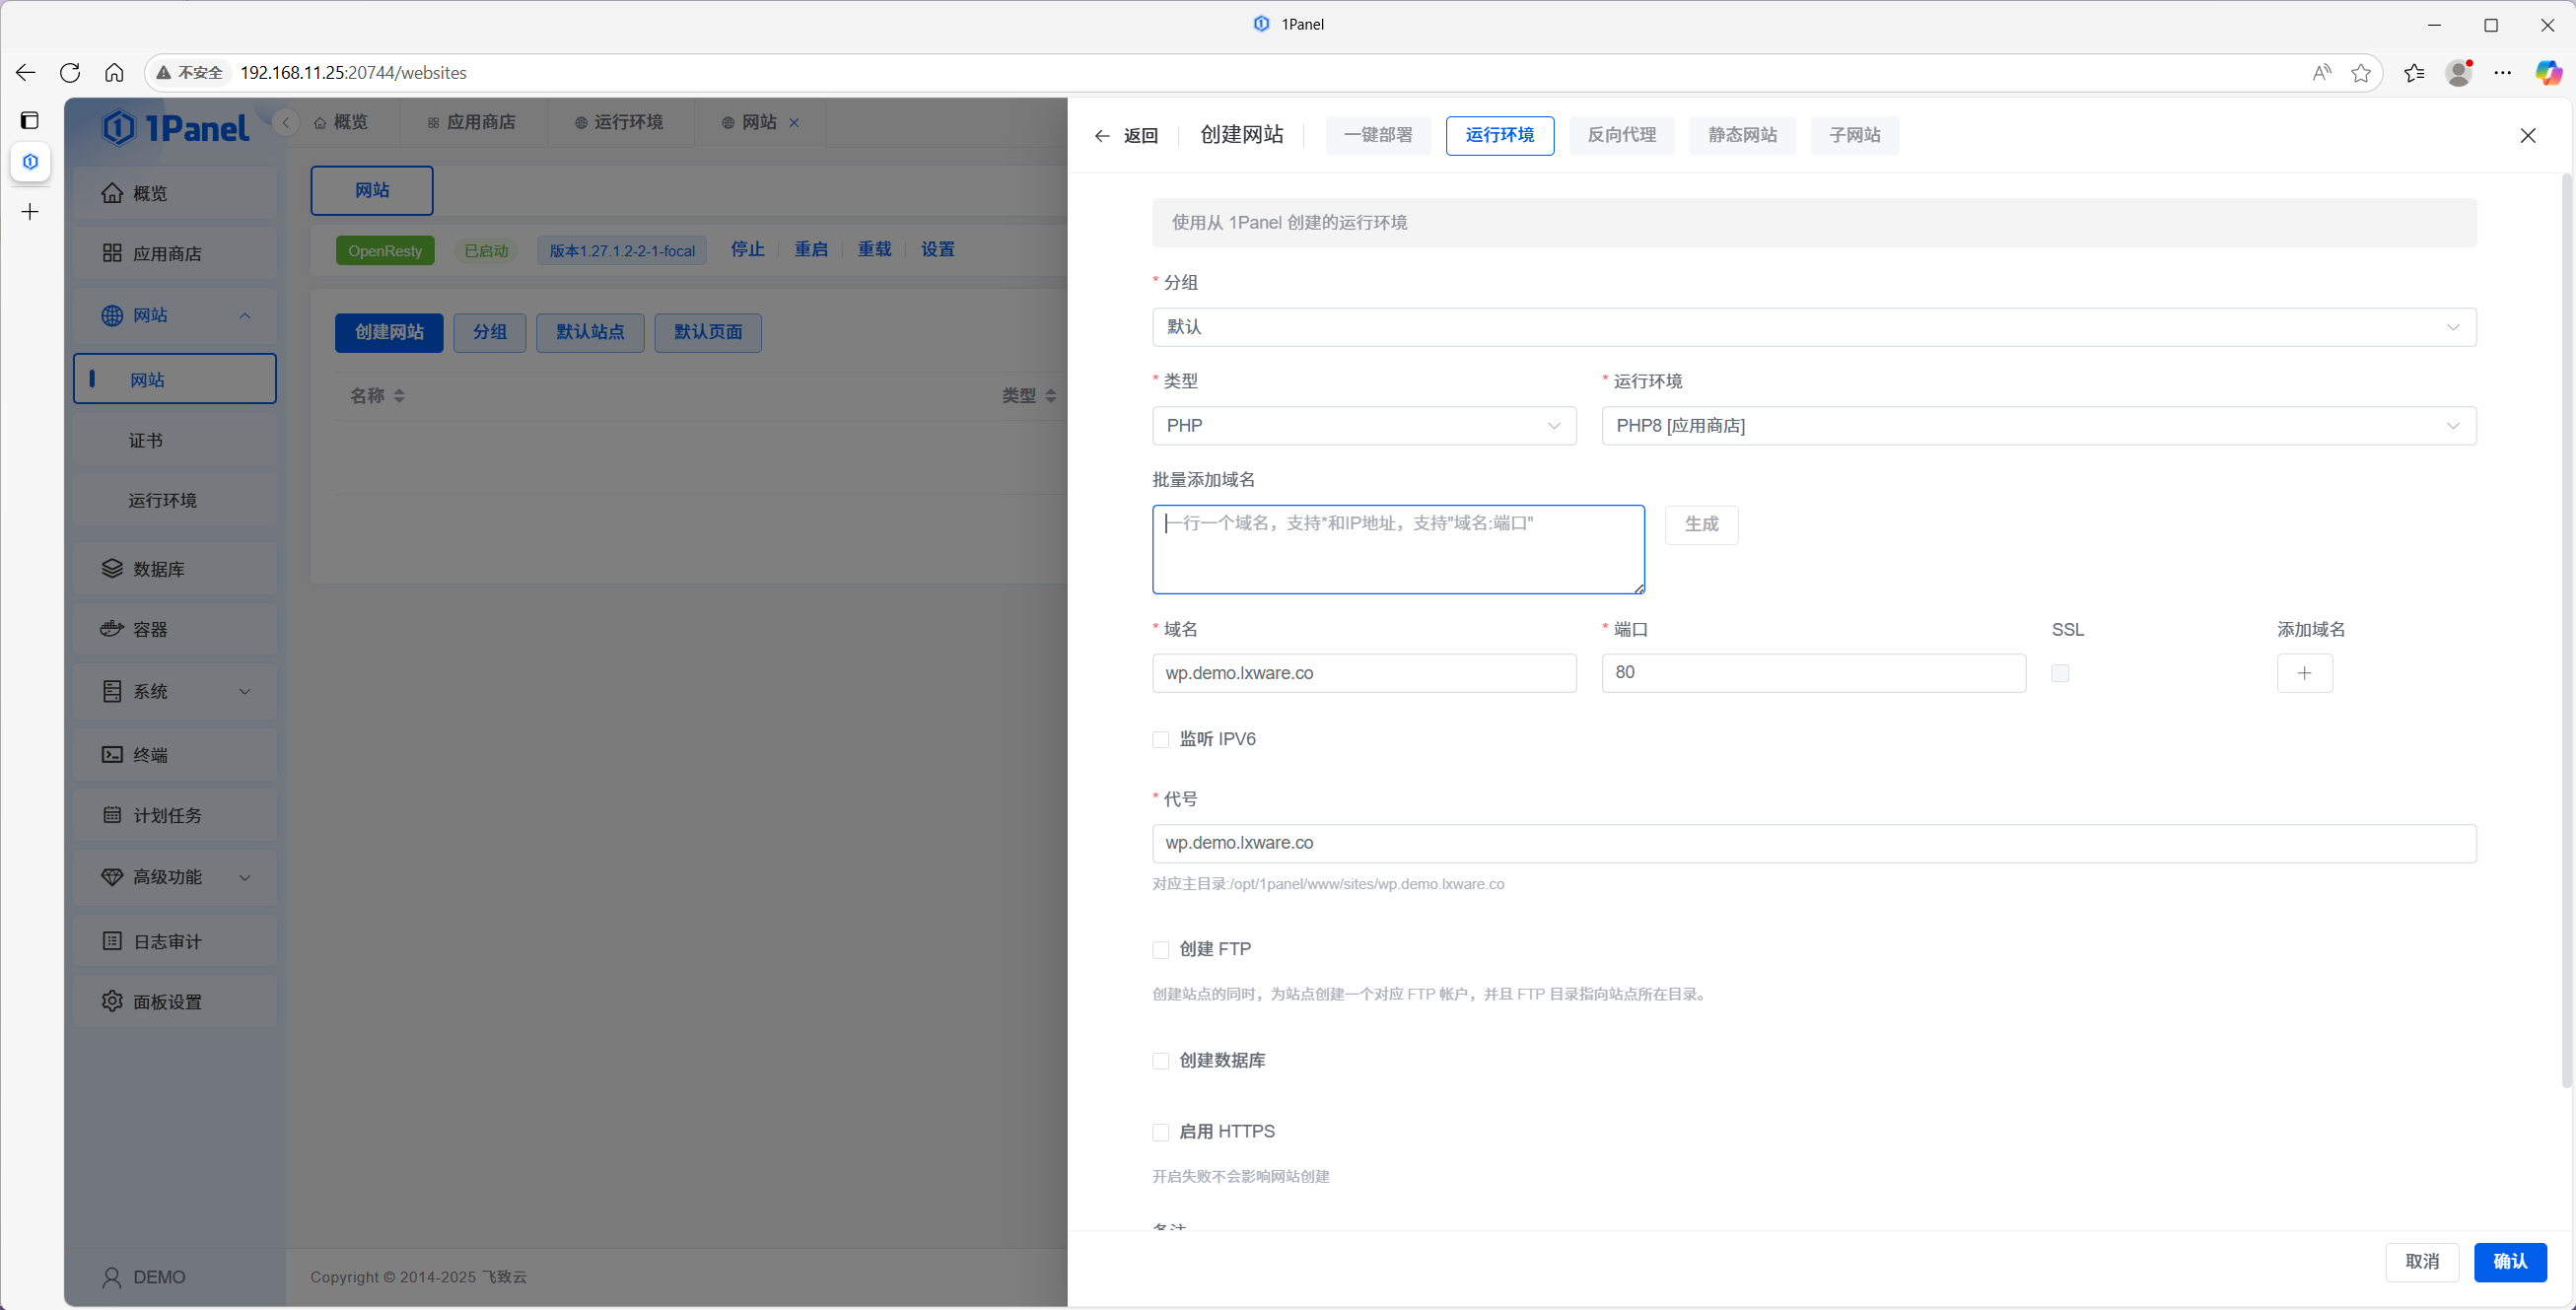
Step 2: Create the Website
2.1 Create Website Record
Click Websites in the left sidebar menu.
Click Create Website.
Select the Runtime tab, then choose the PHP Runtime environment you just created.
Enter the Website Information:
Name: The display name of your WordPress site.
Primary Domain: Your domain name (e.g.,
wp.demo.lxware.co).Alias (Slug): The name of the root directory corresponding to your website.
Set the Default Website status to the site you just created (optional, depending on your routing needs).

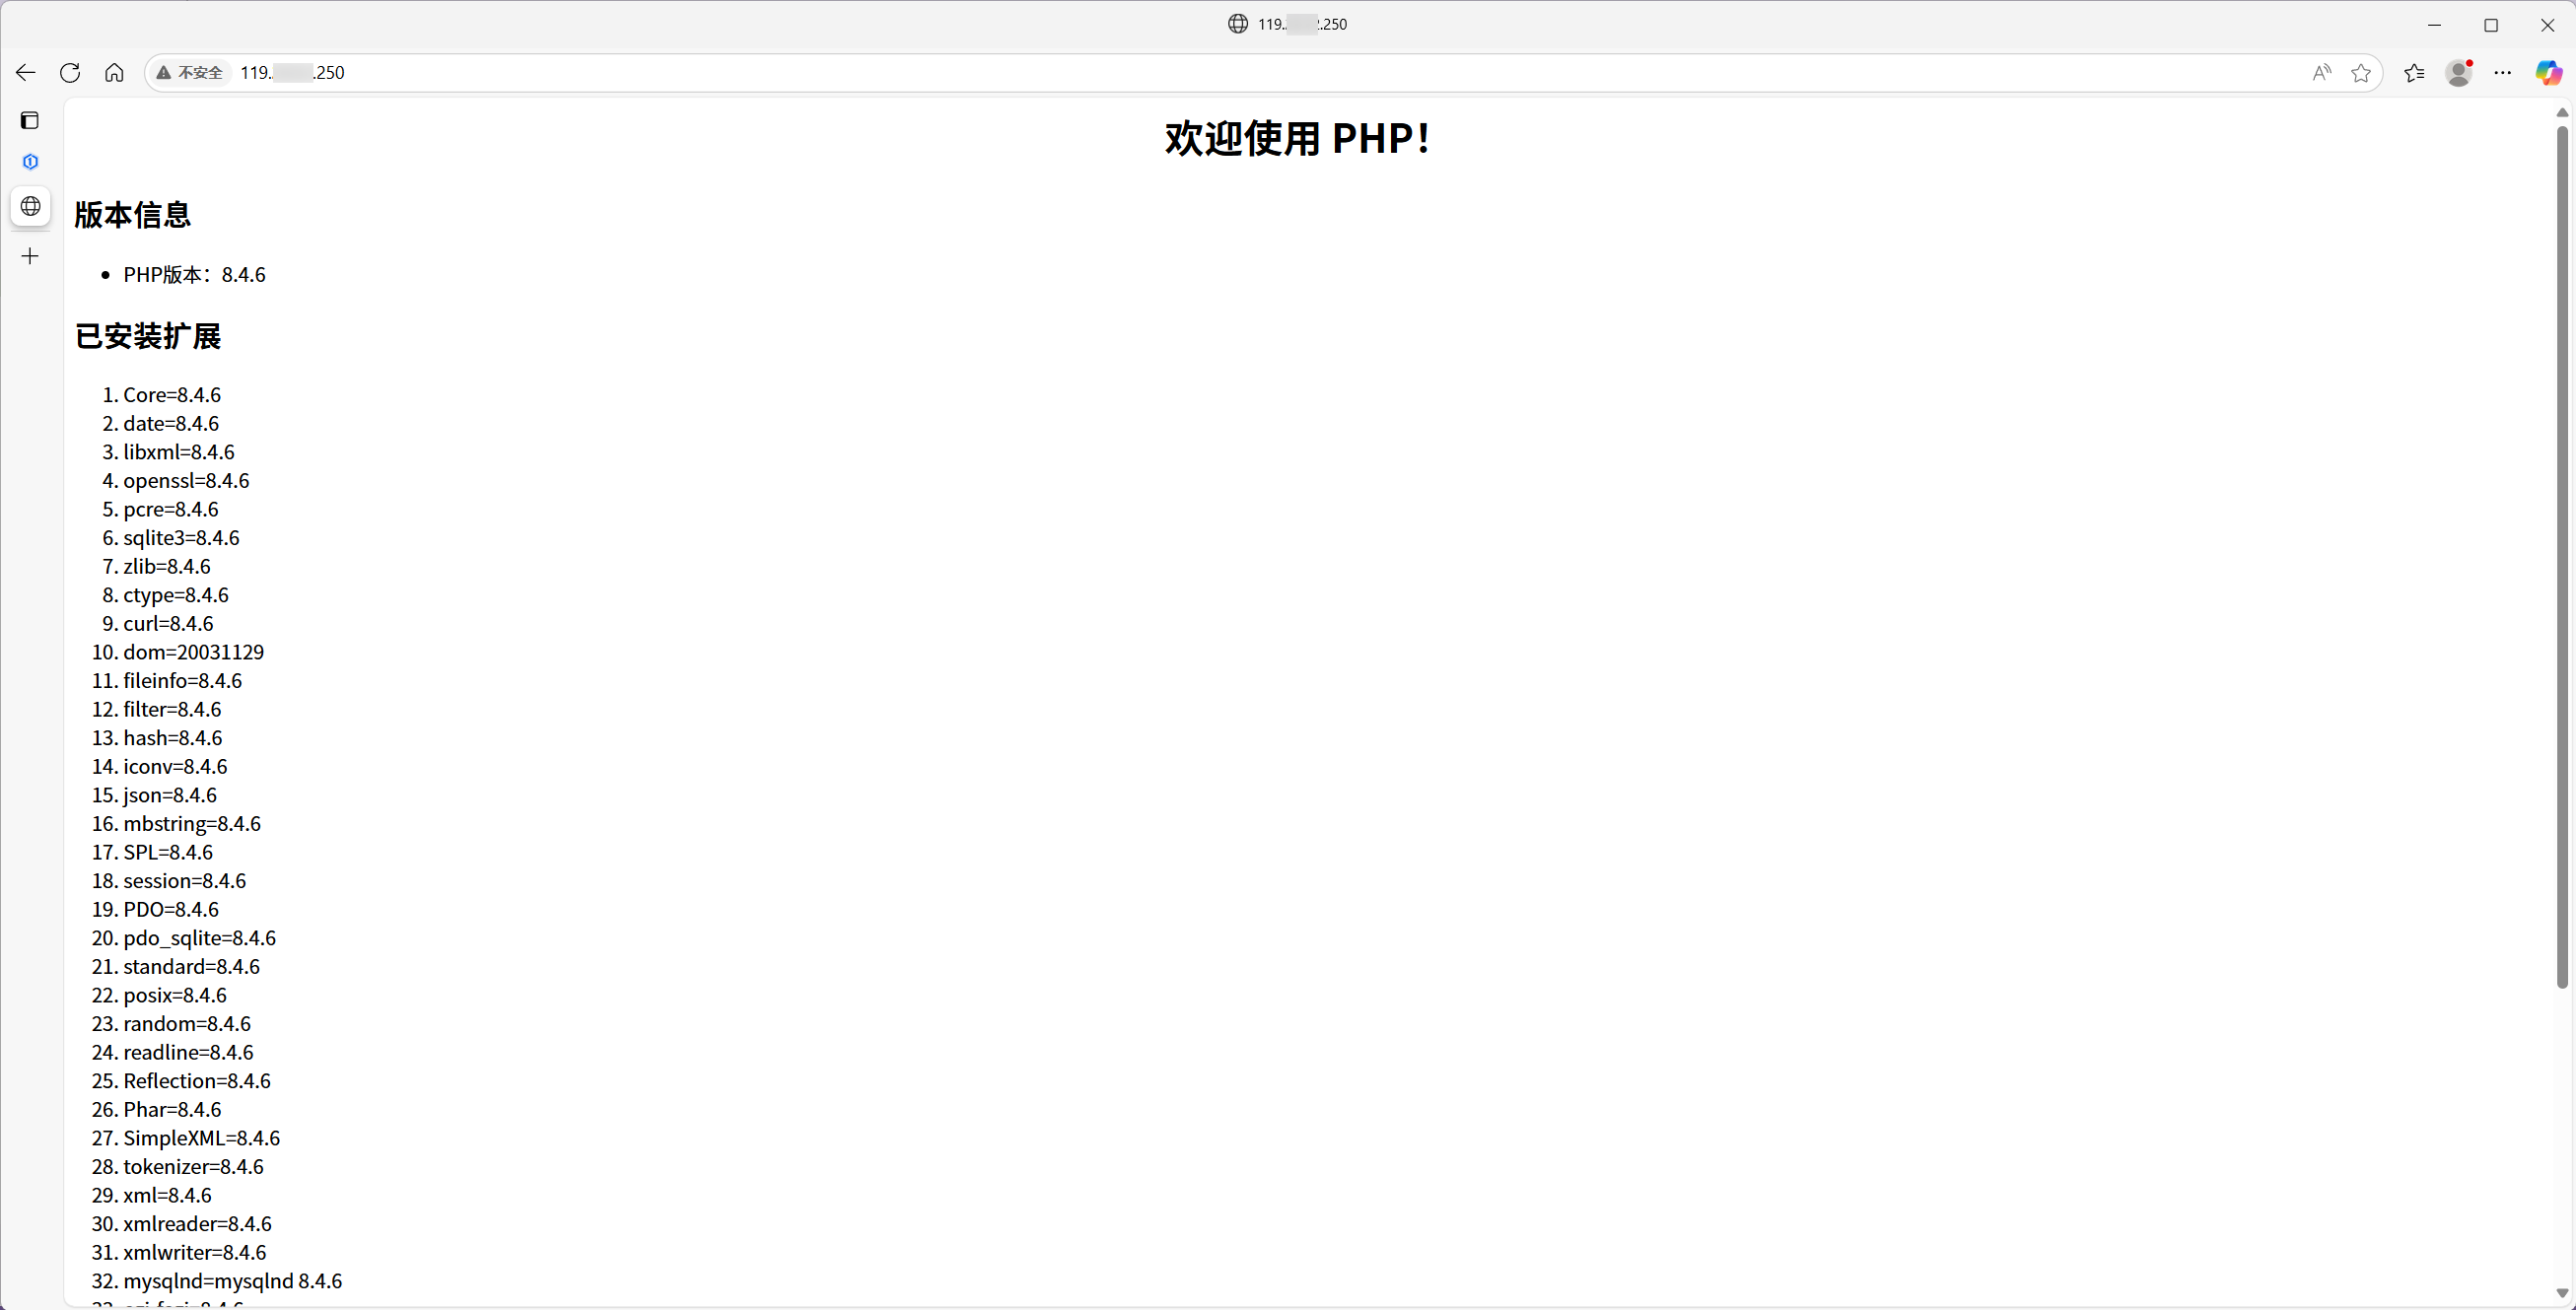
2.2 Test the Website
Access the website using your server's IP address. If the PHP Info page (or environment details) appears, it indicates that the website has been successfully created and the environment is running correctly.
第三步:部署 WordPress
Step 3: Deploy WordPress
3.1 Download WordPress
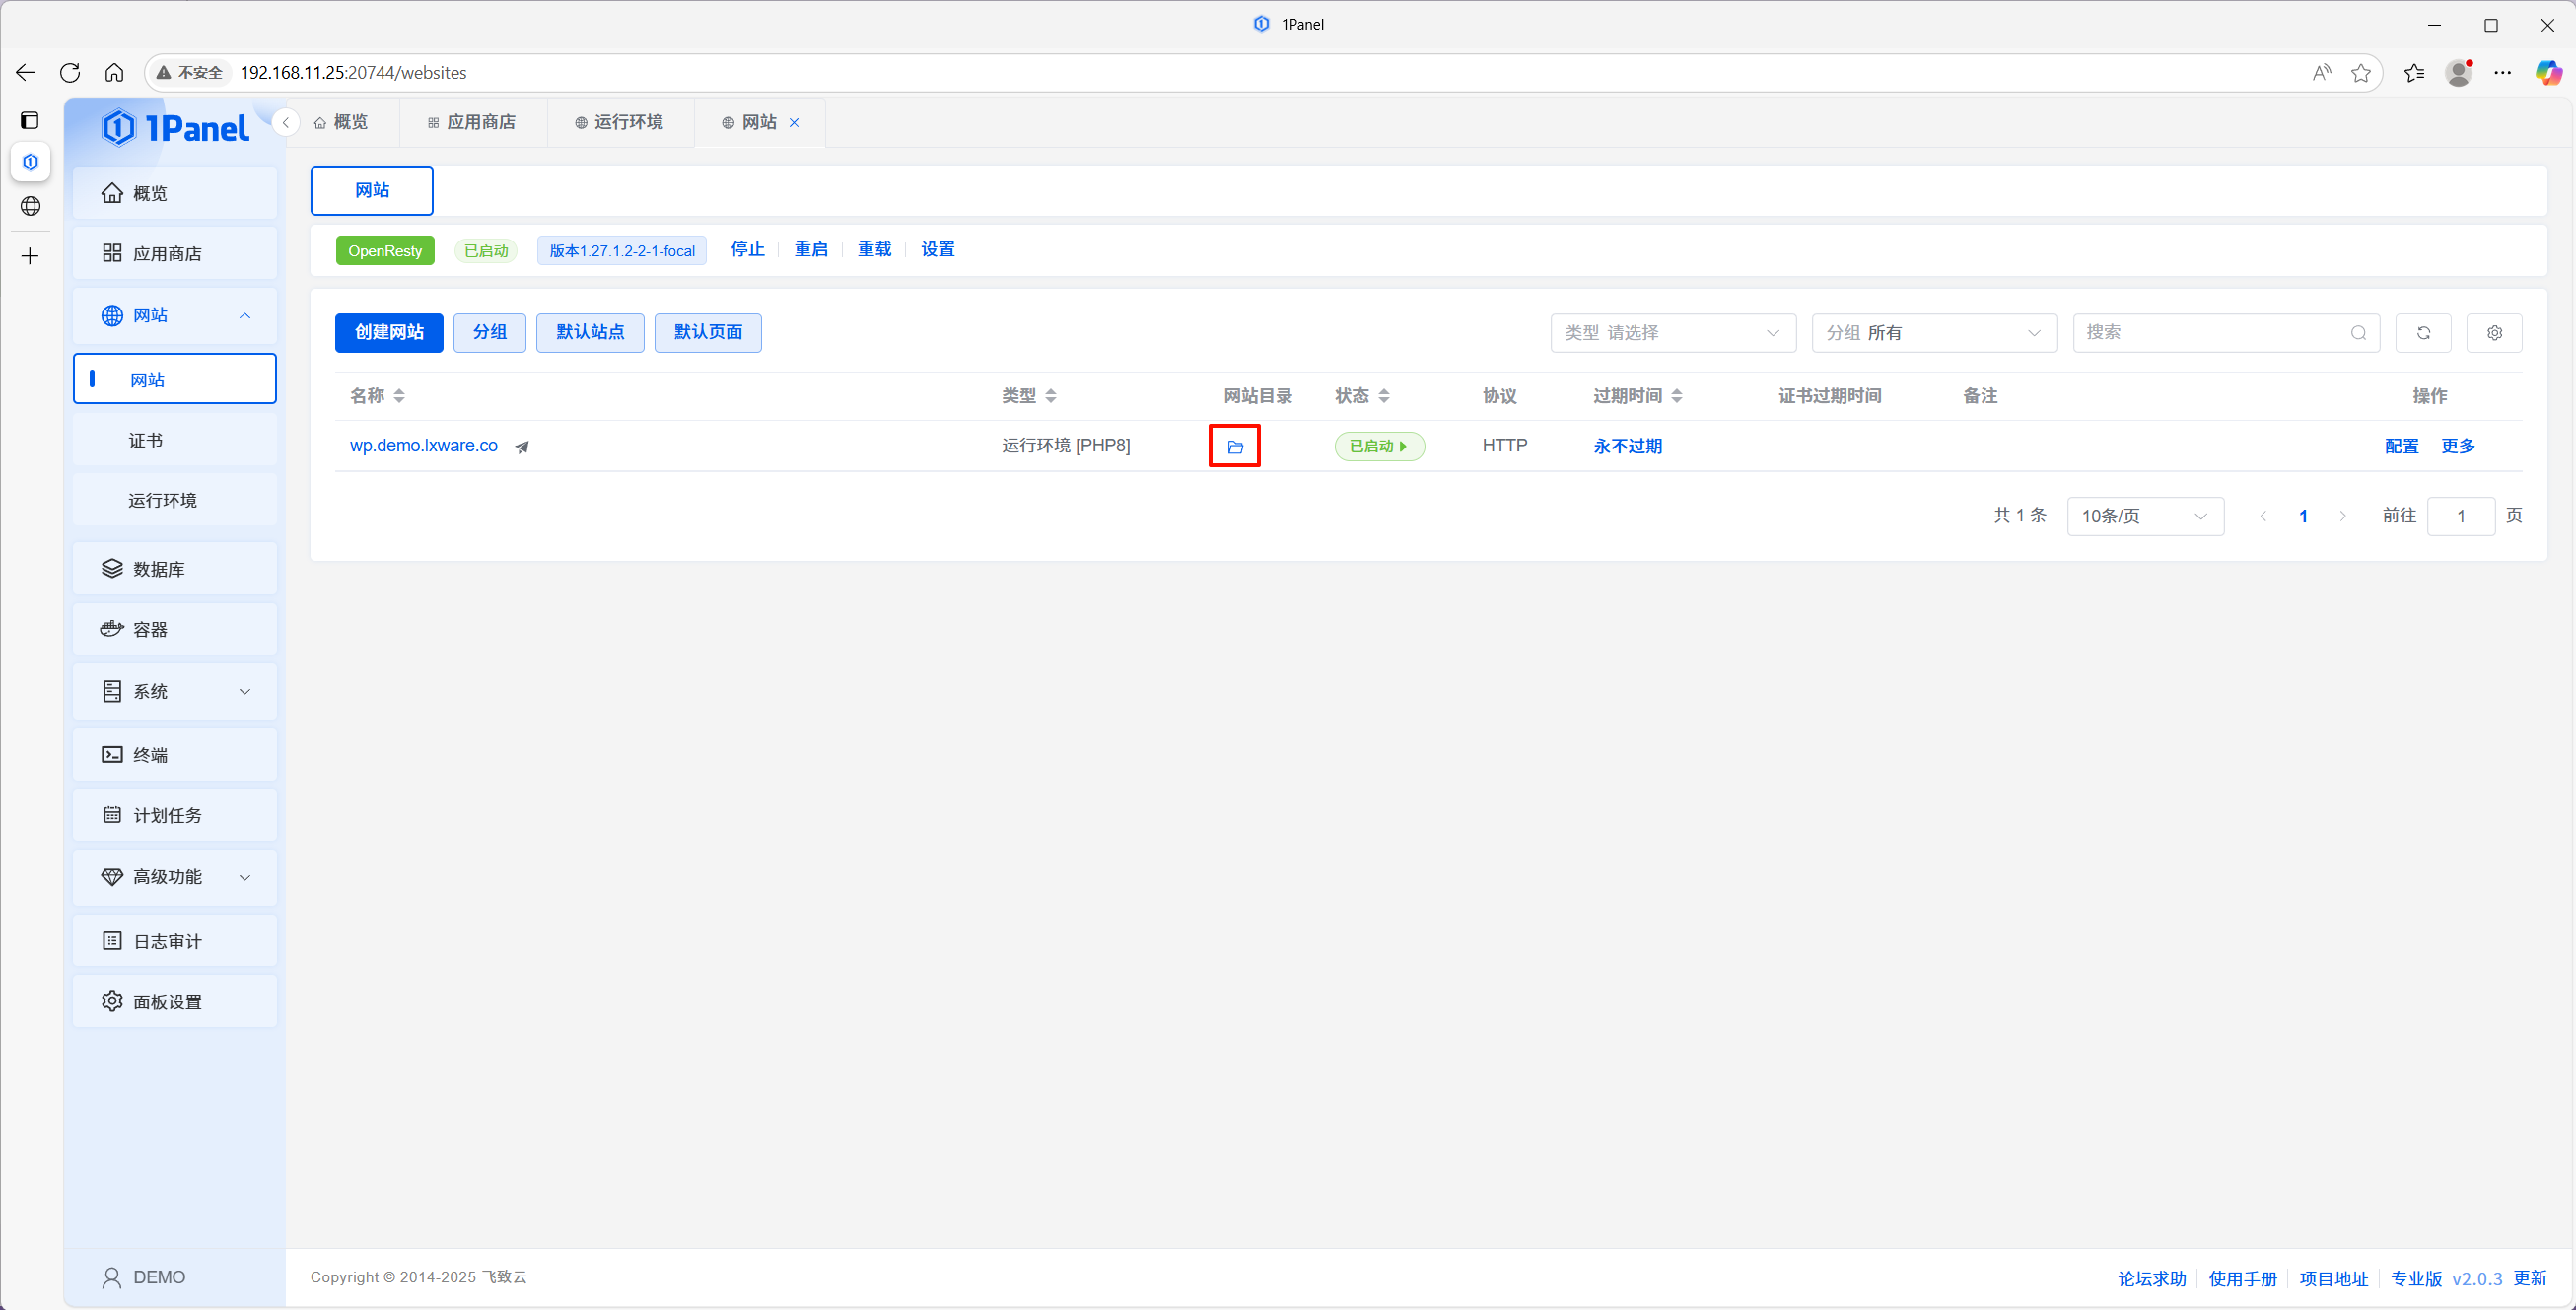
Click the Directory Icon next to your website to enter the Site Root Directory.
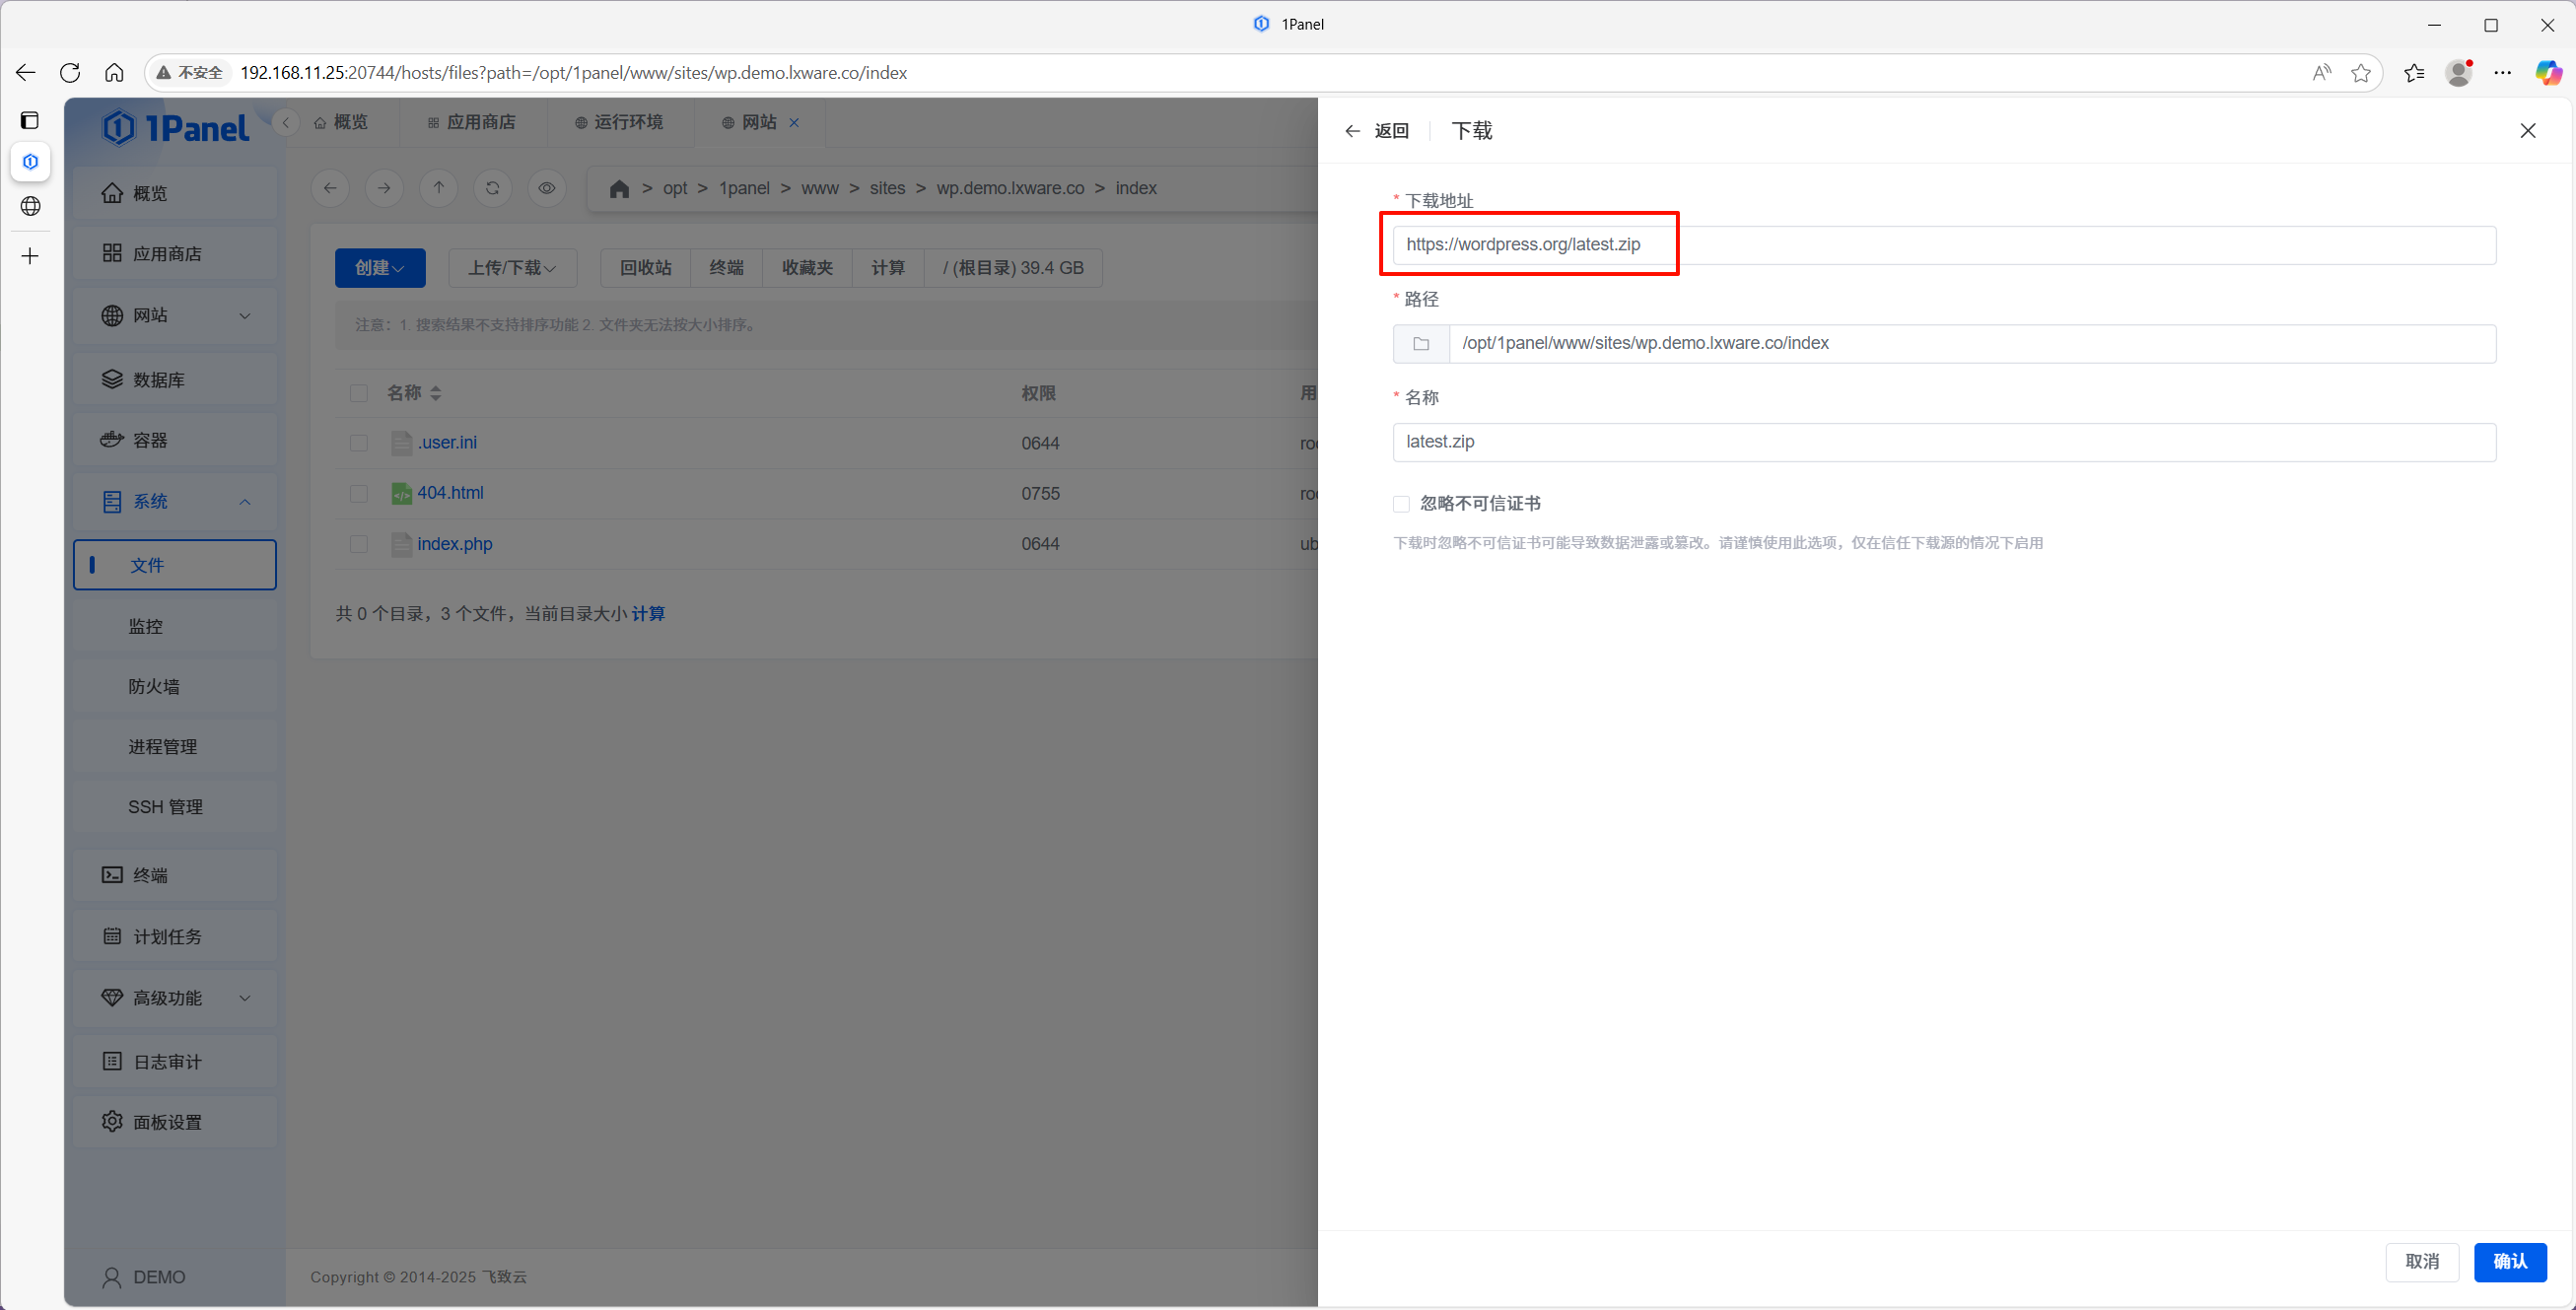
Using the remote download function, download the latest version of WordPress from https://wordpress.org/latest.zip.

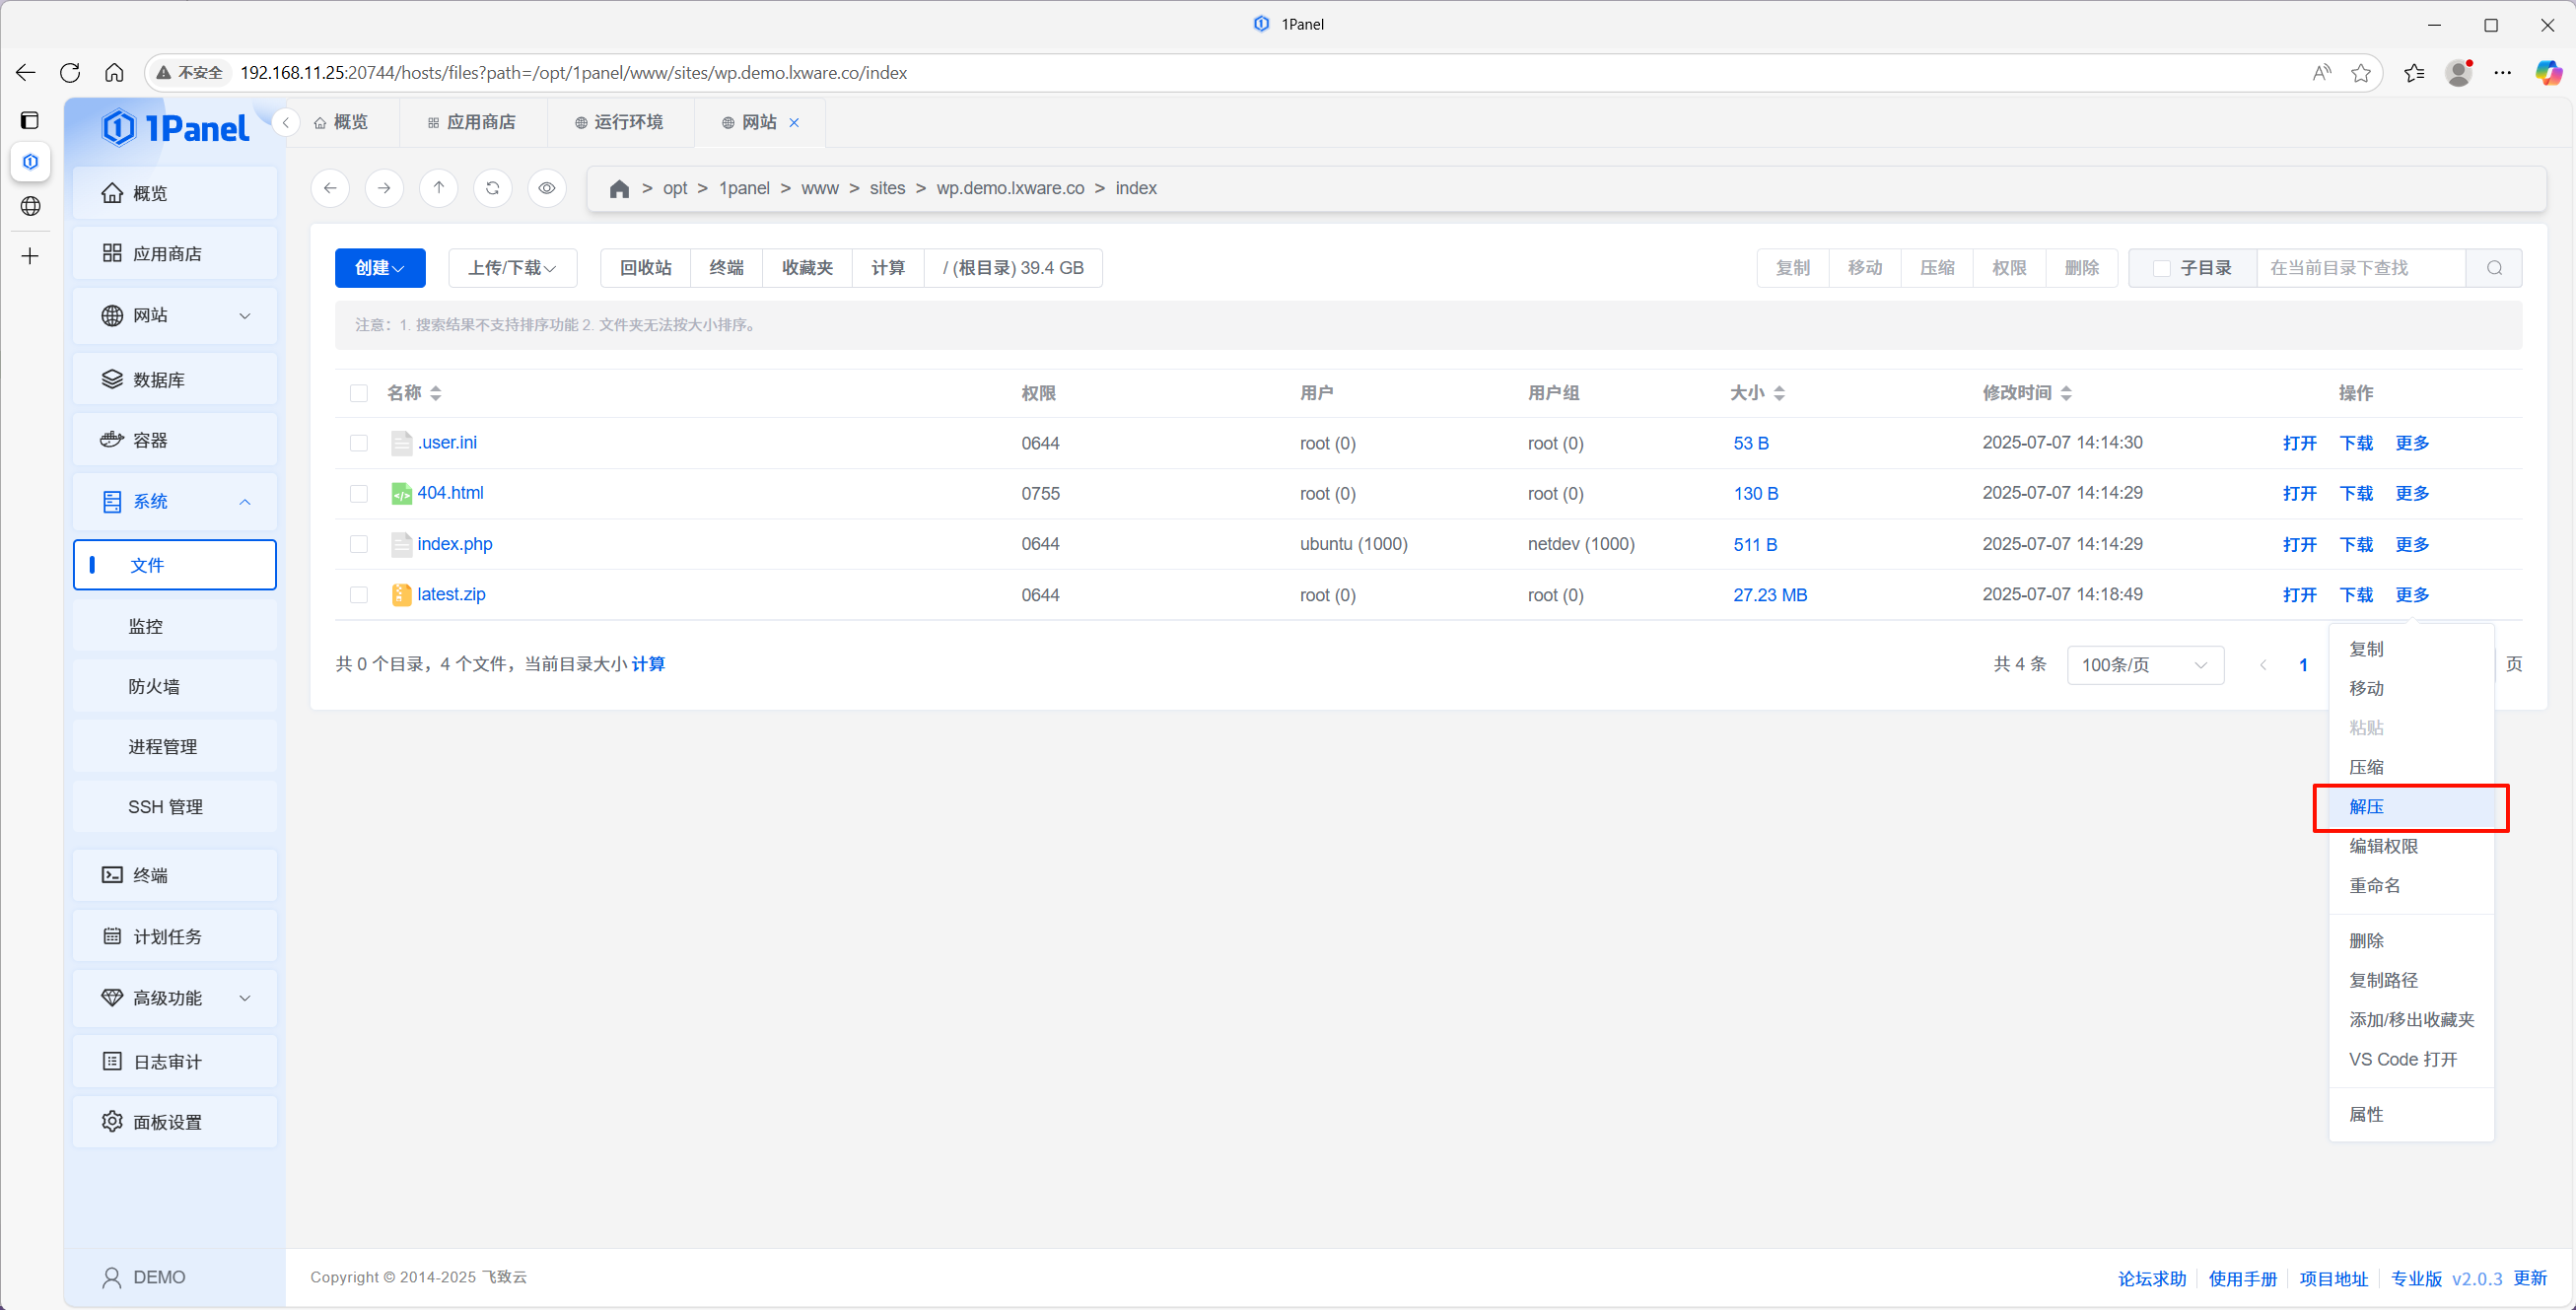
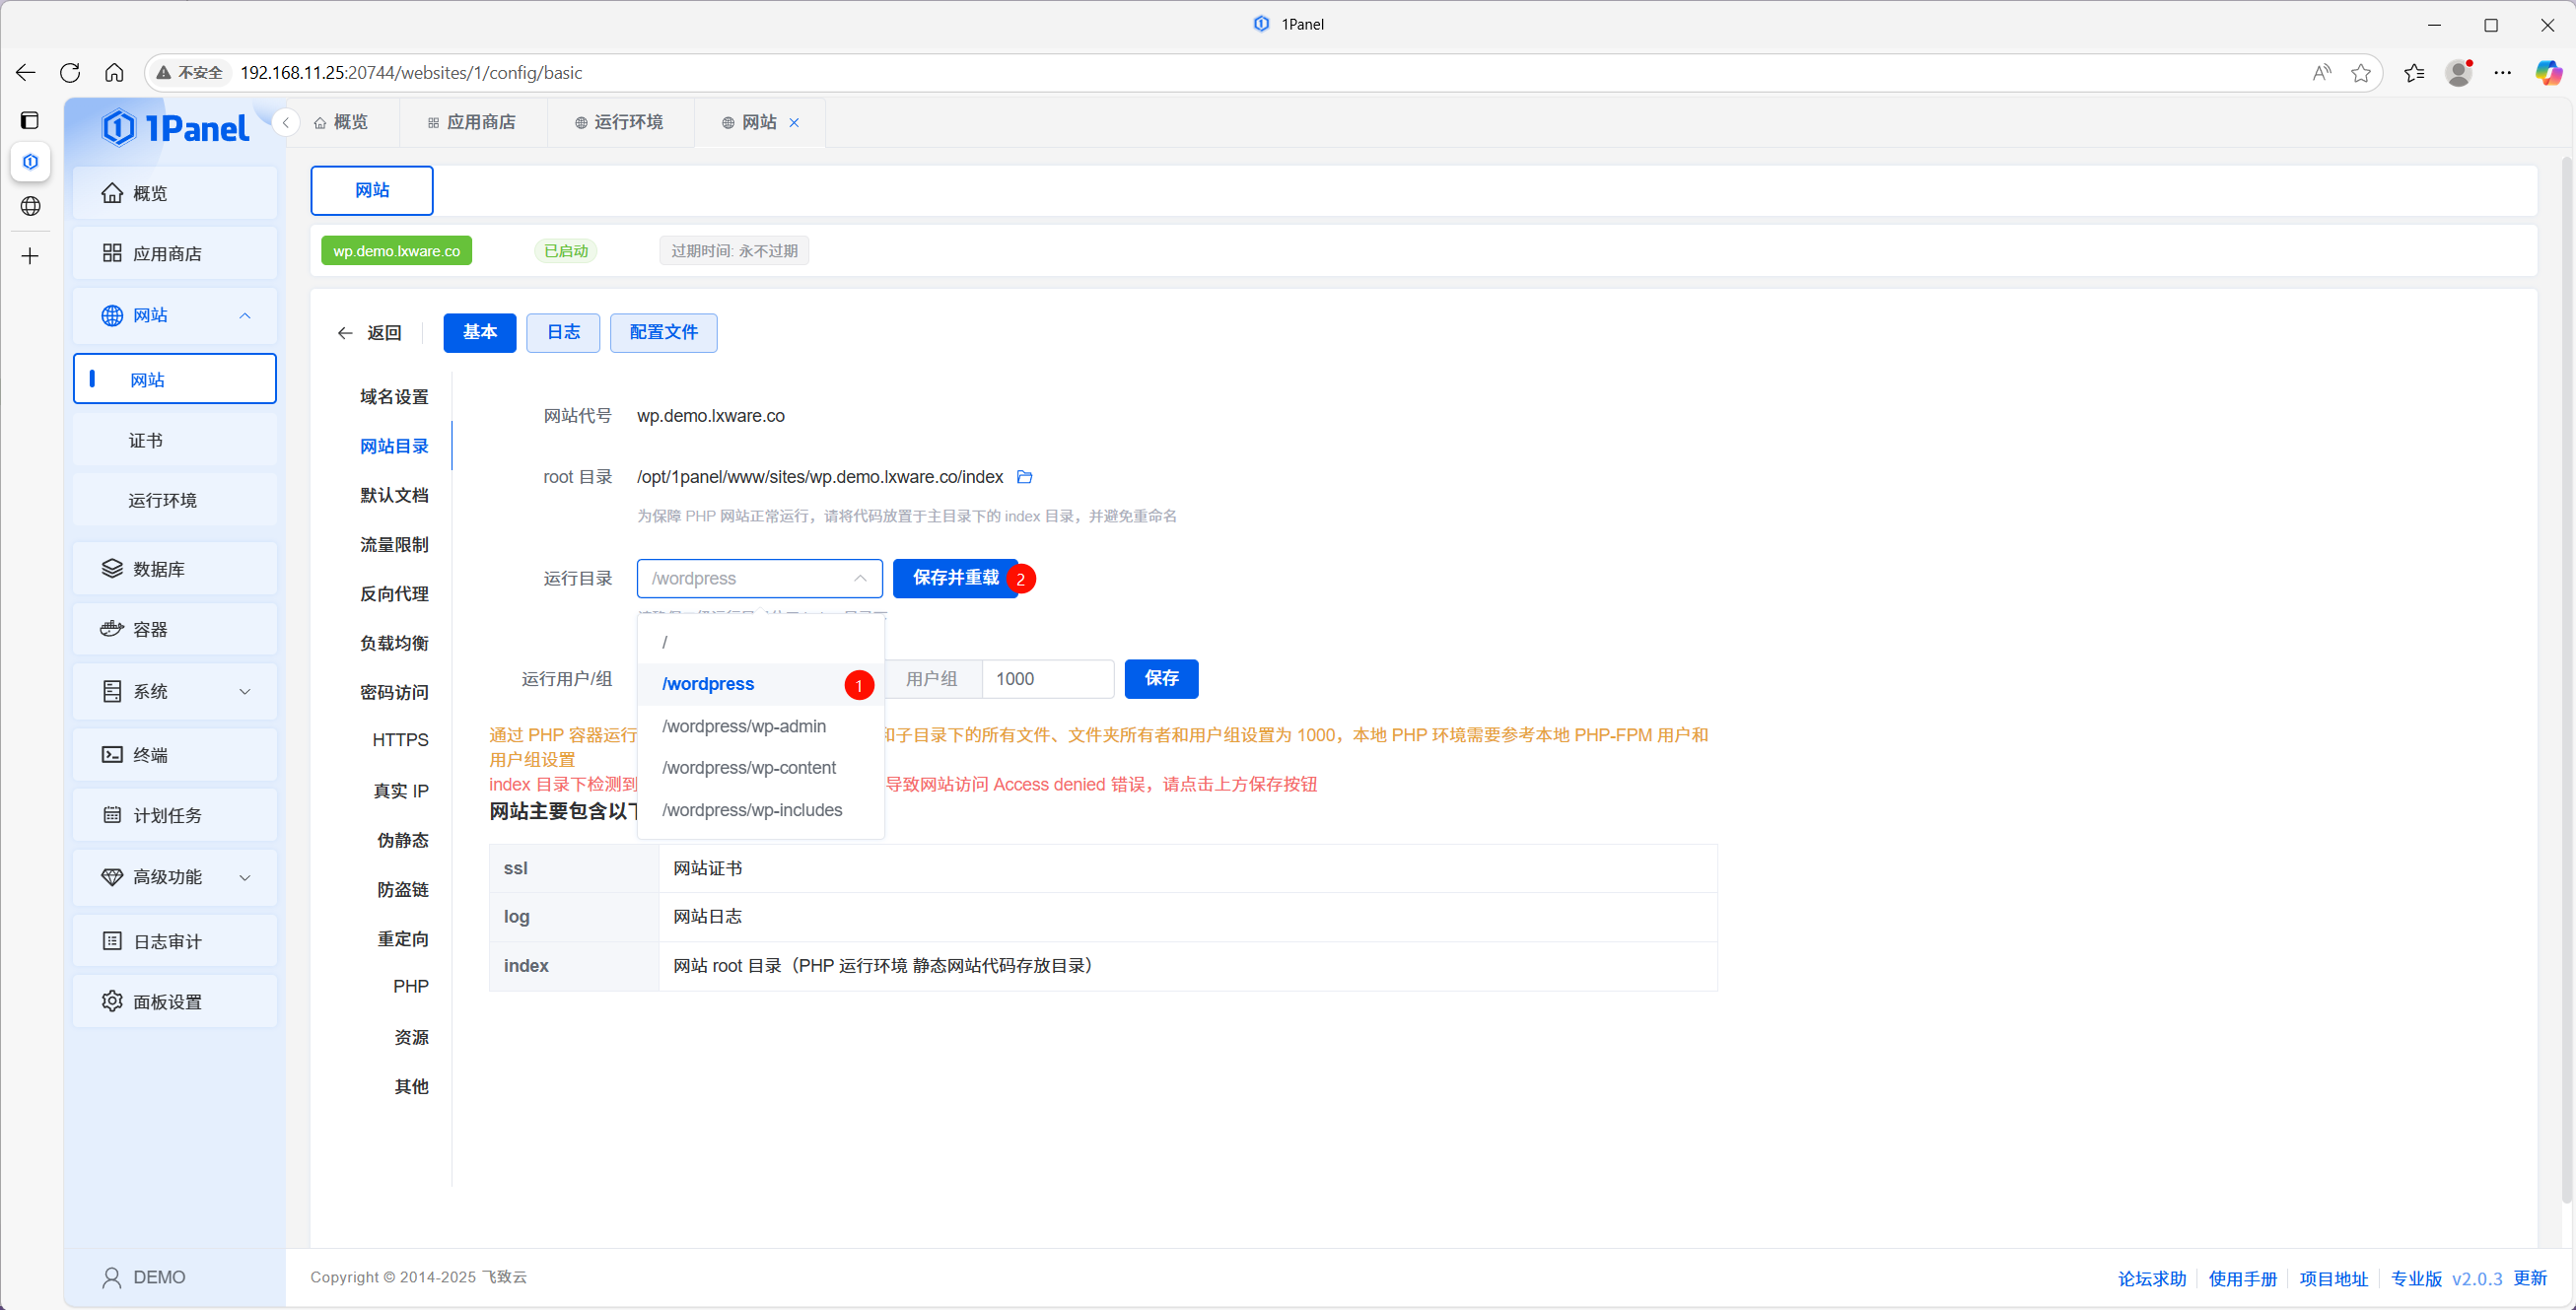
After the download is complete, extract the files to your website's root directory. The WordPress files will be extracted by default to a directory named "wordpress" within the current directory.
Go back to the website settings, change the website's operating directory to "wordpress", and click "Save and Reload".
3.2 Create the Database
Click Databases in the left sidebar menu.
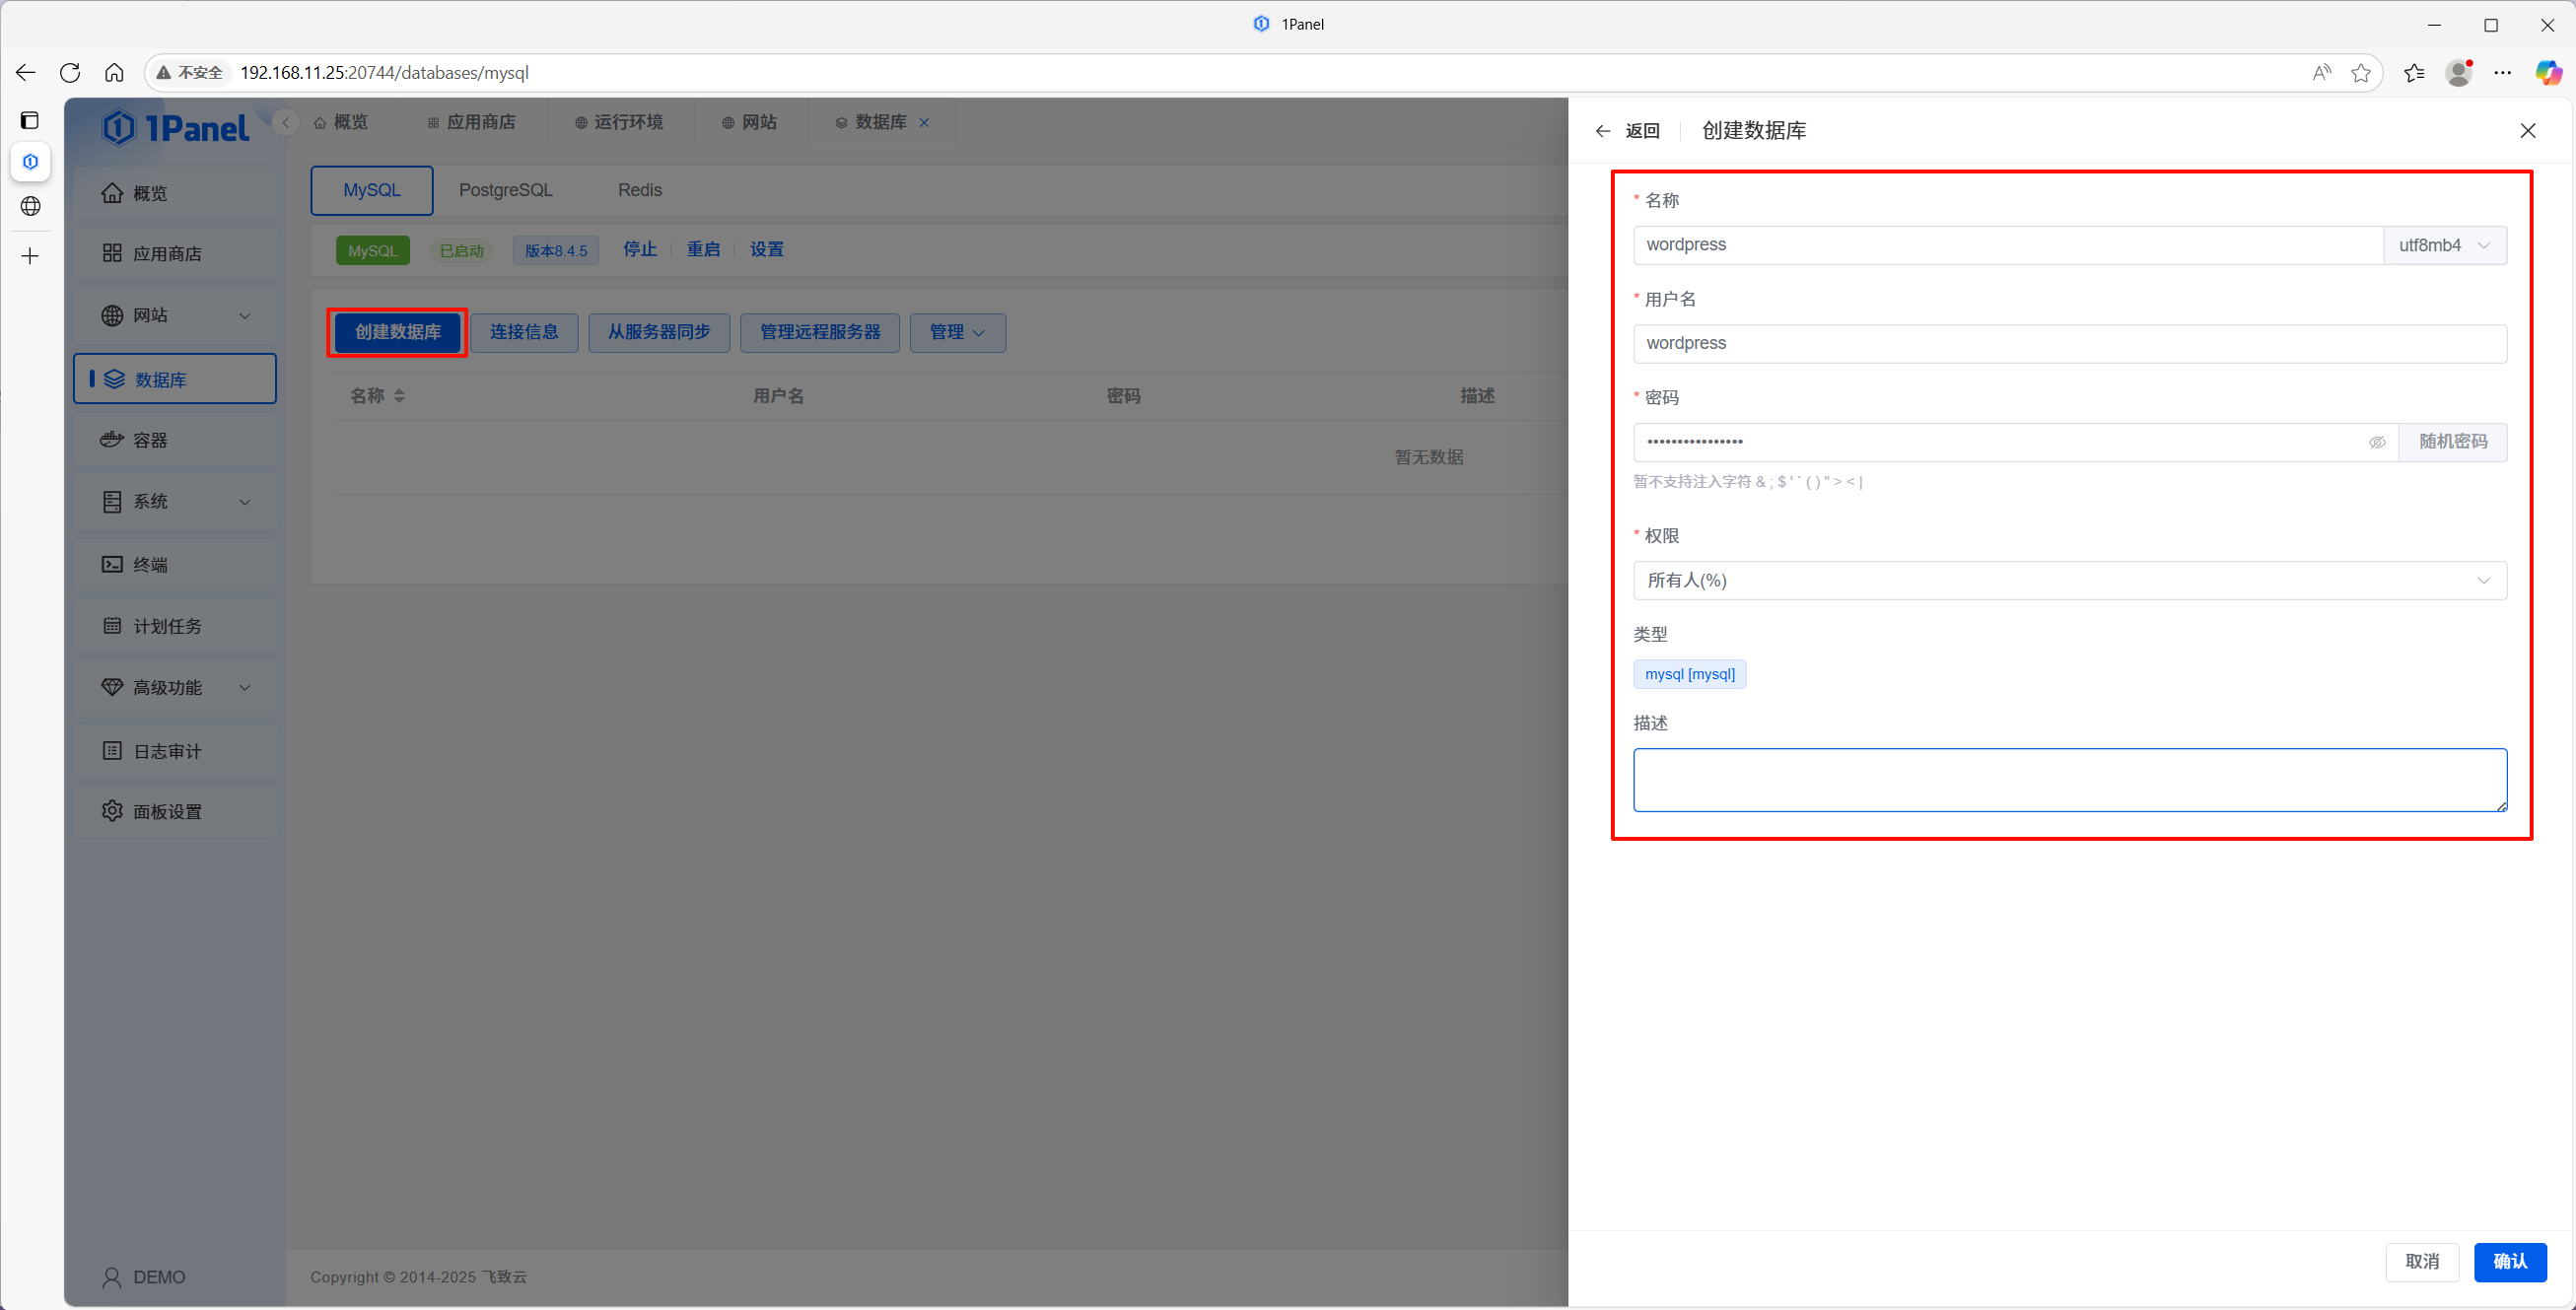
Under the MySQL tab, click Create Database.
Fill in the Database Information:
Name: The name for your WordPress database (e.g.,
wordpress).Username: The database user for WordPress (e.g.,
wordpress).Password: The database password. This is typically randomly generated by the system—ensure you copy and save this password for later use.
Click OK and wait for the database creation to complete.
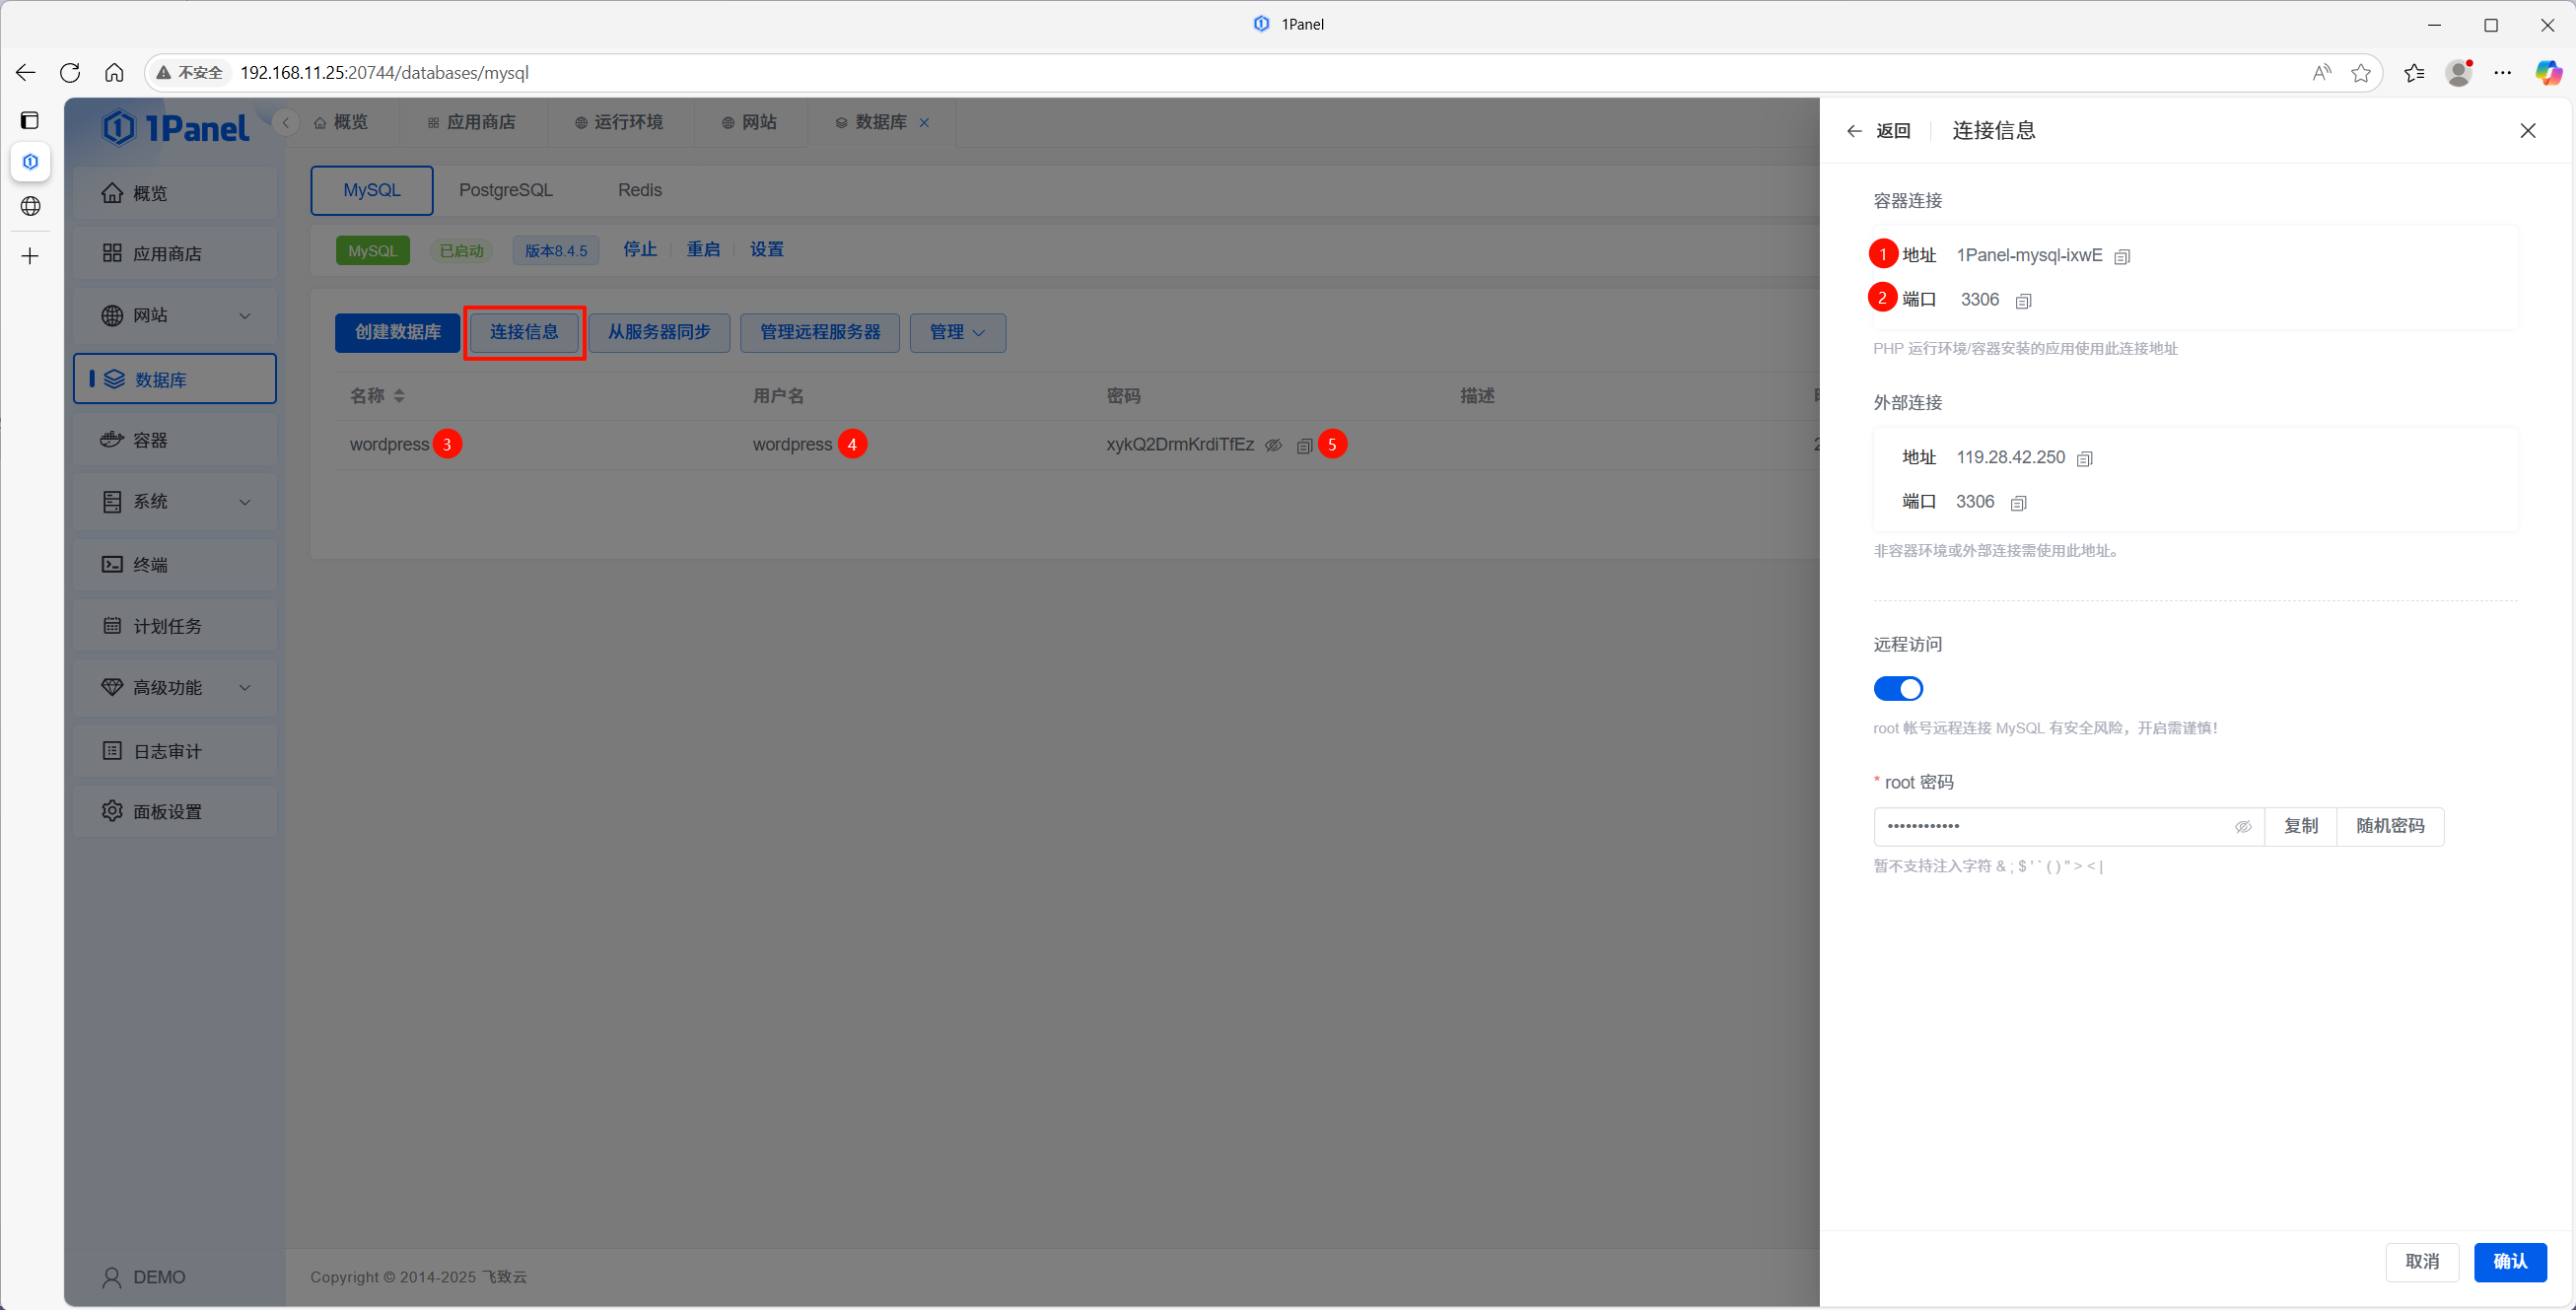
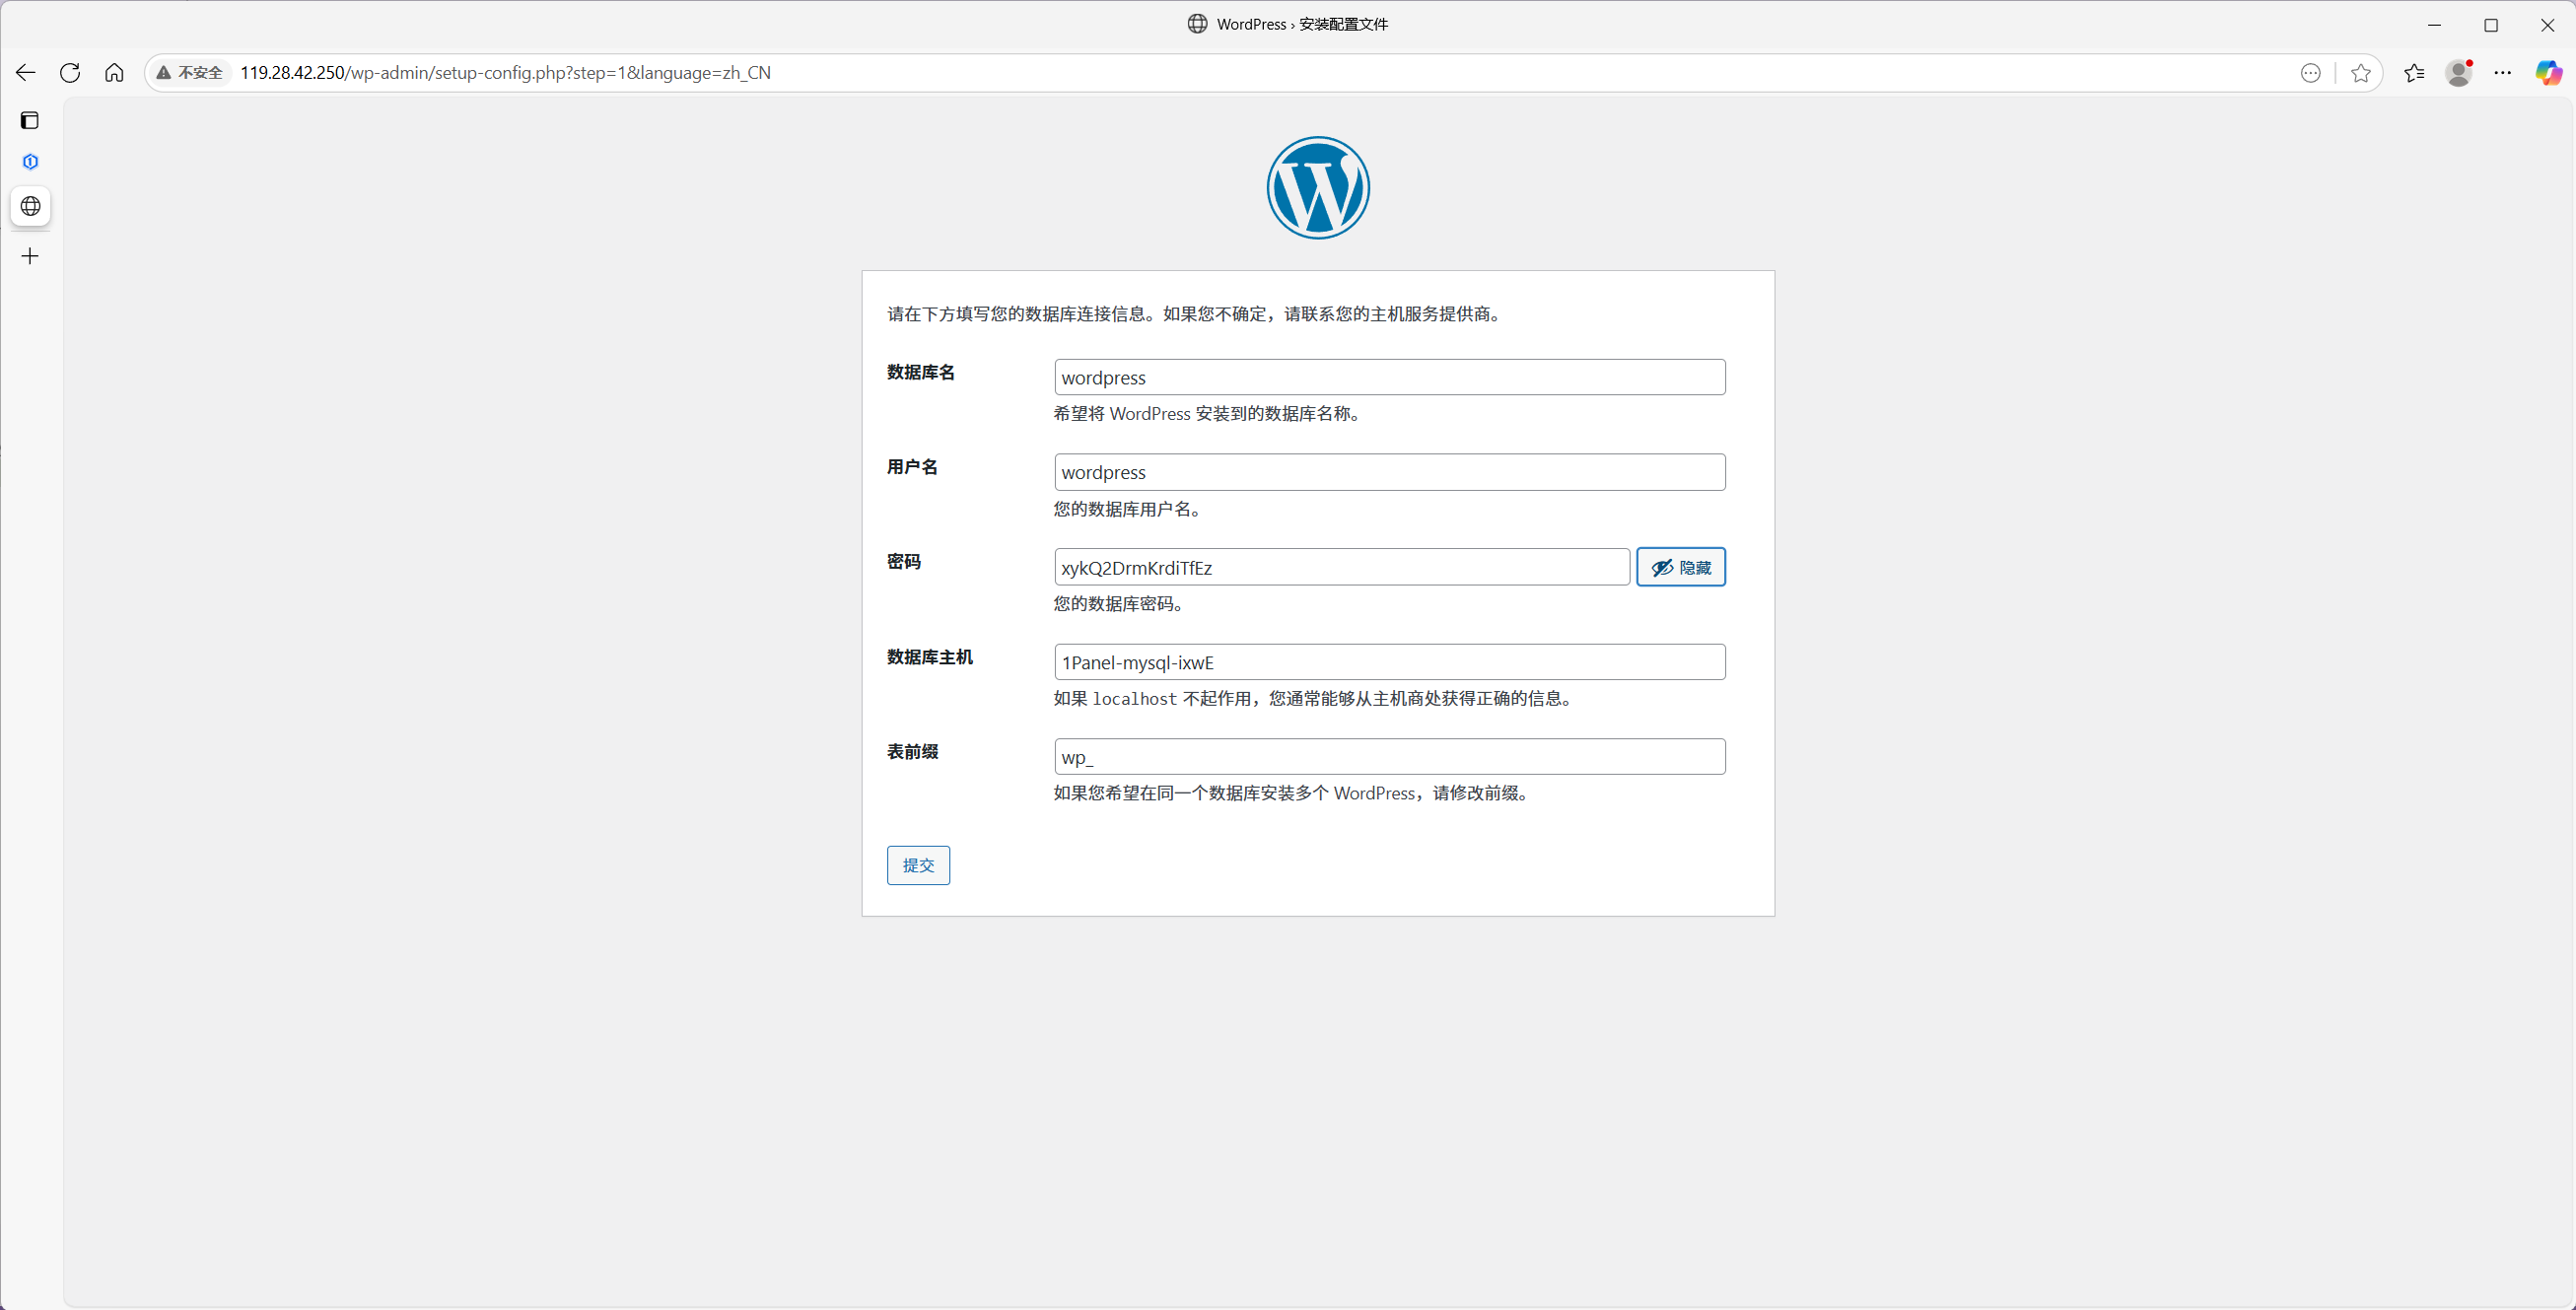
Click on "Connection Information" to record the container connection information for the database, as well as the database name, username, and password created above. This information will be needed later when configuring WordPress.
3.3 Complete the WordPress Installation
Access your server's IP address in a web browser.
If the WordPress Installation Wizard appears, it indicates that the WordPress files have been deployed correctly and the setup is ready to proceed.
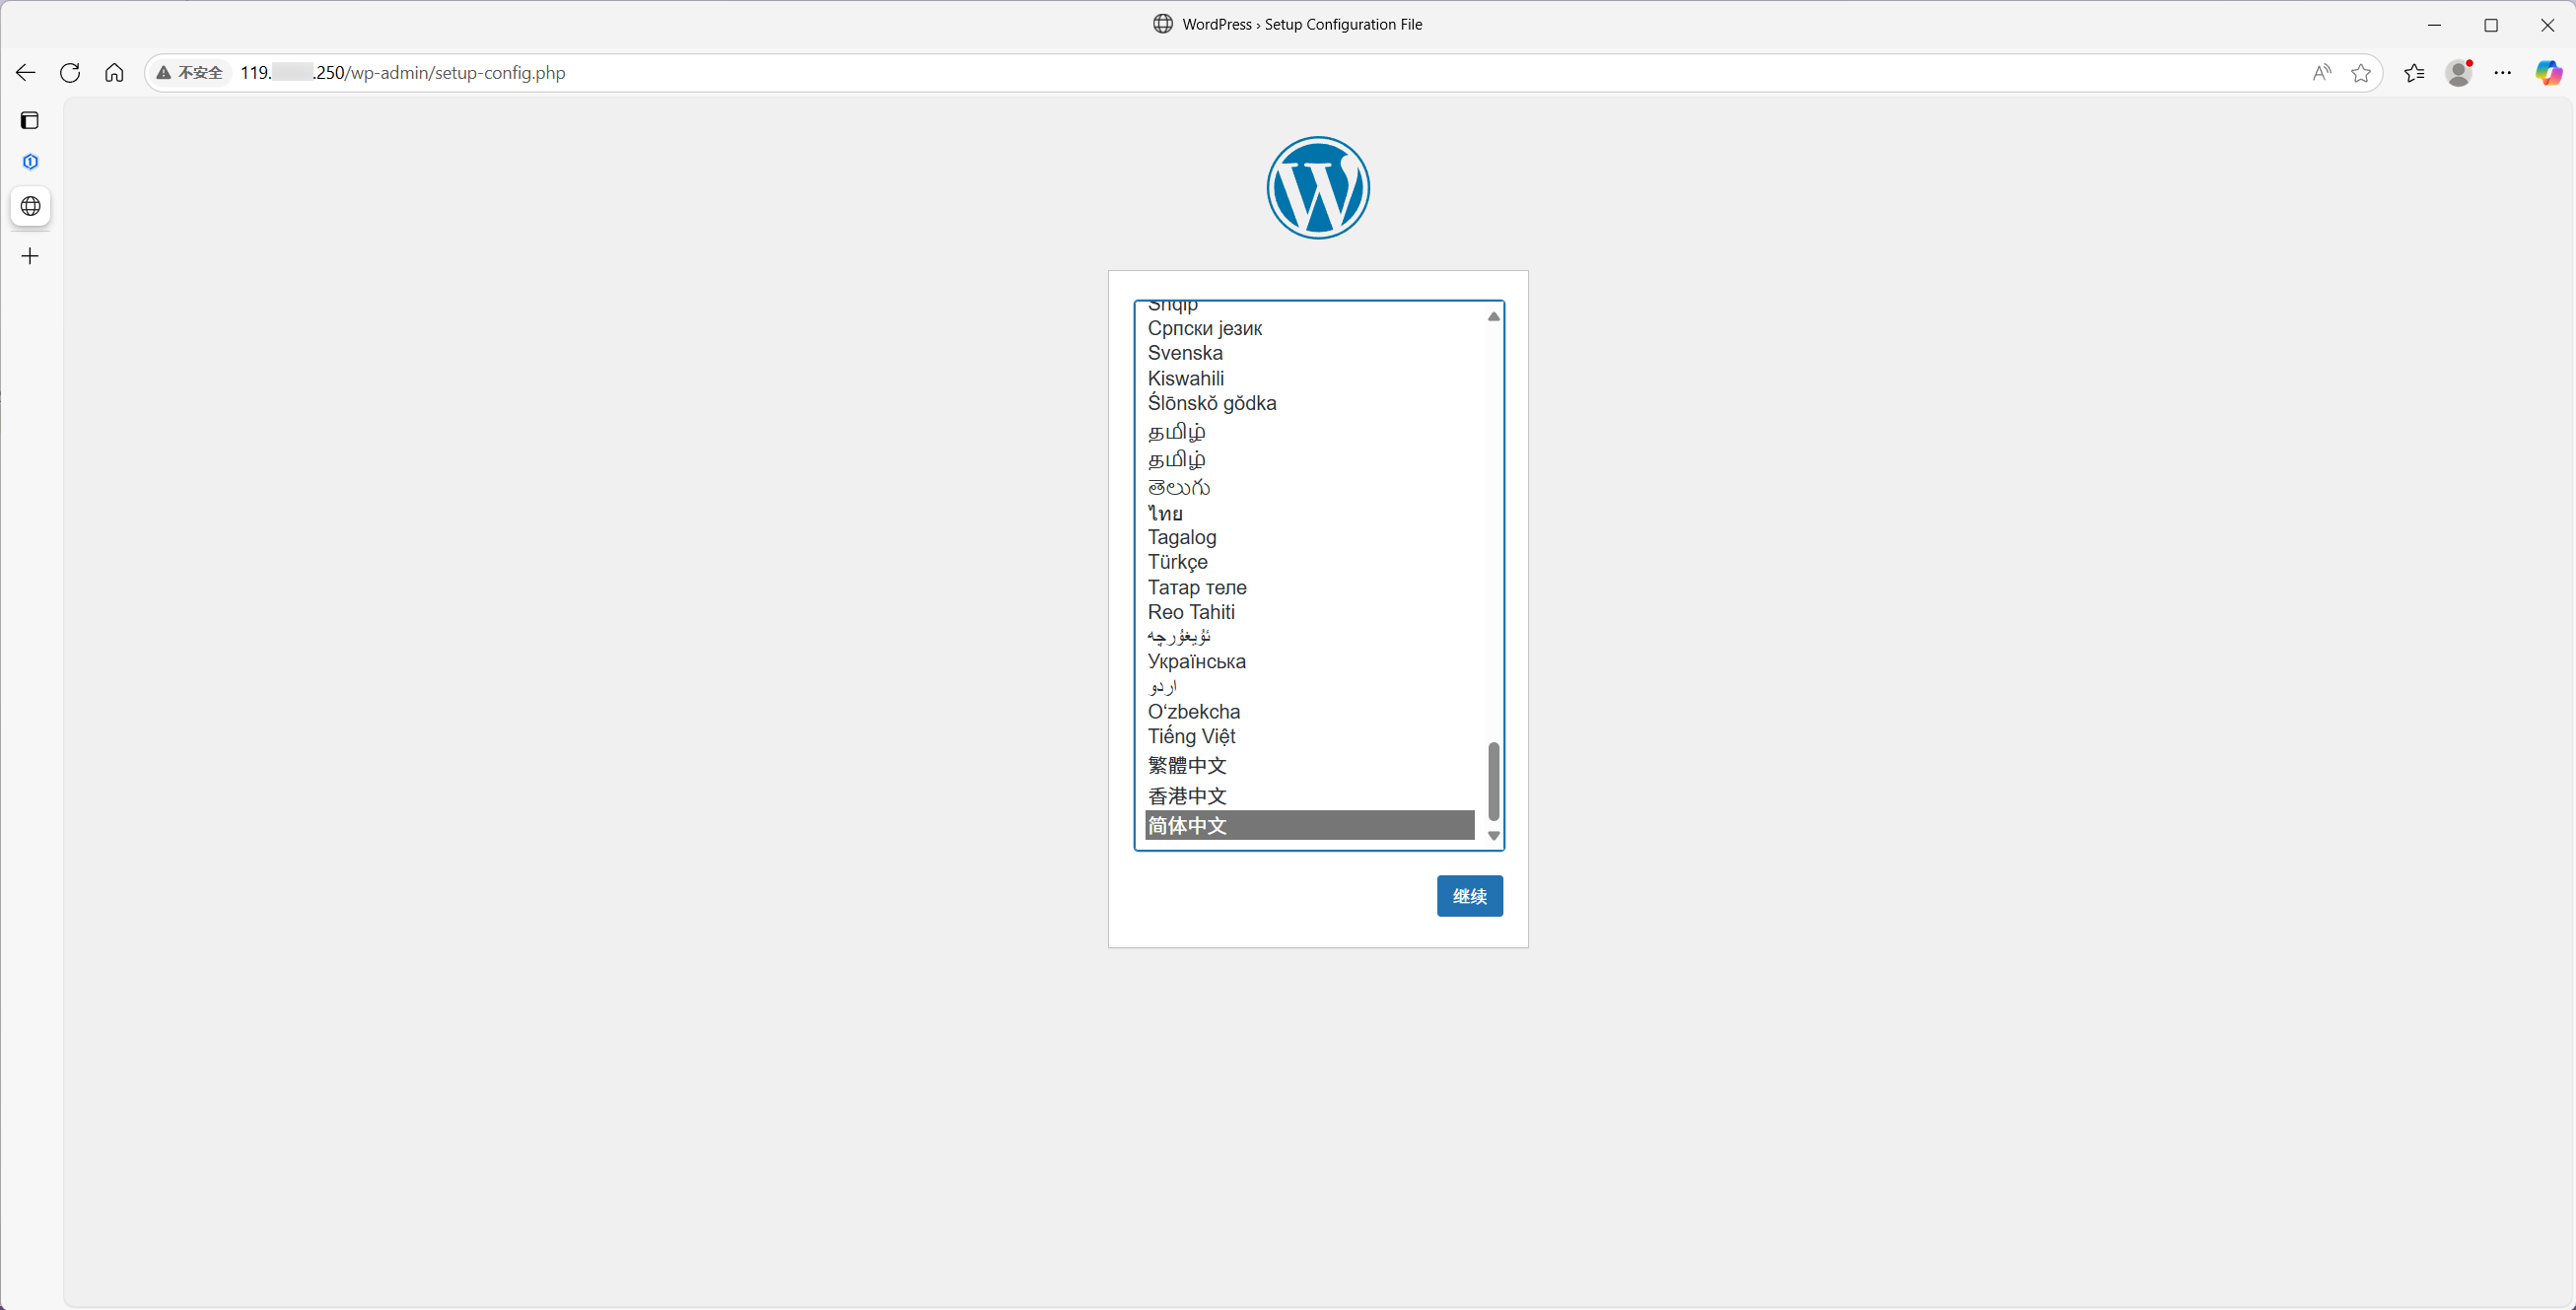
Select your language, click Continue, enter your database information, and then click Submit.
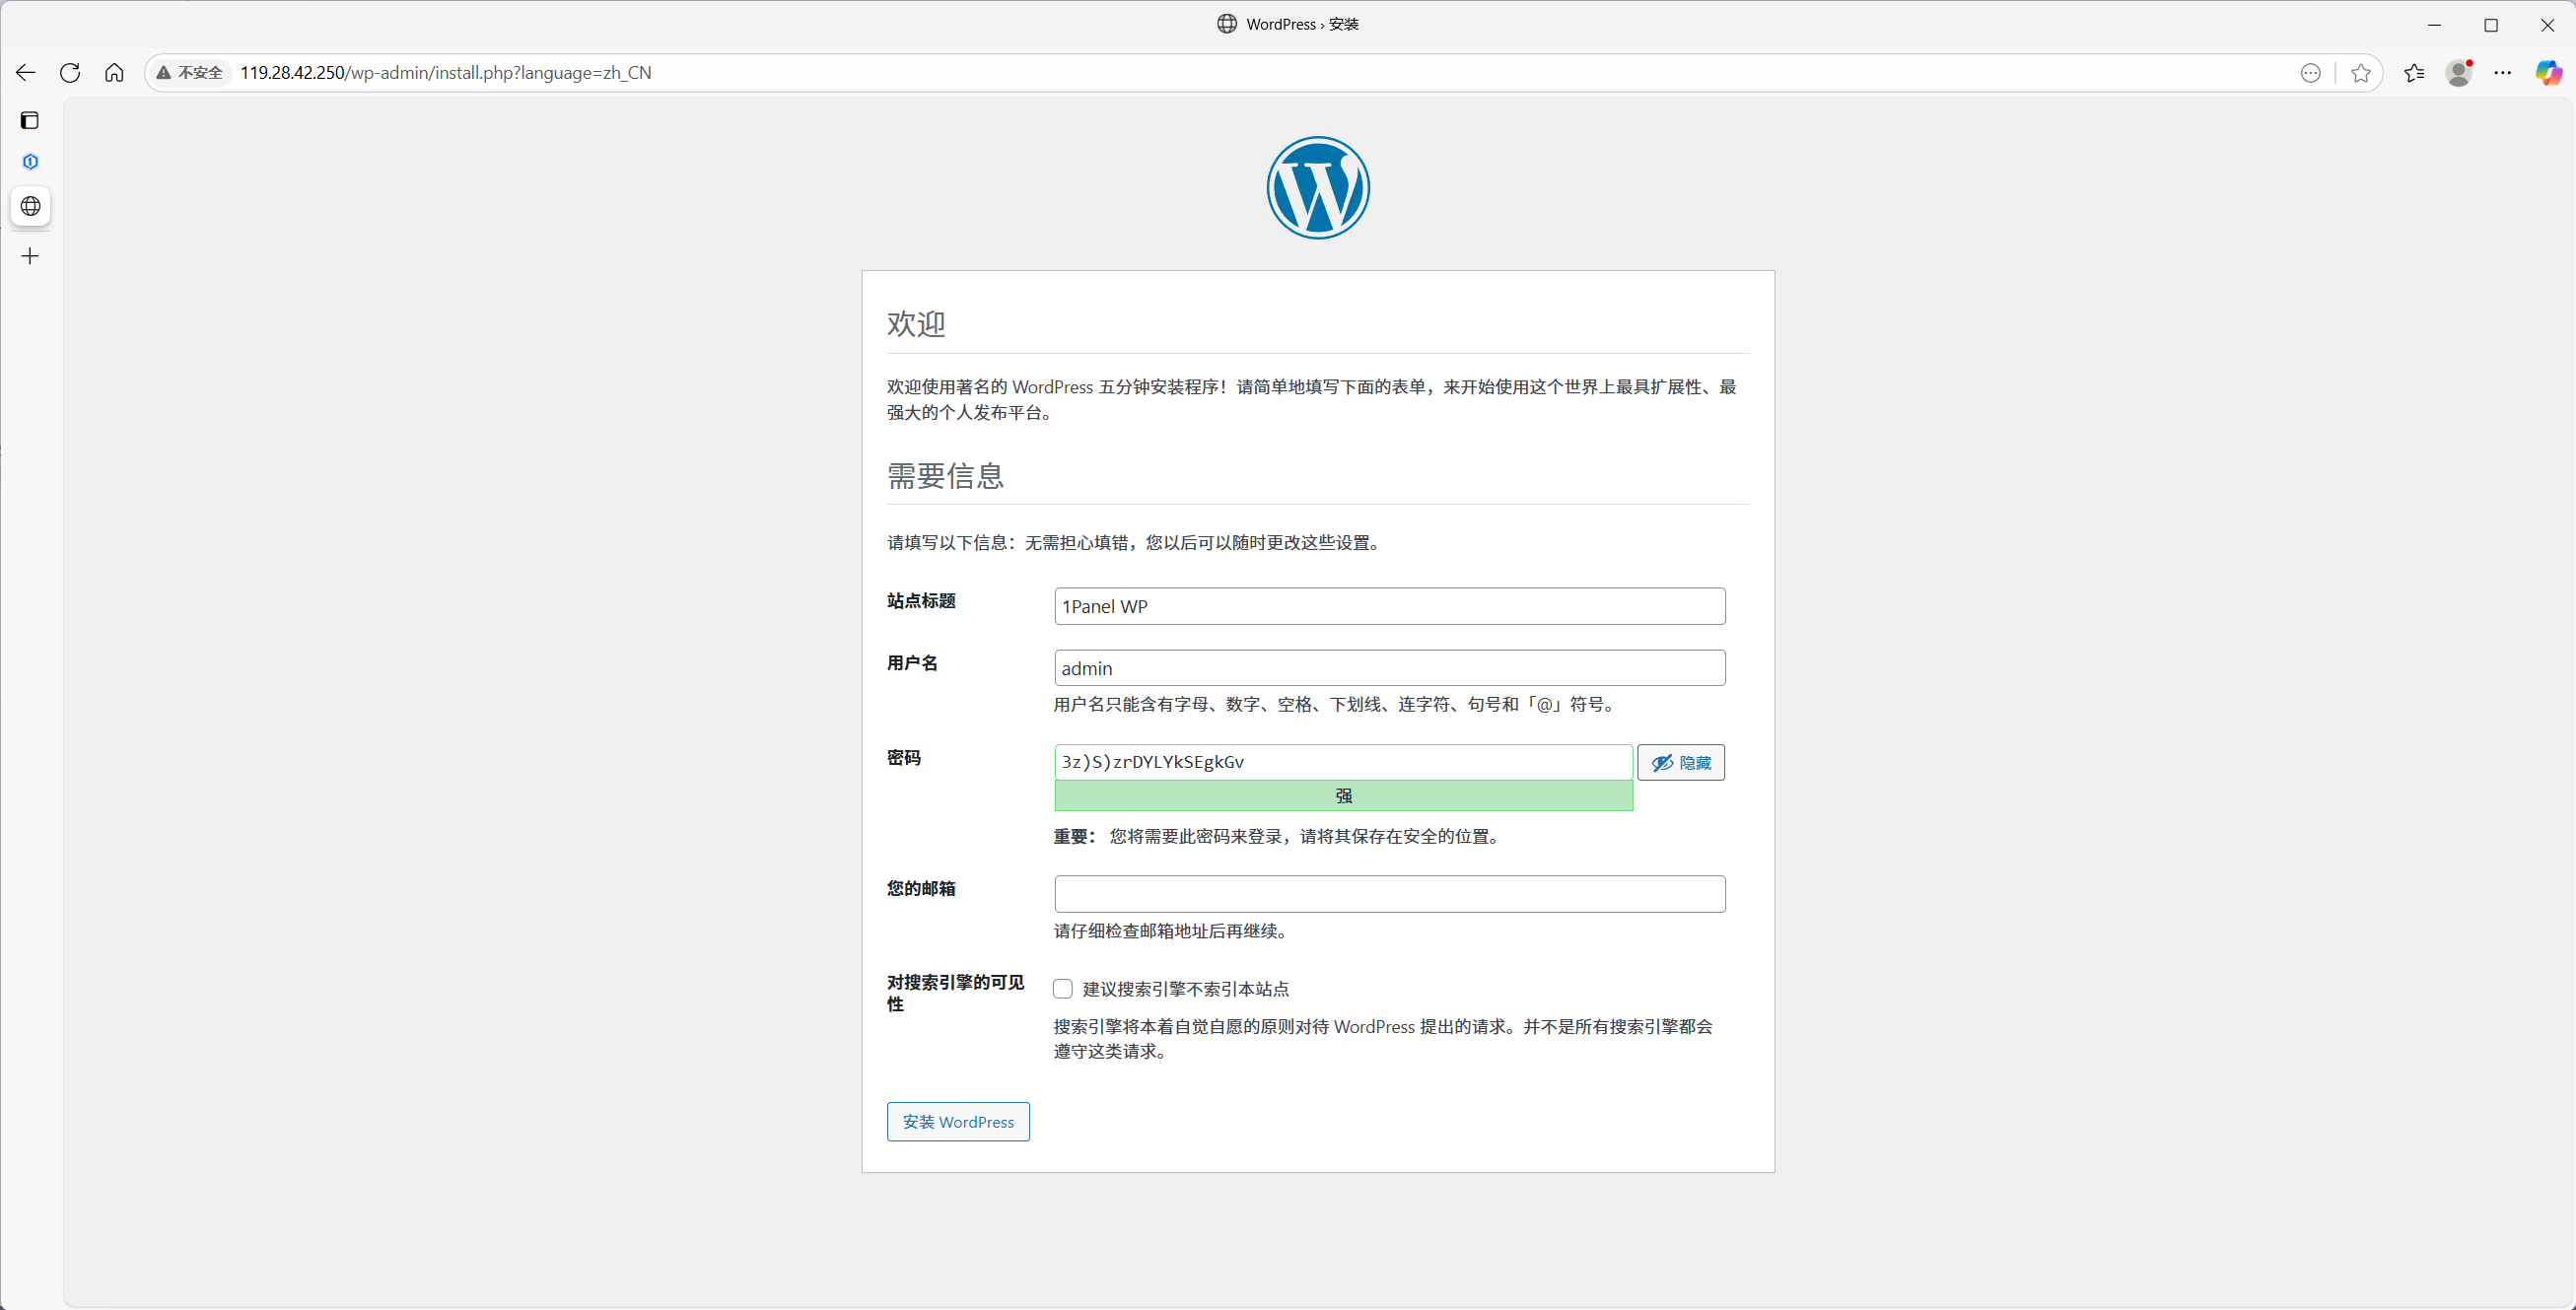
Follow the WordPress Installation Wizard to complete the setup:
Select Language: Choose your preferred language for the site backend and frontend.
Fill in Website Information: Provide your Site Title and connect the database using the credentials created in the previous step.
Create Admin Account: Set up your administrator username, password, and email address.
Complete Installation: Click the install button and wait for the "Success!" message to appear.
Step 4: Configure Domain Access
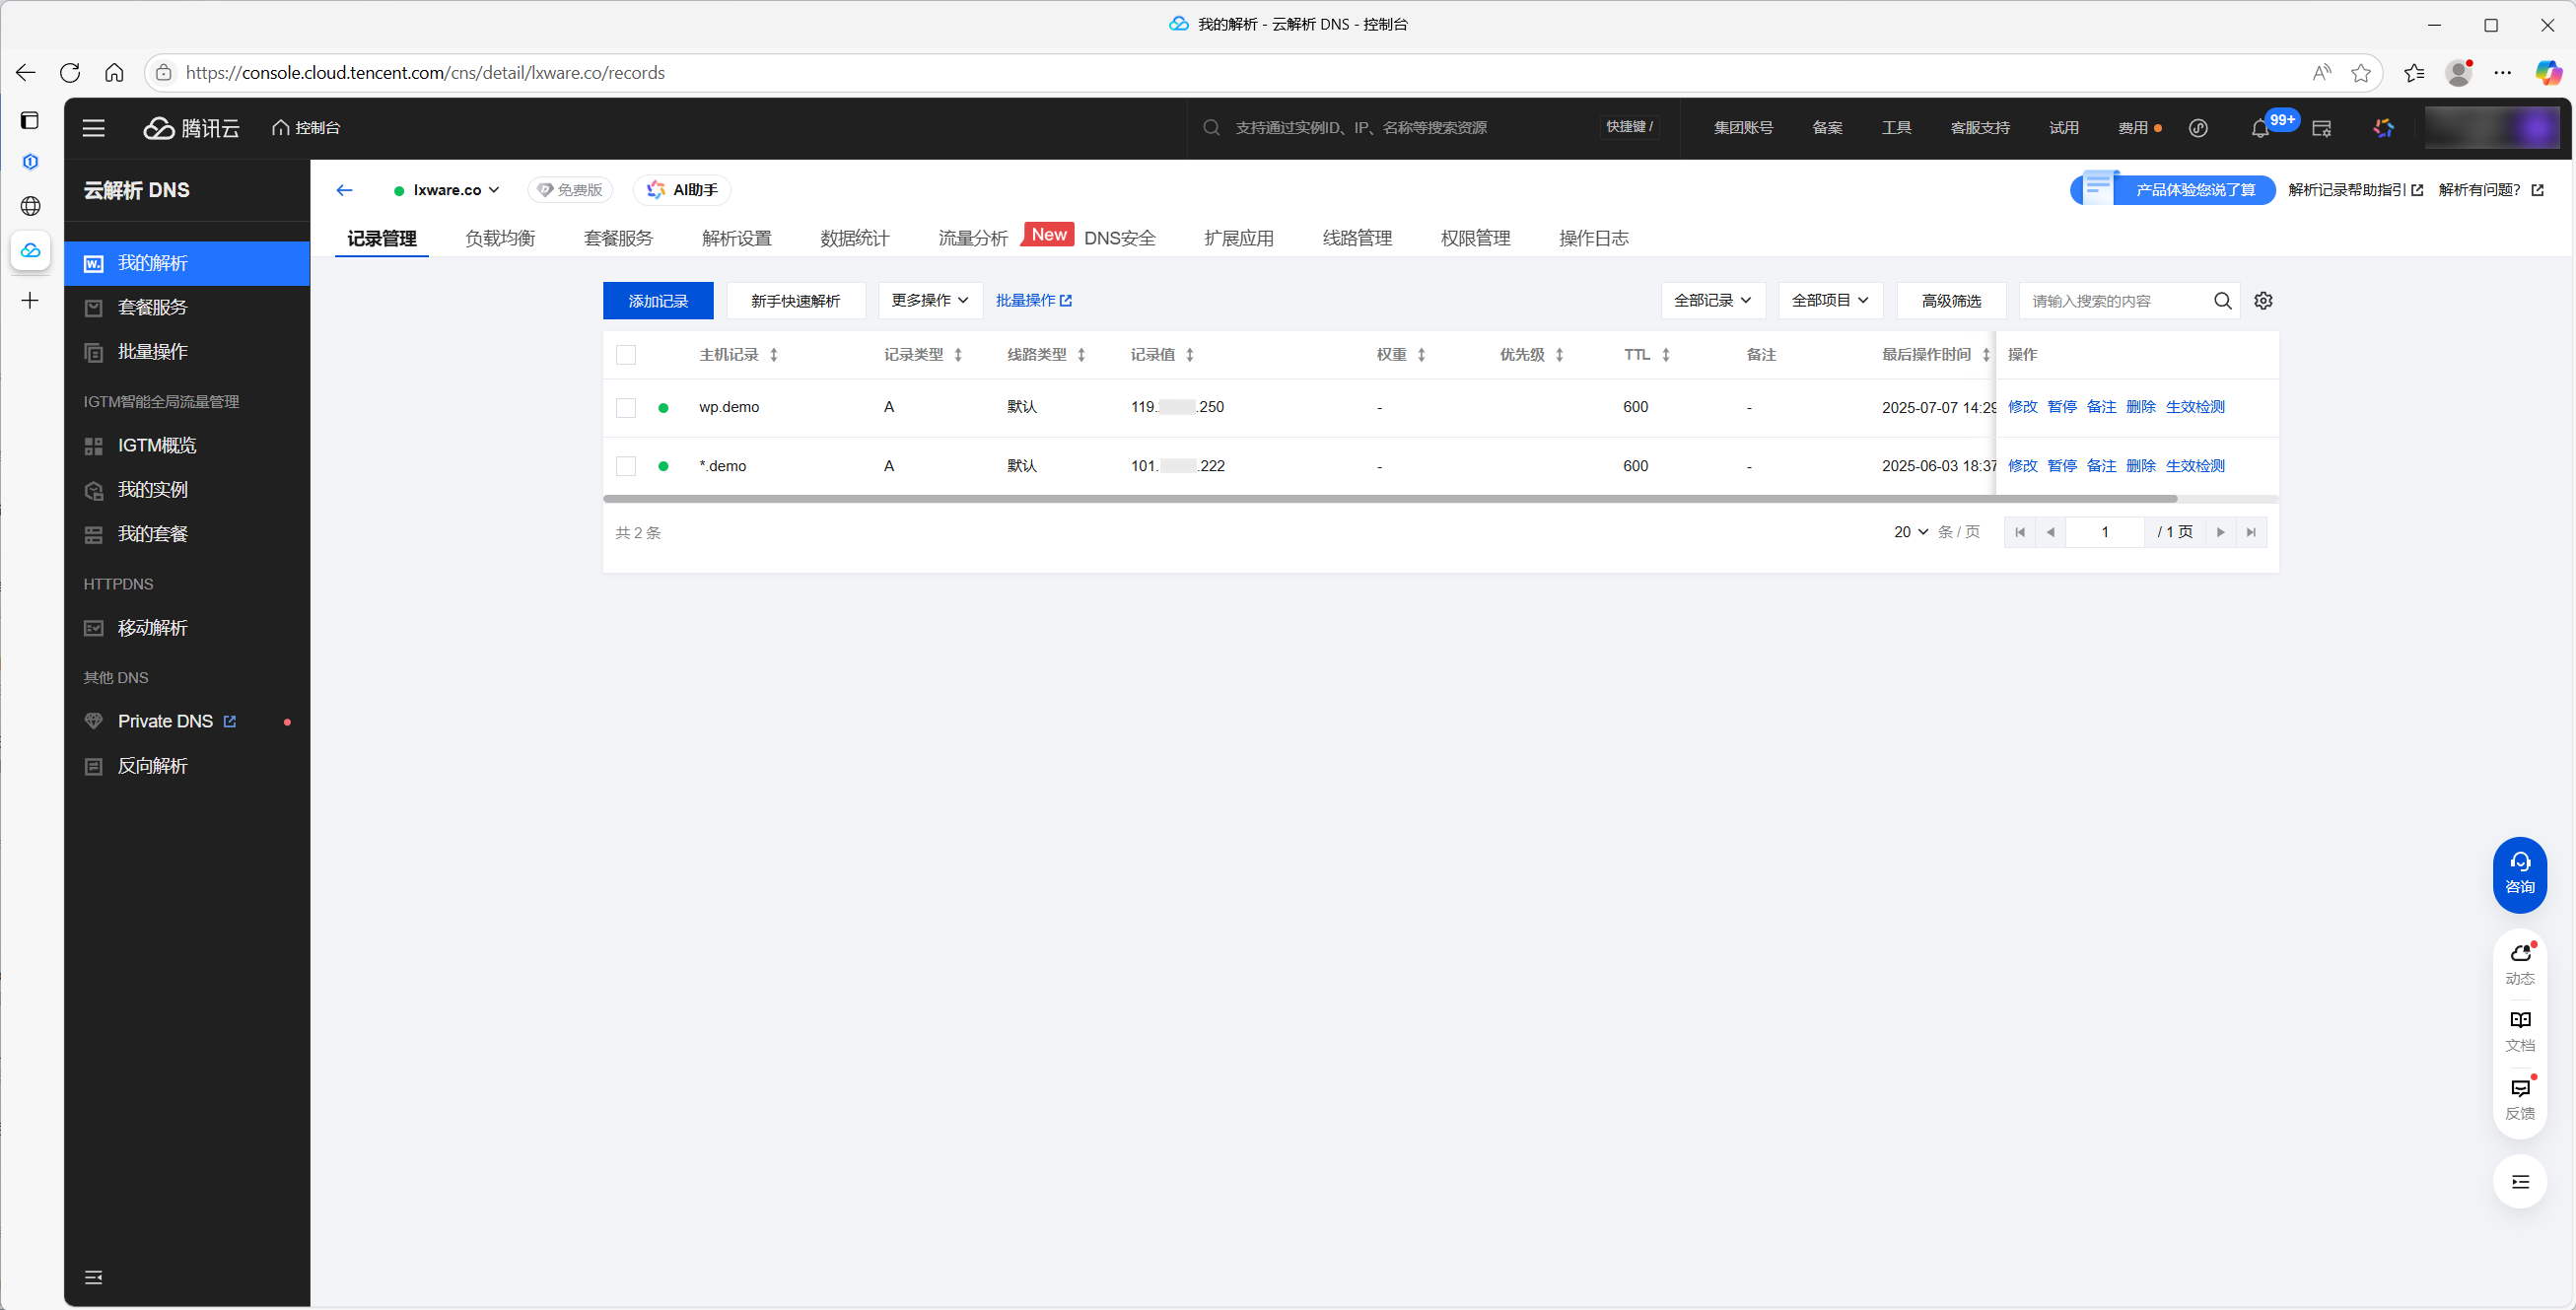
4.1 Add DNS Records
Log in to your Domain Management Console (e.g., Tencent Cloud, Cloudflare, Alibaba Cloud, etc.).
Add an A Record with the following details:
Record Type:
AHost (Hostname):
@(for the root domain) orwwwValue (Points to): Your server's Public IP Address
TTL:
600(or the default value)
4.2 Verify Domain Propagation
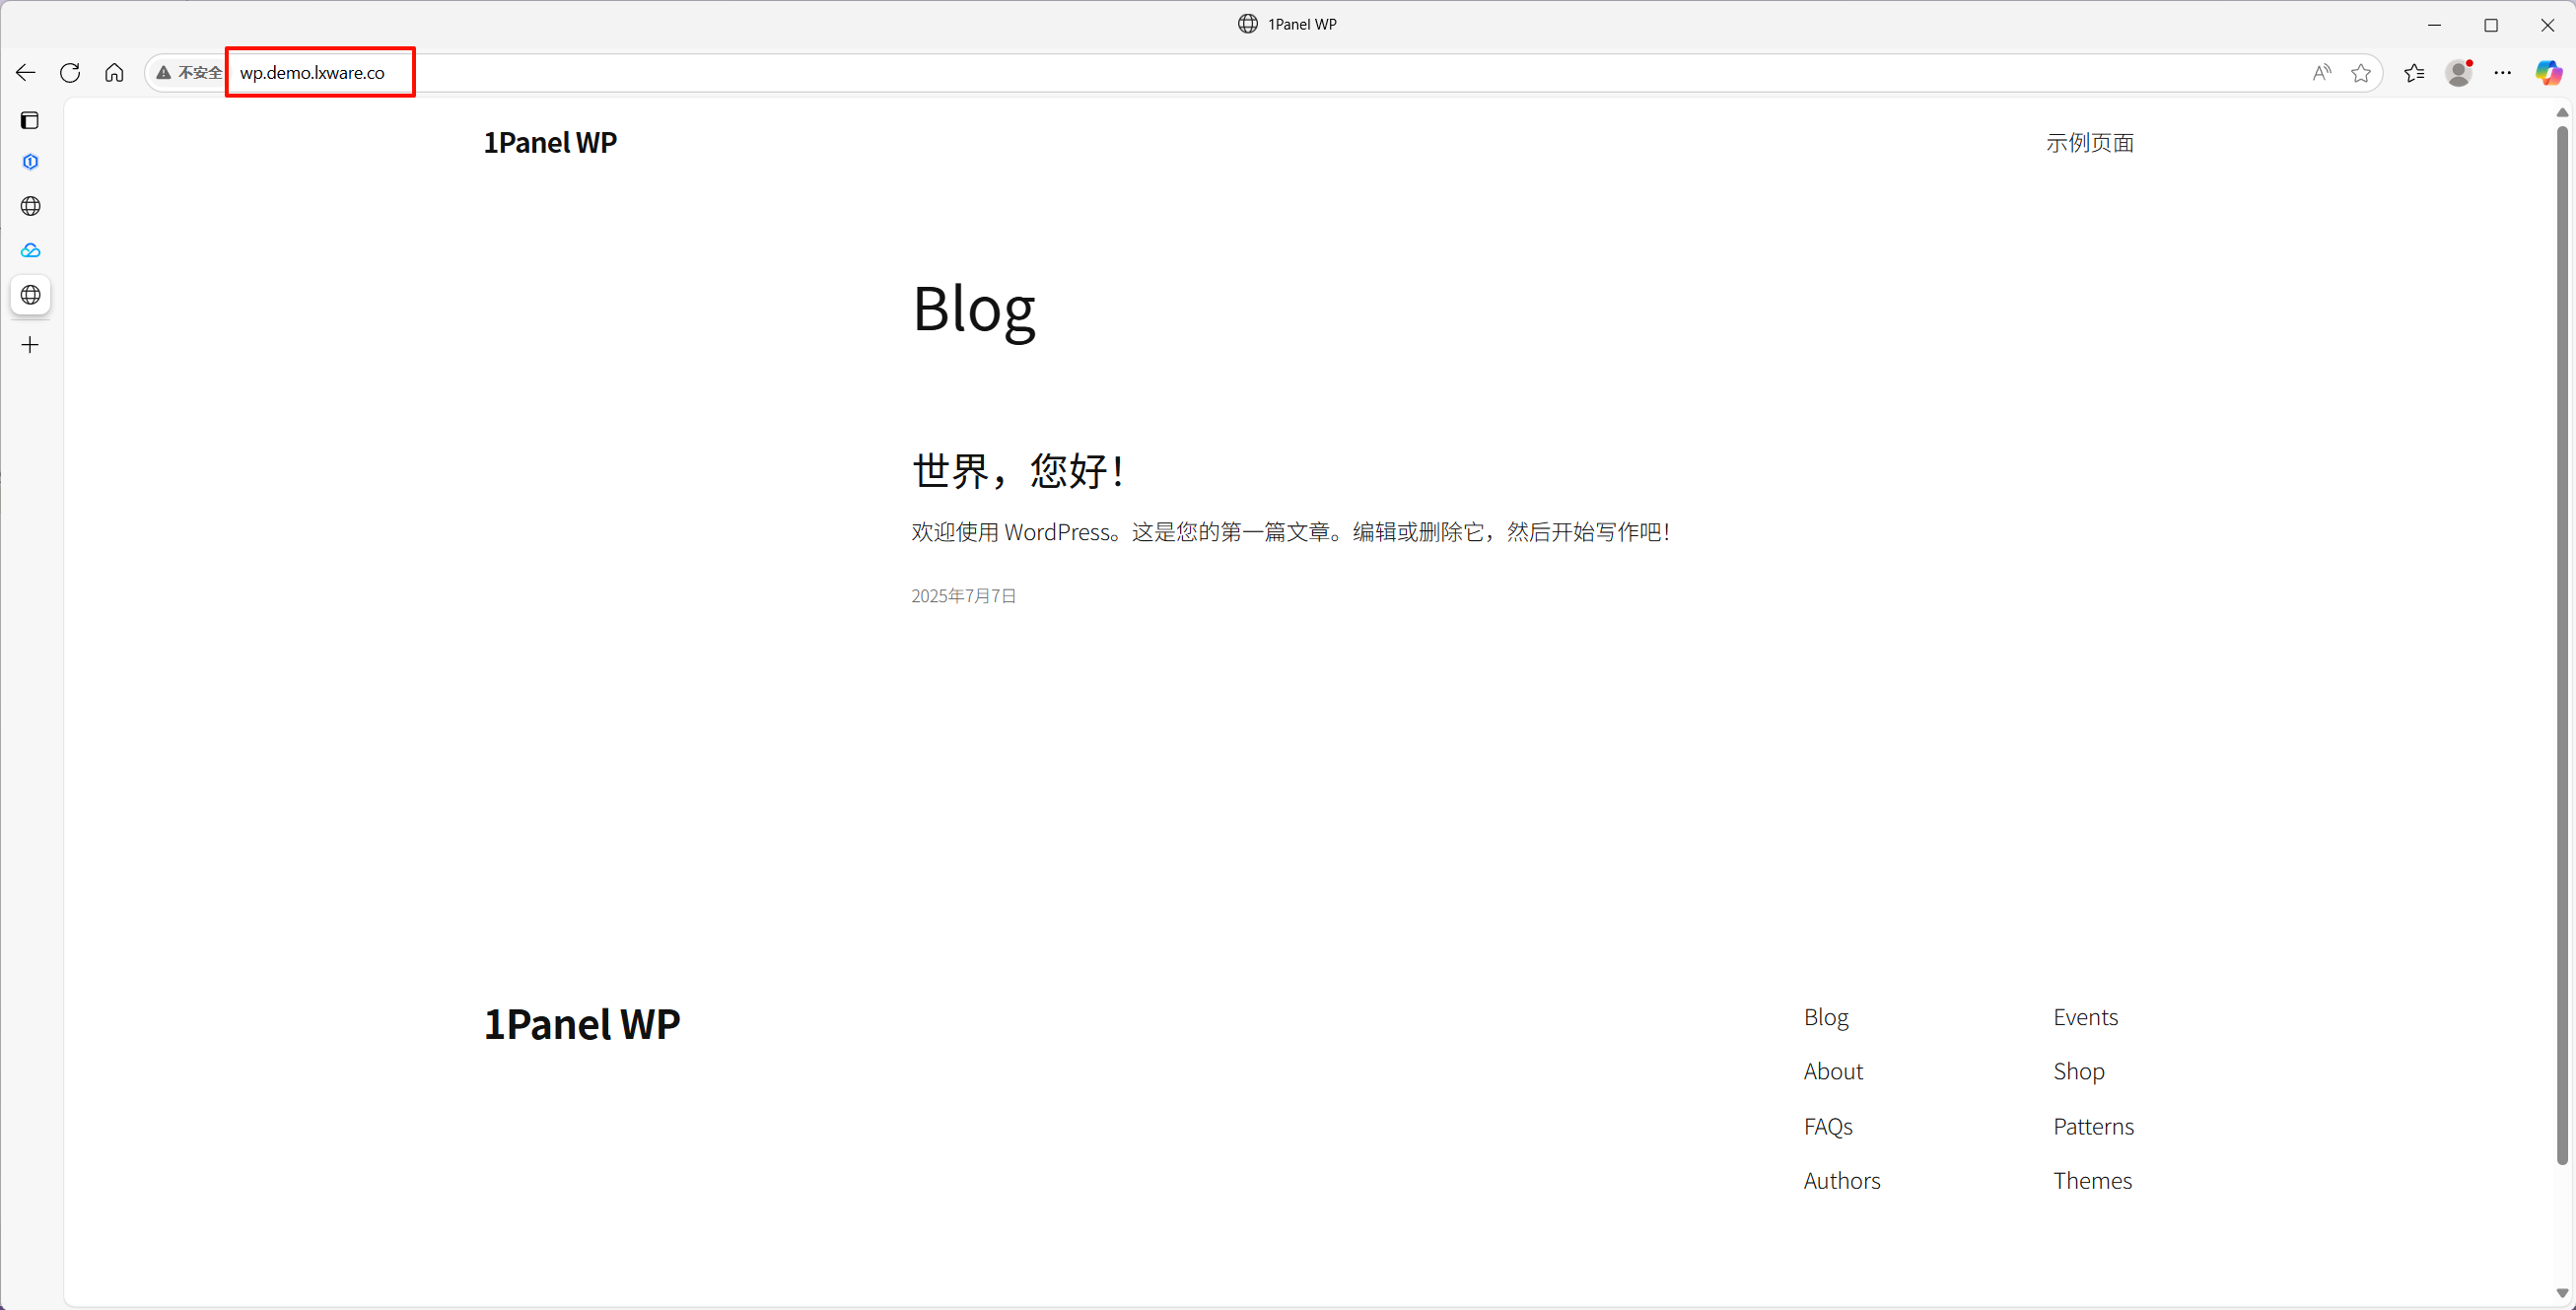
Access your domain name in a web browser. If the WordPress homepage appears, it indicates that the domain name resolution (DNS propagation) was successful.
Step 5: Configure HTTPS Certificate
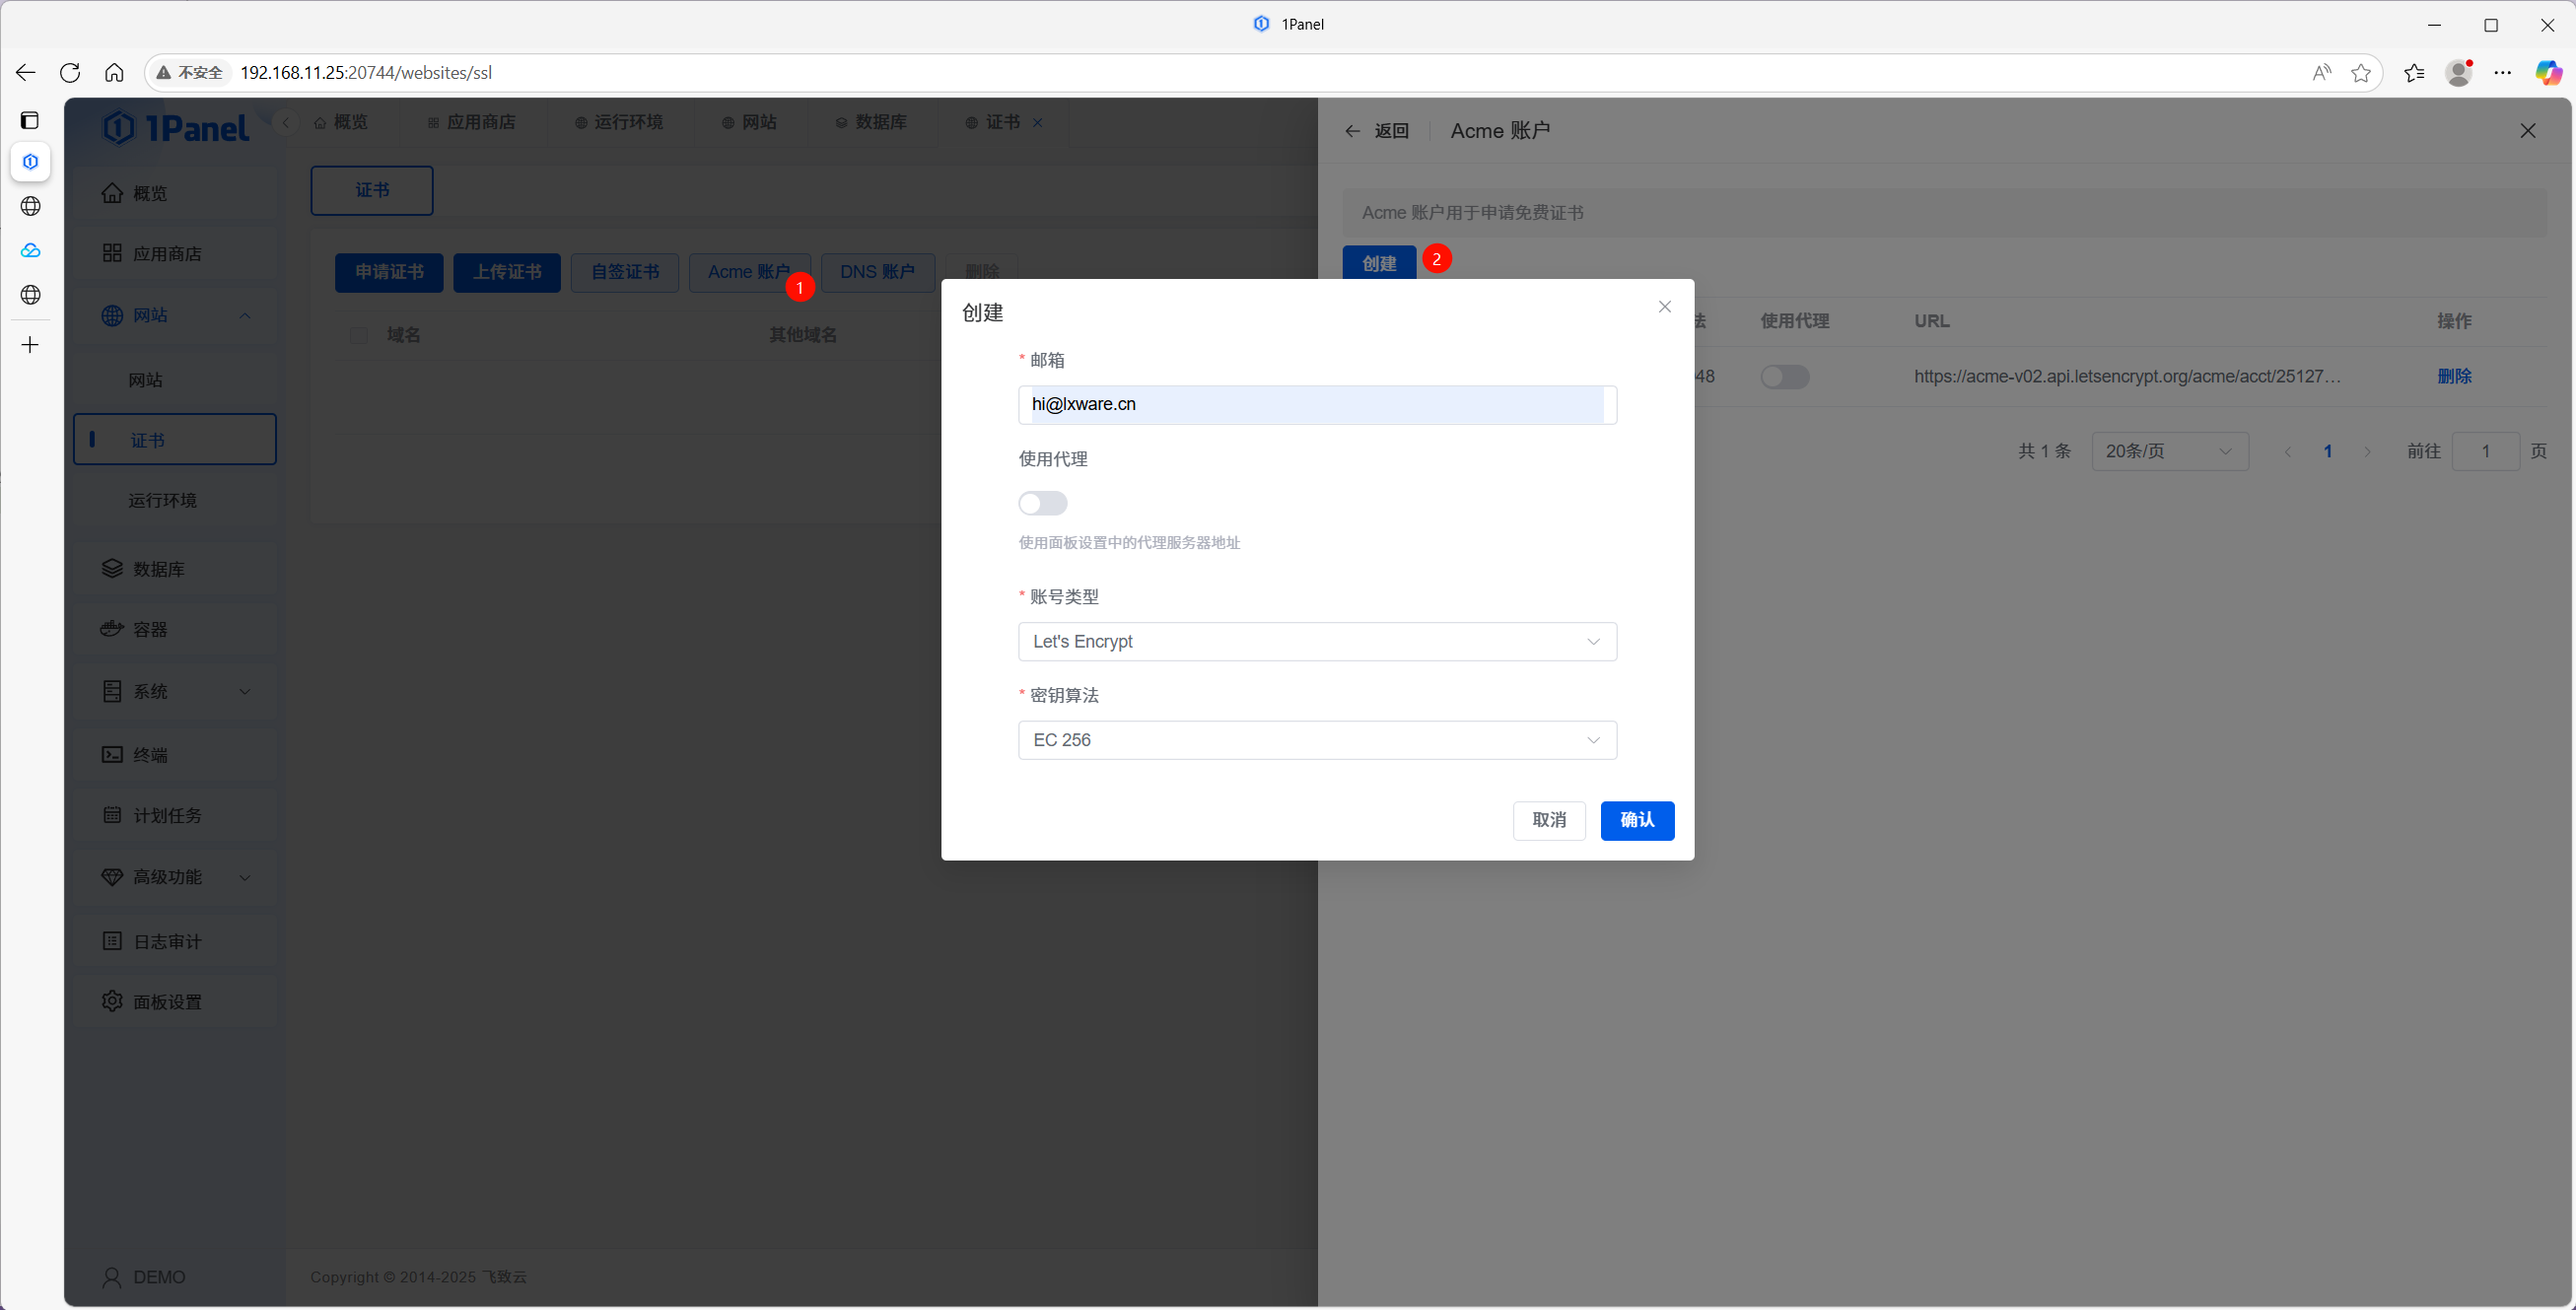
5.1 Create an ACME Account
In 1Panel, click on Certificates in the sidebar.
Click Manage ACME Accounts.
Enter your Email Address.
Select the Account Type and Encryption Algorithm.
Click Create to set up the ACME account.
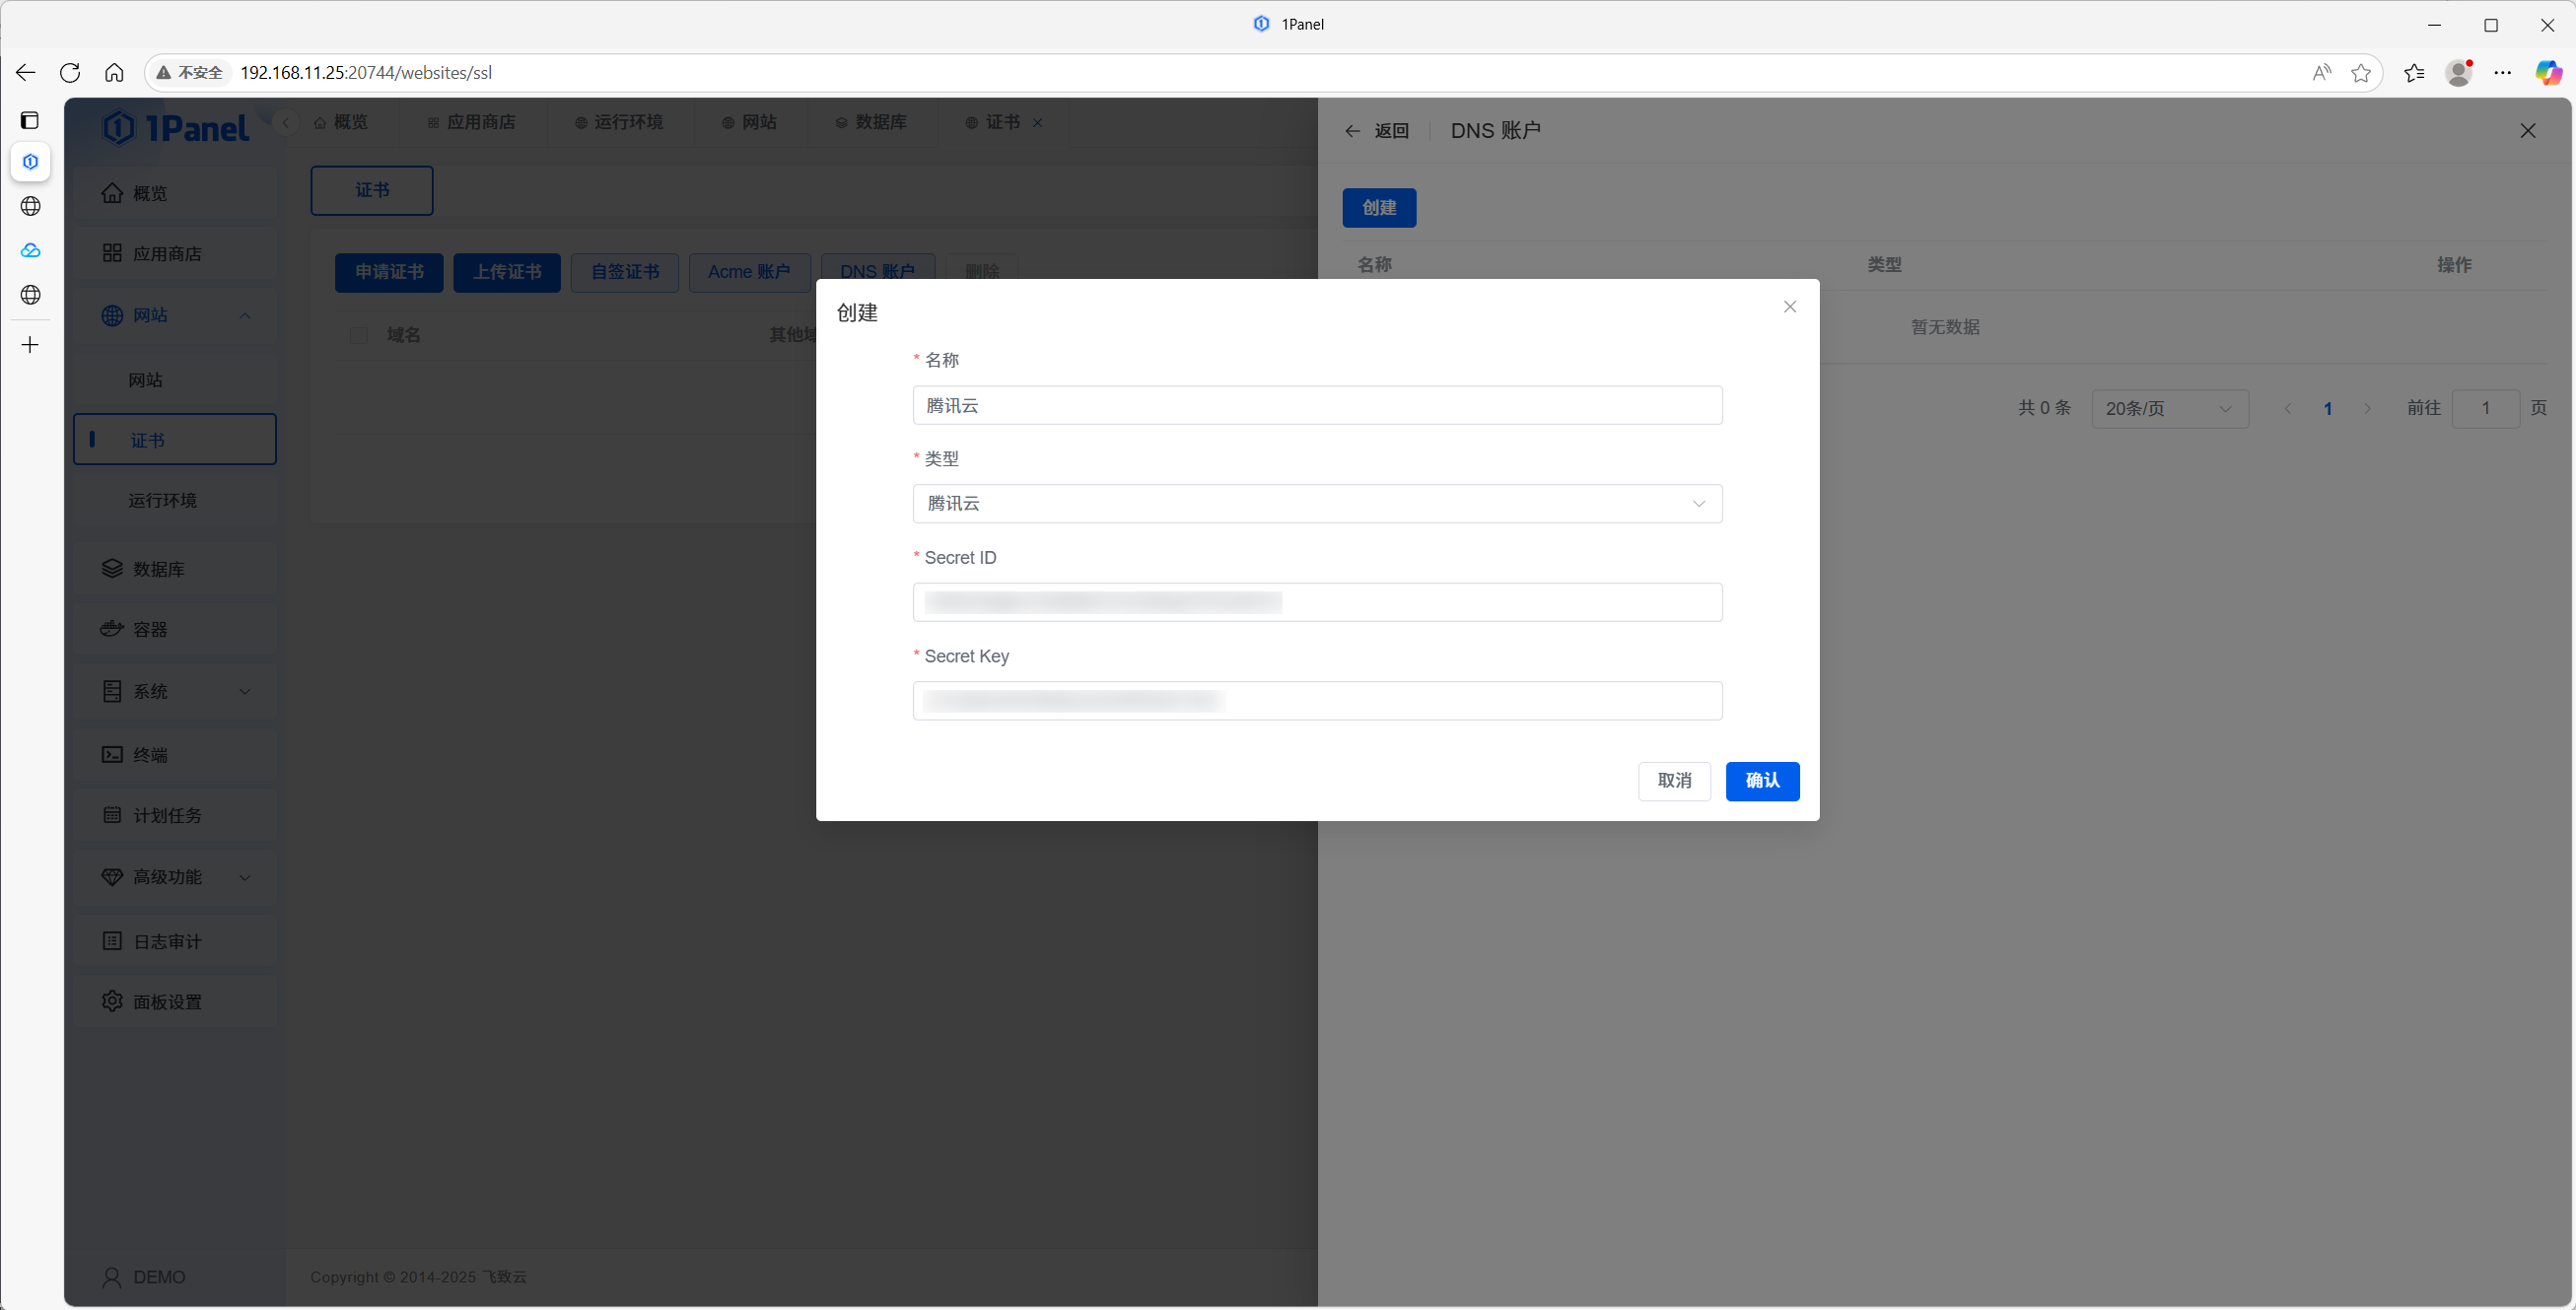
5.2 Configure DNS Provider
Click Manage DNS Providers.
Select your DNS Service Provider (e.g., Tencent Cloud).
Enter your API Credentials (such as SecretId and SecretKey).
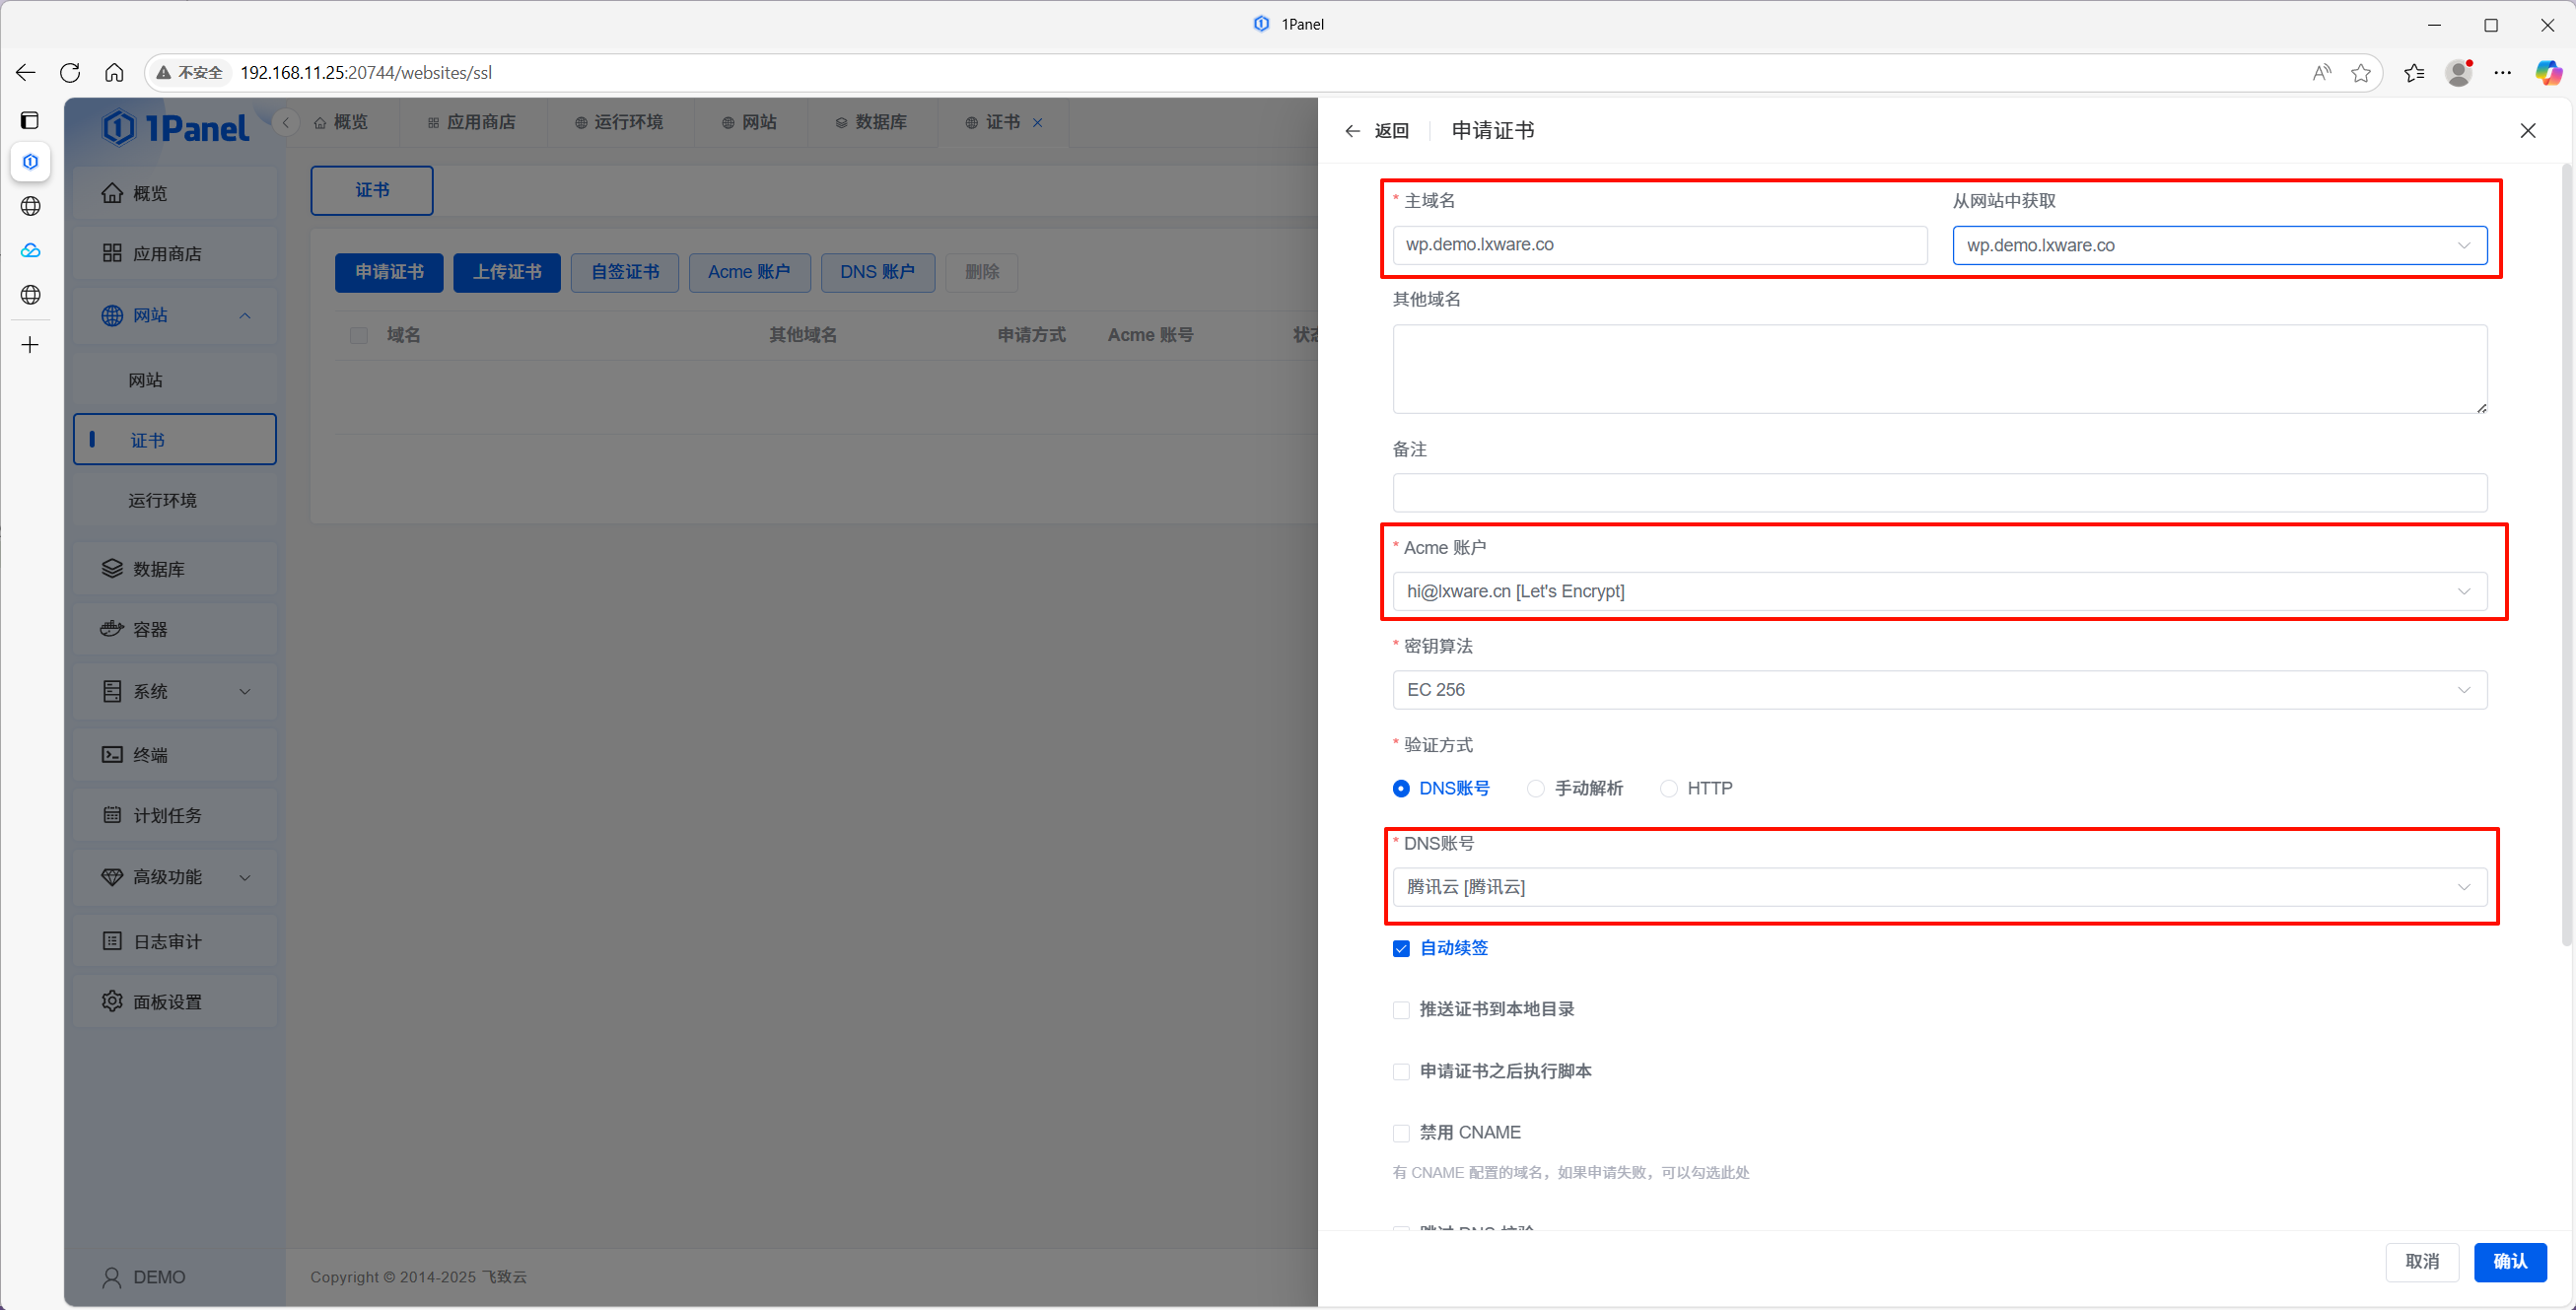
5.3 Apply for an SSL Certificate
On the Certificates page, click the Apply button.
Fill in the Certificate Information:
Primary Domain: Your domain name (e.g.,
example.com).ACME Account: Select the account you just created.
Verification Method: Select DNS Verification.
DNS Provider: Select the DNS account you just configured.
Click Confirm and wait for the certificate issuance process to complete.
5.4 Enable HTTPS
Go to the Websites management page.
Click on your Website Name to enter the configuration panel.
In the SSL Settings section:
Toggle Enable HTTPS.
Select the Certificate you just applied for.
Configure HTTPS Redirection (Force HTTPS) to ensure all traffic is secure.
Save the settings.
Access your website again using the HTTPS address:
https://wp.demo.lxware.com. If the WordPress homepage loads correctly, your HTTPS configuration is successful.
