Preface
Visual Studio Code (VS Code), a free and open-source code editor developed by Microsoft, features revolutionary Remote Development capabilities that serve as its definitive "killer feature," setting it apart from many heavyweight commercial IDEs. Most importantly, this powerful functionality is fully accessible in its standard version, which is completely free to use (no payment required for non-commercial purposes). This is highly significant for developers—especially individuals, students, startup teams, or groups with limited budgets.
Imagine being able to use your meticulously configured and familiar VS Code interface, themes, keyboard shortcuts, and extensions on your local machine to directly open, edit, run, and debug code stored on a remote Linux server (whether it's Alibaba Cloud, Tencent Cloud, AWS EC2, or a self-hosted server), within Docker containers, or even inside a Windows Subsystem for Linux (WSL) environment—all without paying for expensive licenses.
This is made possible through the official Remote Development Extension Pack provided by Microsoft (which includes Remote - SSH, Remote - Containers, and Remote - WSL). Once installed, VS Code establishes a secure connection channel, seamlessly merging the local UI and editing experience with the remote computing environment and file system. When you edit a file, the changes occur directly on the remote server; when you run terminal commands, they execute in the remote environment; when you debug a program, the debugger attaches to the remote process. This experience feels remarkably close to local development while completely solving the classic "it works on my machine" problem—making it ideal for cloud-native applications, projects requiring specific Linux configurations, or scenarios leveraging powerful cloud computing resources.
I. Detailed Remote Connection Steps
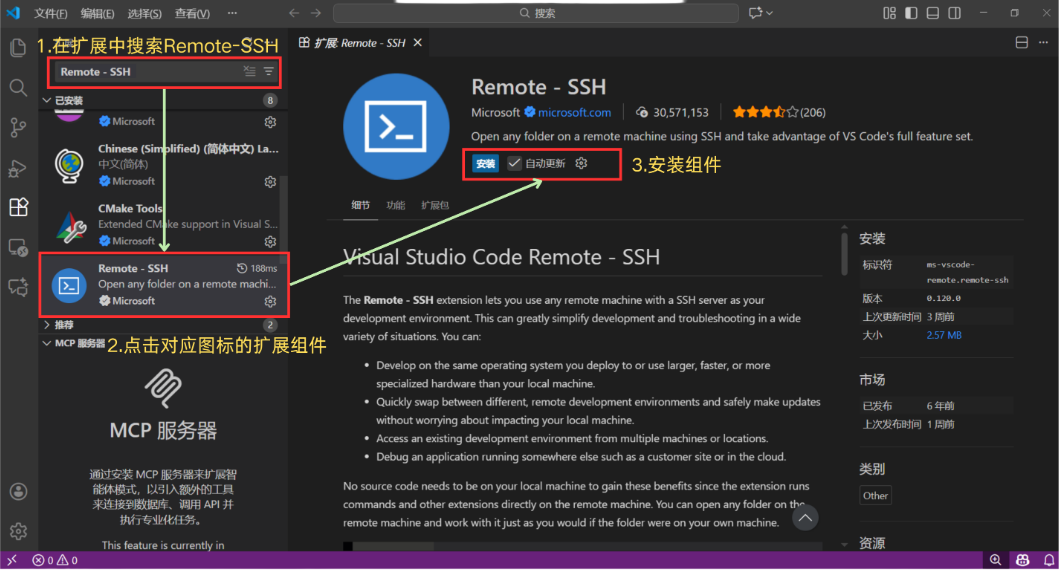
Step 1: Install the Remote-SSH Extension
Open VS Code, go to the Extensions panel on the left (shortcut Ctrl+Shift+X), search for "Remote-SSH", select the official extension published by Microsoft, and click Install.
Step 2: Add a Remote Host
Once the installation is complete, click the Remote Explorer icon on the left sidebar (it looks like a small monitor or globe). Click the "+" icon in the SSH section and enter your connection address:
ssh username@IP-addressCloud Servers: Use your public IP address (e.g.,
ssh ubuntu@123.123.123.123).Local Network PCs: Use the
ifconfigorip acommand on your Linux machine to find its internal IP address.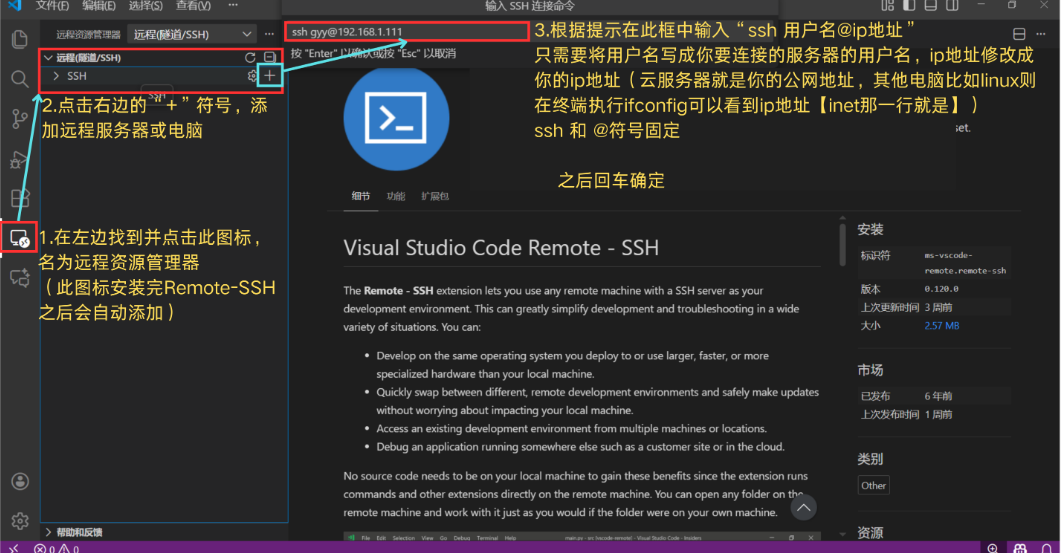
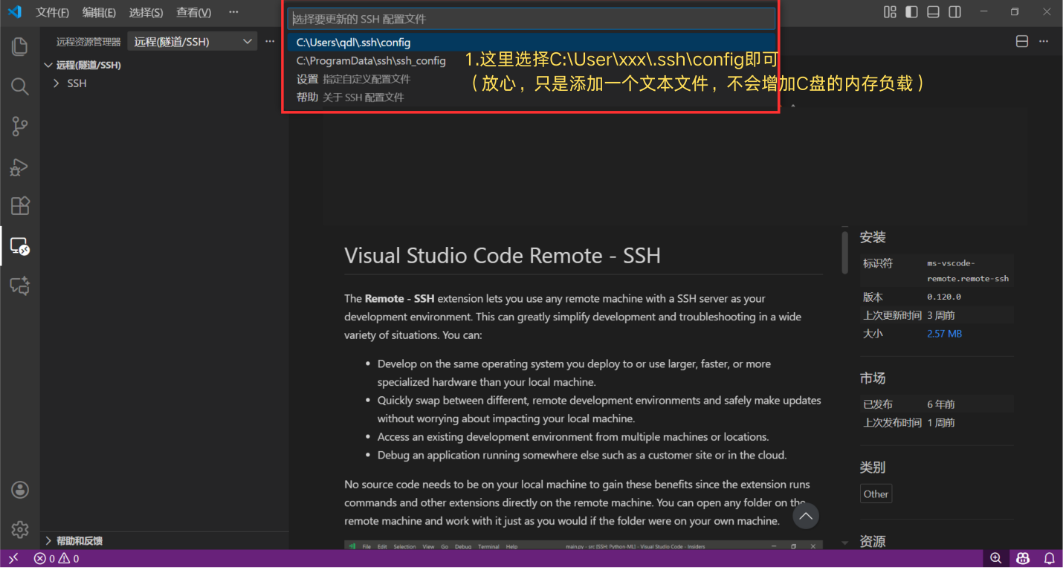
Step 3: Save the SSH Configuration File
The system will prompt you to select the location to save your configuration file. Simply choose the default path provided (usually C:\Users\YourUsername\.ssh\config).
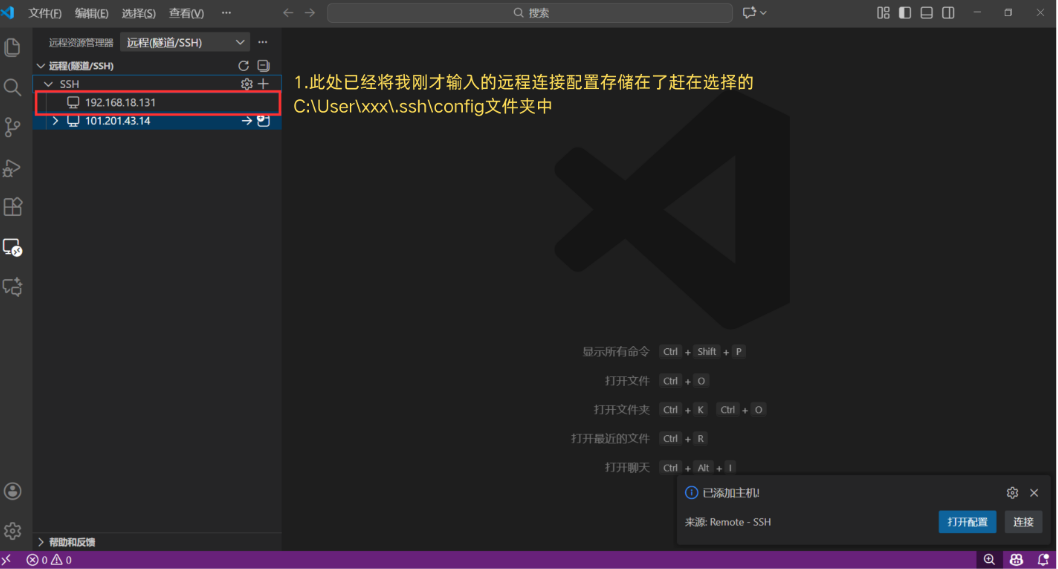
Step 4: Verify the Added Host
Once added successfully, the server name or IP address you just configured will appear in the SSH Targets list on the left-hand side.
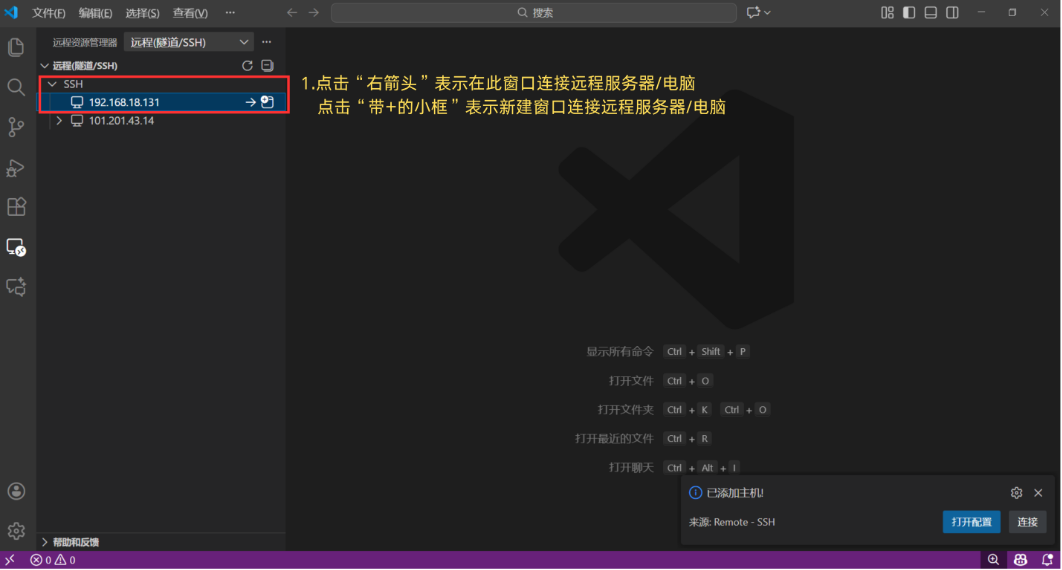
Step 5: Initiate the Connection
Click the green arrow icon to the right of the host (to connect in the current window), or click the small square icon with a "+" (to connect in a new window).
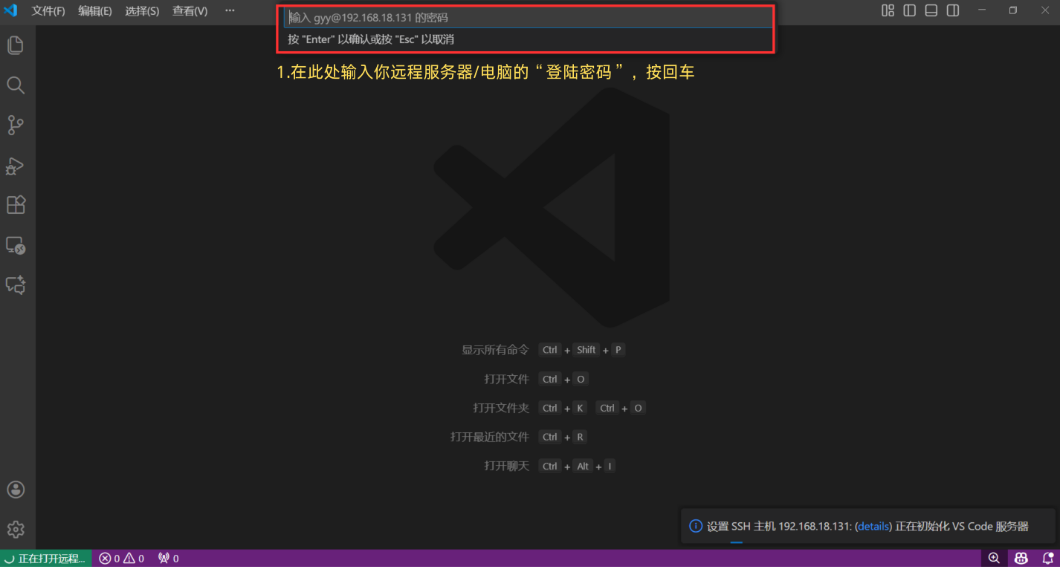
Step 6: Password Authentication
In the input box that appears at the top of the window, enter the login password for your remote server.
Note: For security reasons, the characters will not be displayed as you type. Simply type your password and press Enter.
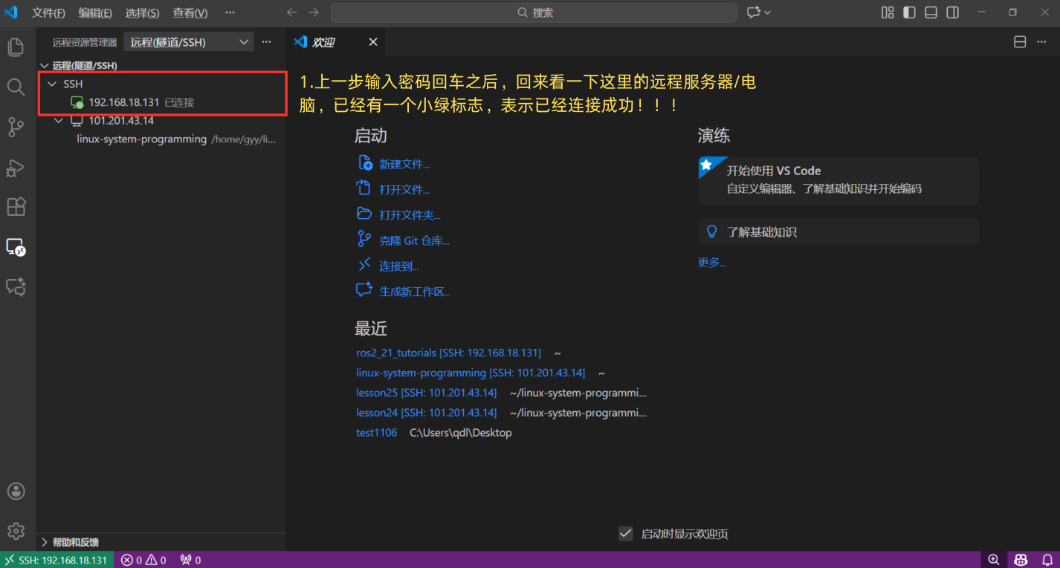
Step 7: Successful Connection Indicator
When a green dot appears next to the host name, it indicates that VS Code has successfully established the SSH connection to your remote machine.
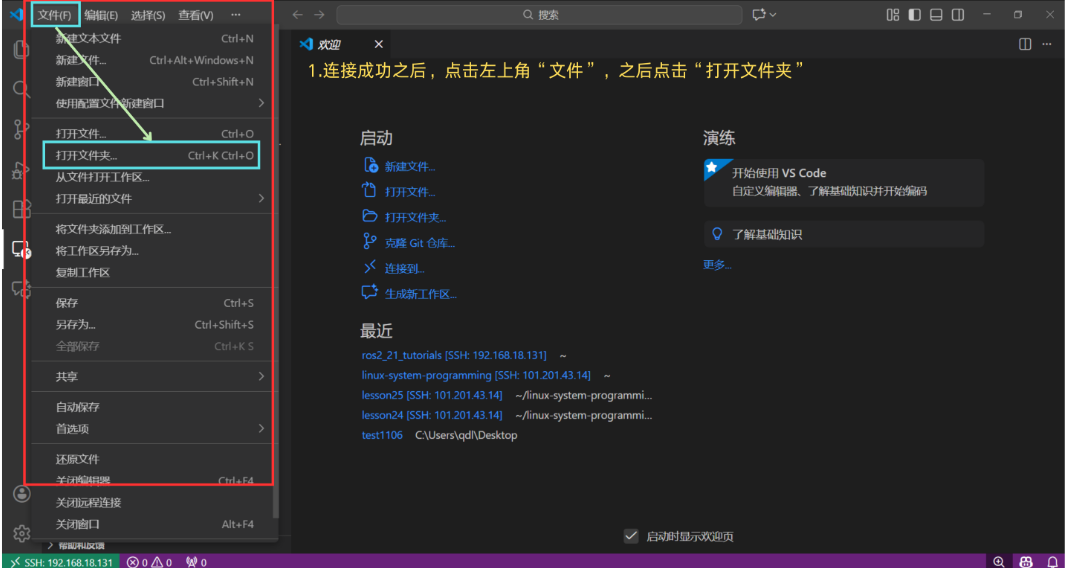
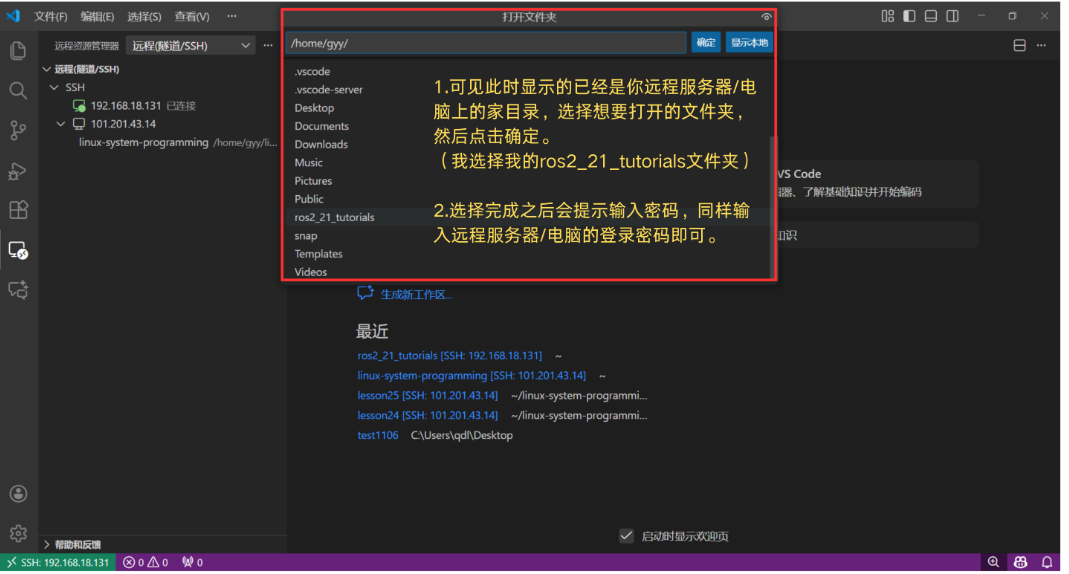
Step 8: Open the Remote Folder
Click on "File" in the top menu bar → "Open Folder" to access the directory on your remote server.
Step 9: Select the Target Directory
In the dialog box that appears, enter the remote path you wish to edit (e.g., /home/ubuntu/my_project). You may be prompted to enter your password again to confirm access.
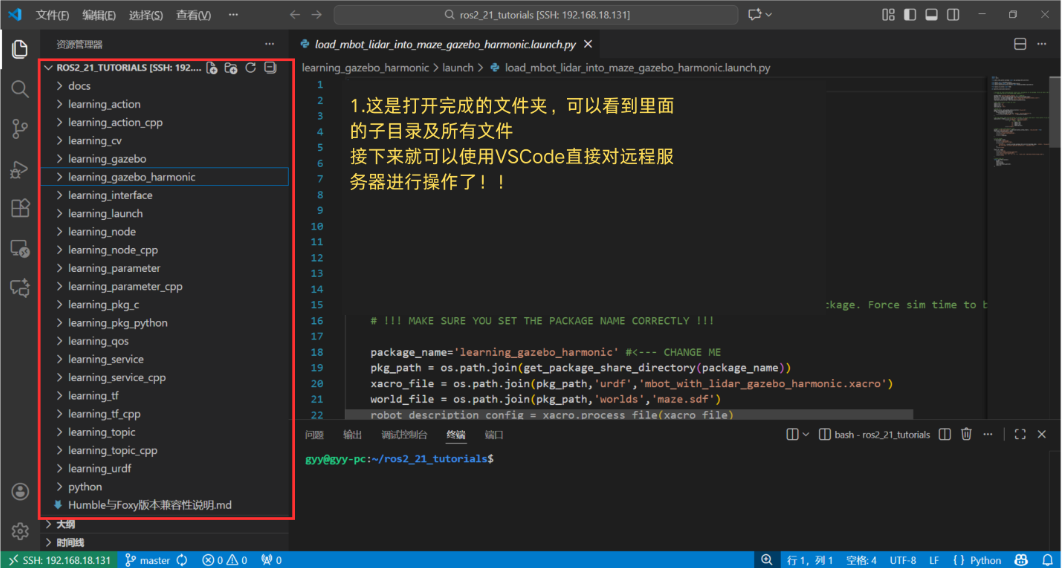
Step 10: Start Remote Developing!
You are all set! You can now view and edit remote files directly within VS Code and use the built-in terminal to execute commands. Enjoy a development workflow that feels completely local while leveraging the power of your remote environment!
II. Essential VS Code Shortcuts (Remote Development)
III. Essential Linux Command Cheat Sheet
Conclusion & Advanced Tips
By following these 10 steps, you have mastered the core skills of VS Code Remote Development. Say goodbye to tedious file transfers and enjoy a seamless, cross-device coding experience!
Next Steps for Optimization:
Configure SSH Key-Based Authentication (Passwordless Login)
Use ssh-keygen to generate a key pair and upload the public key to the server's ~/.ssh/authorized_keys file. This allows you to log in automatically without typing your password every time.
Install Remote-Specific Extensions
VS Code allows you to install extensions directly on the remote host (e.g., Python, C/C++, Docker). This ensures the remote environment has full language support and debugging capabilities.
Use tmux or screen
For long-running tasks, use terminal multiplexers to prevent processes from being terminated if your network connection drops.